
Up-date 27th Nov 2019 Have been with out the internet for 18 hrs so going to use this blog for my link incase I loose the internet again, I wrote this for Sobana on the 14th of Jan. Happy sewing every one Cheers Glenda
For you Sobana
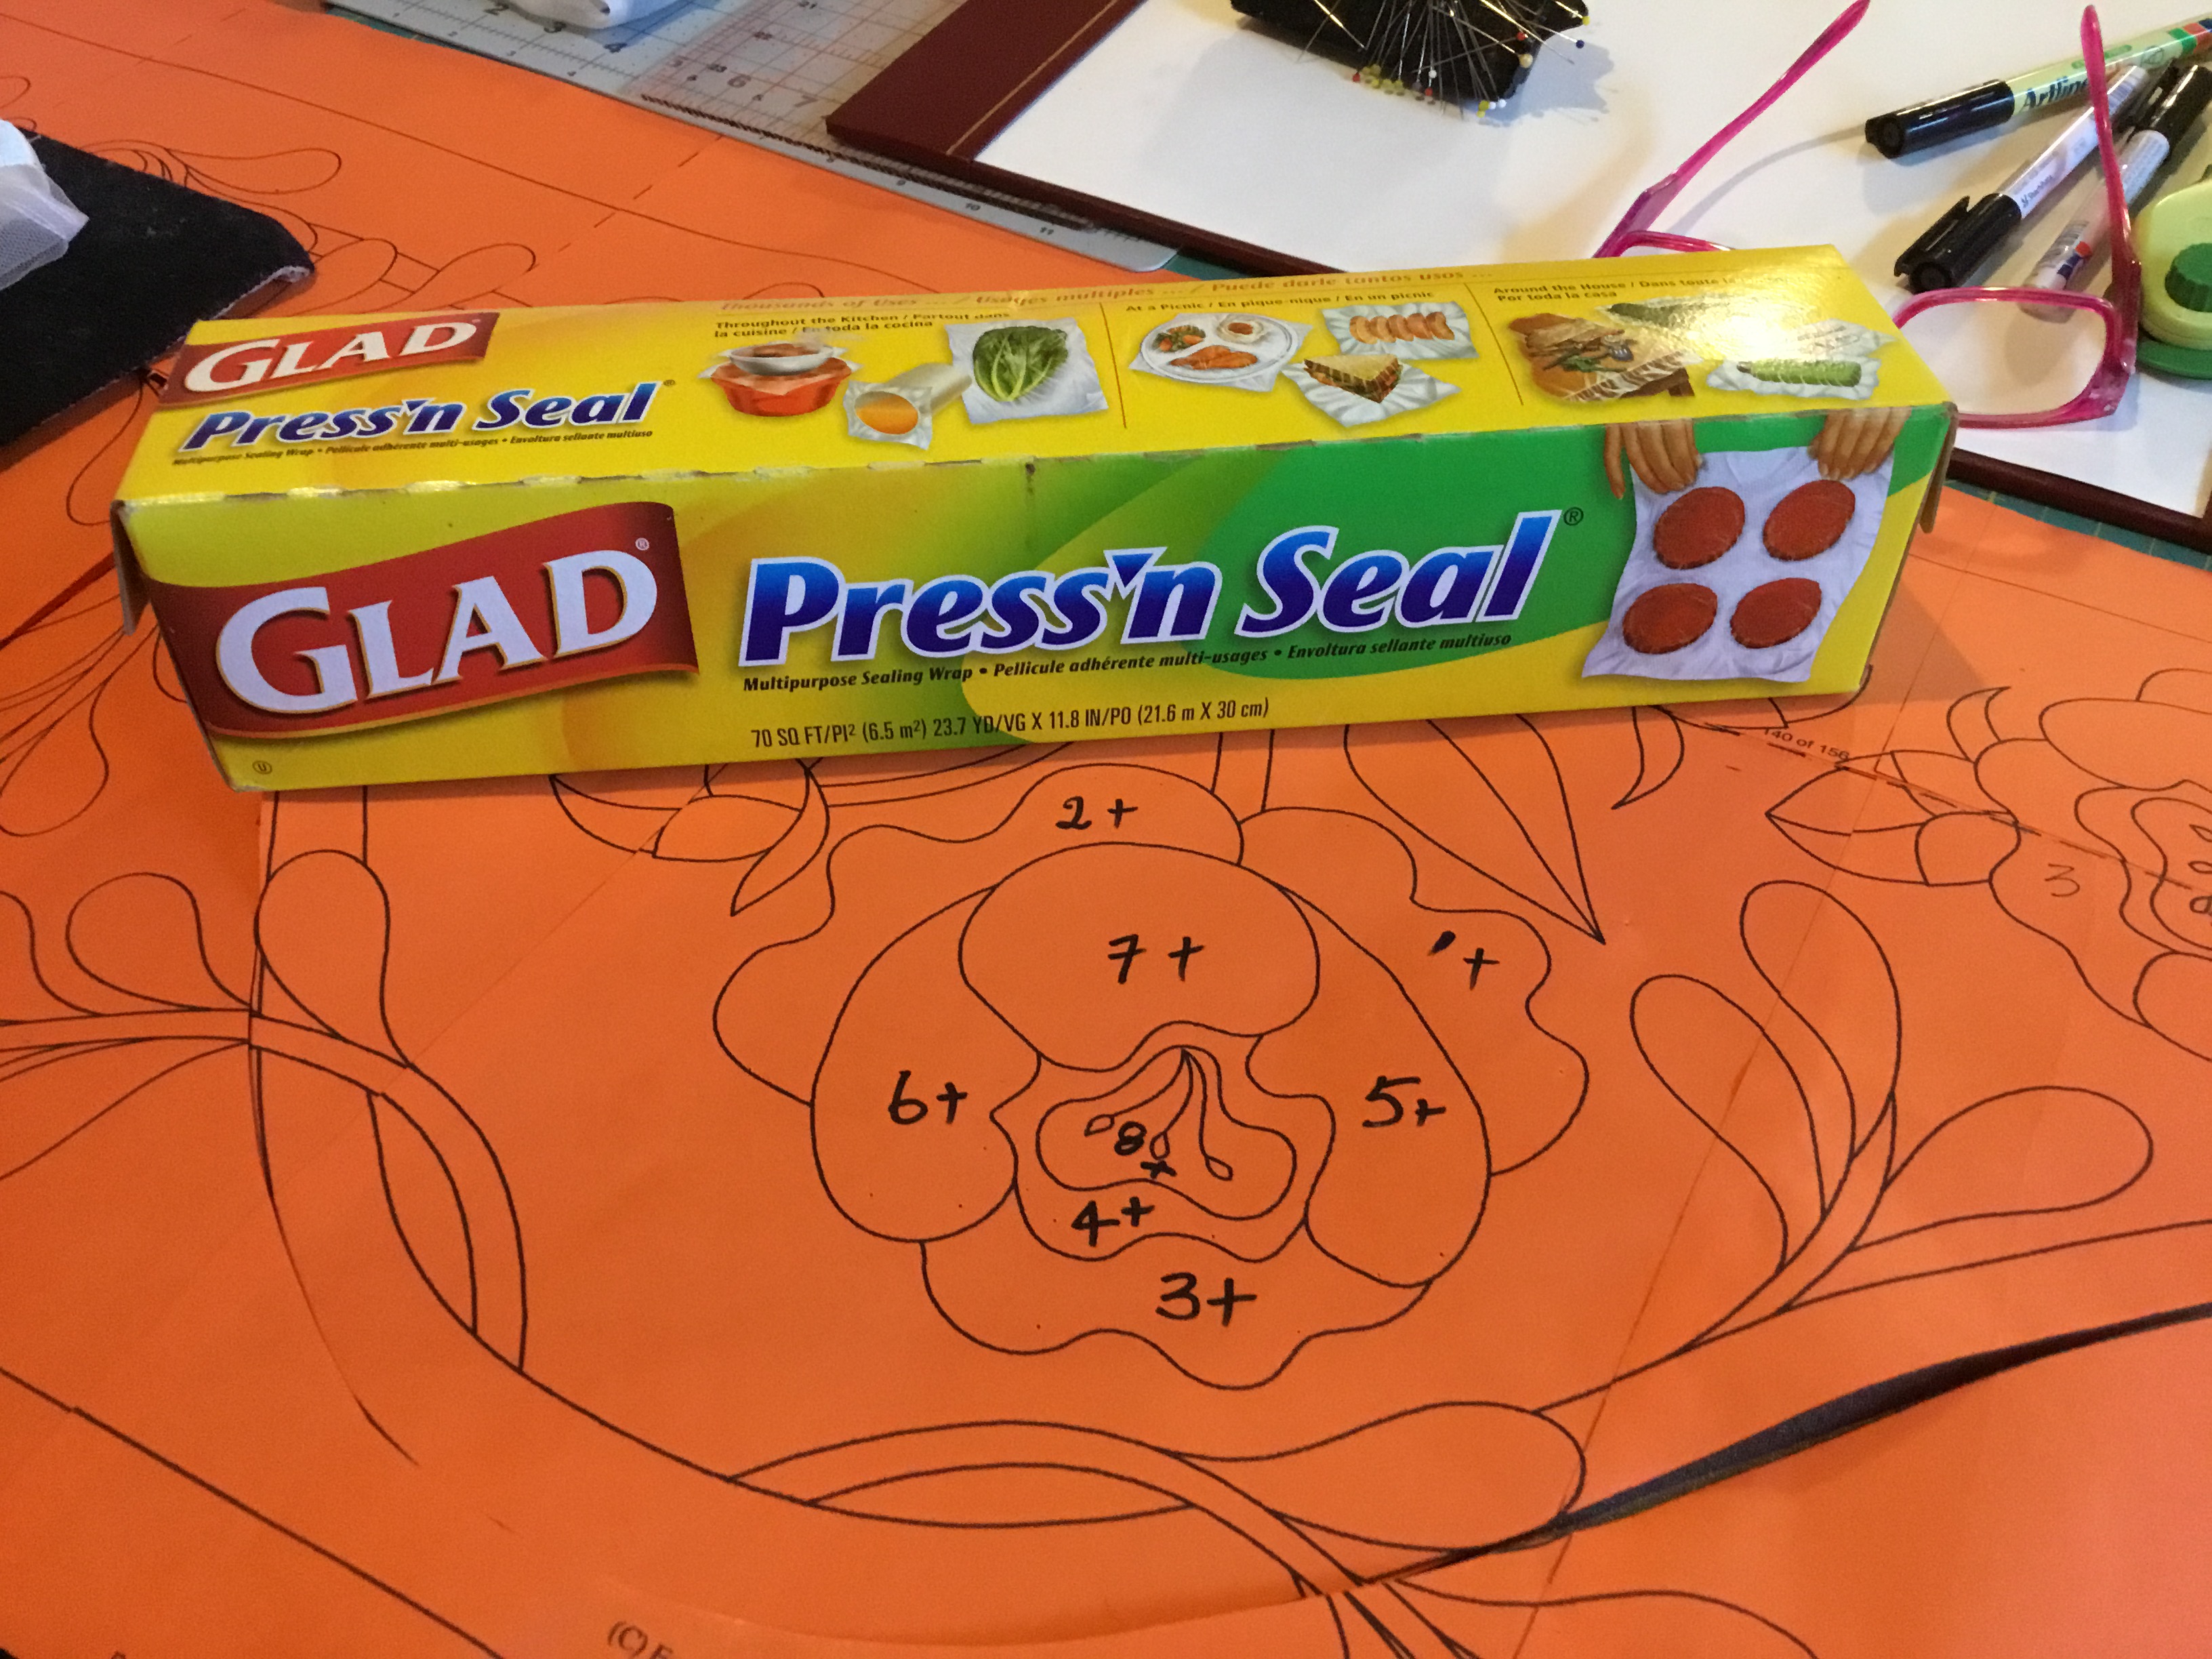
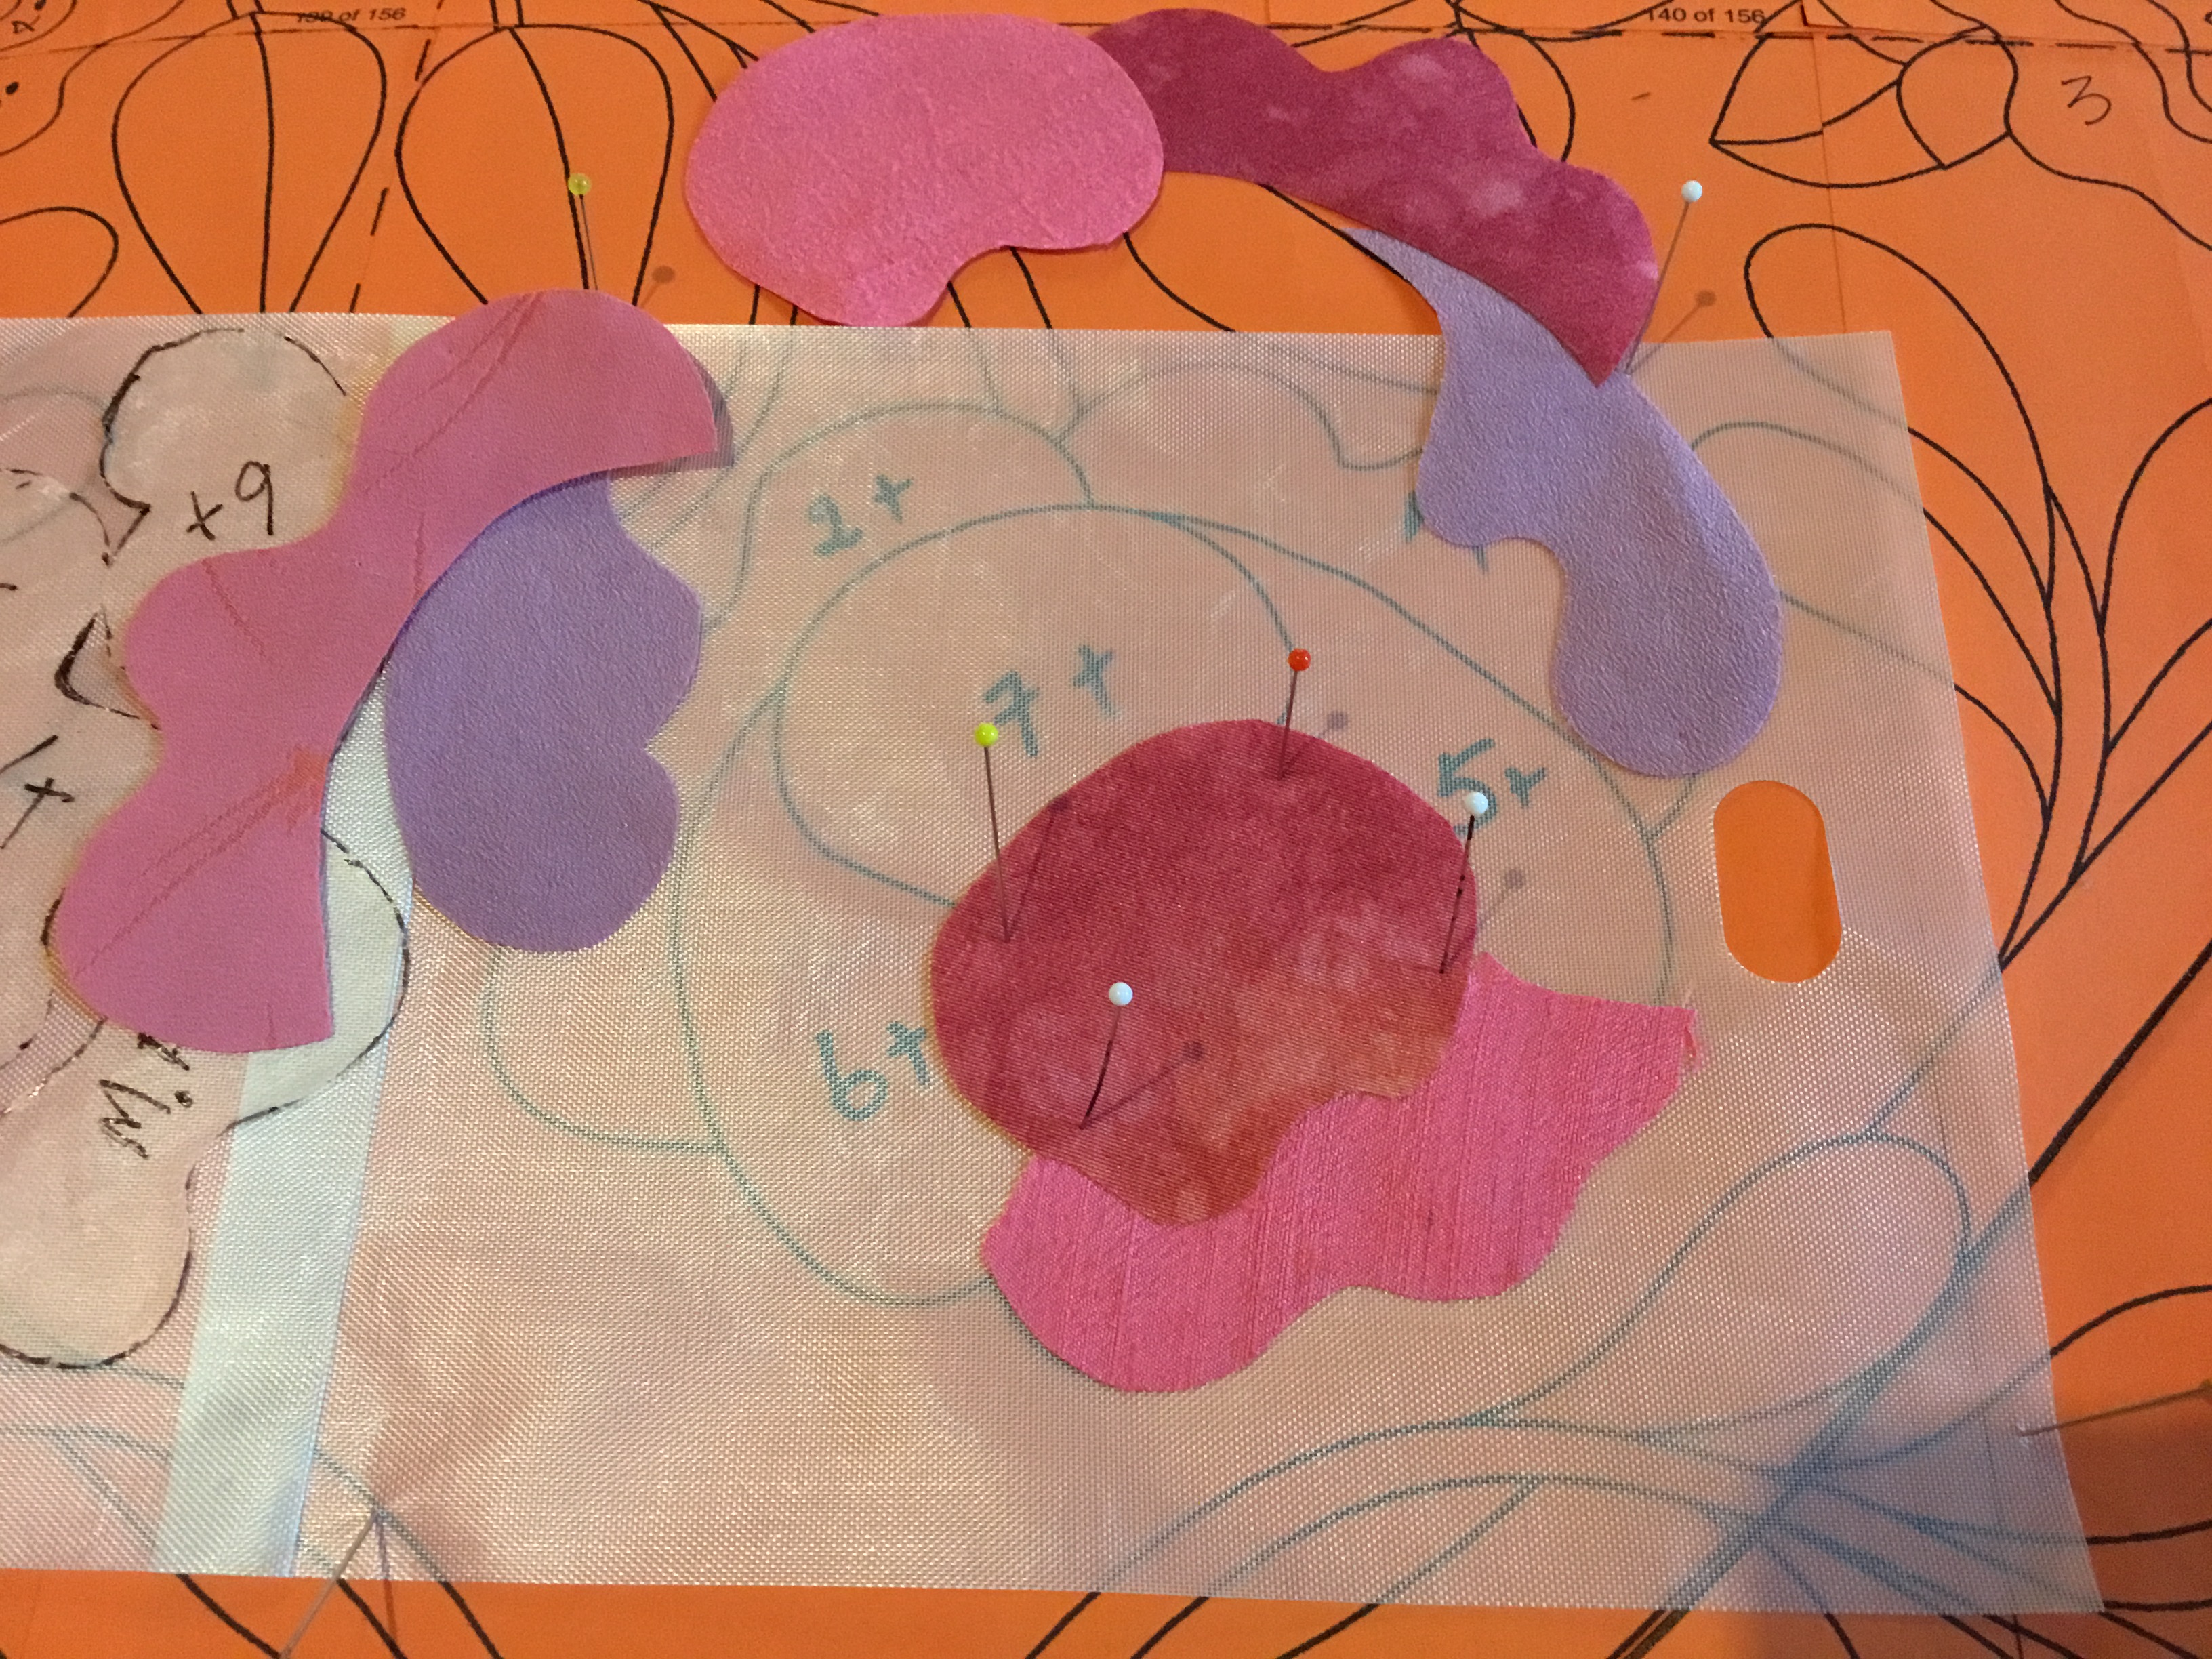
First number all the pieces of the rose, also add a mark that tells you this is the front of the rose and if placed on the front side of the fabric will give you the rose as you see it, if placed on the back of the fabric it will be reversed. Cover flower with press and seal it will stick and not move if you do it carefully and press with your hands. Use a fine permanent marker and draw all the pieces adding seams where needed, you will ahve to lift the press and seal constantly to get the shapes that need seams. see below how I have the shapes. make sure you number and add any memory marks.
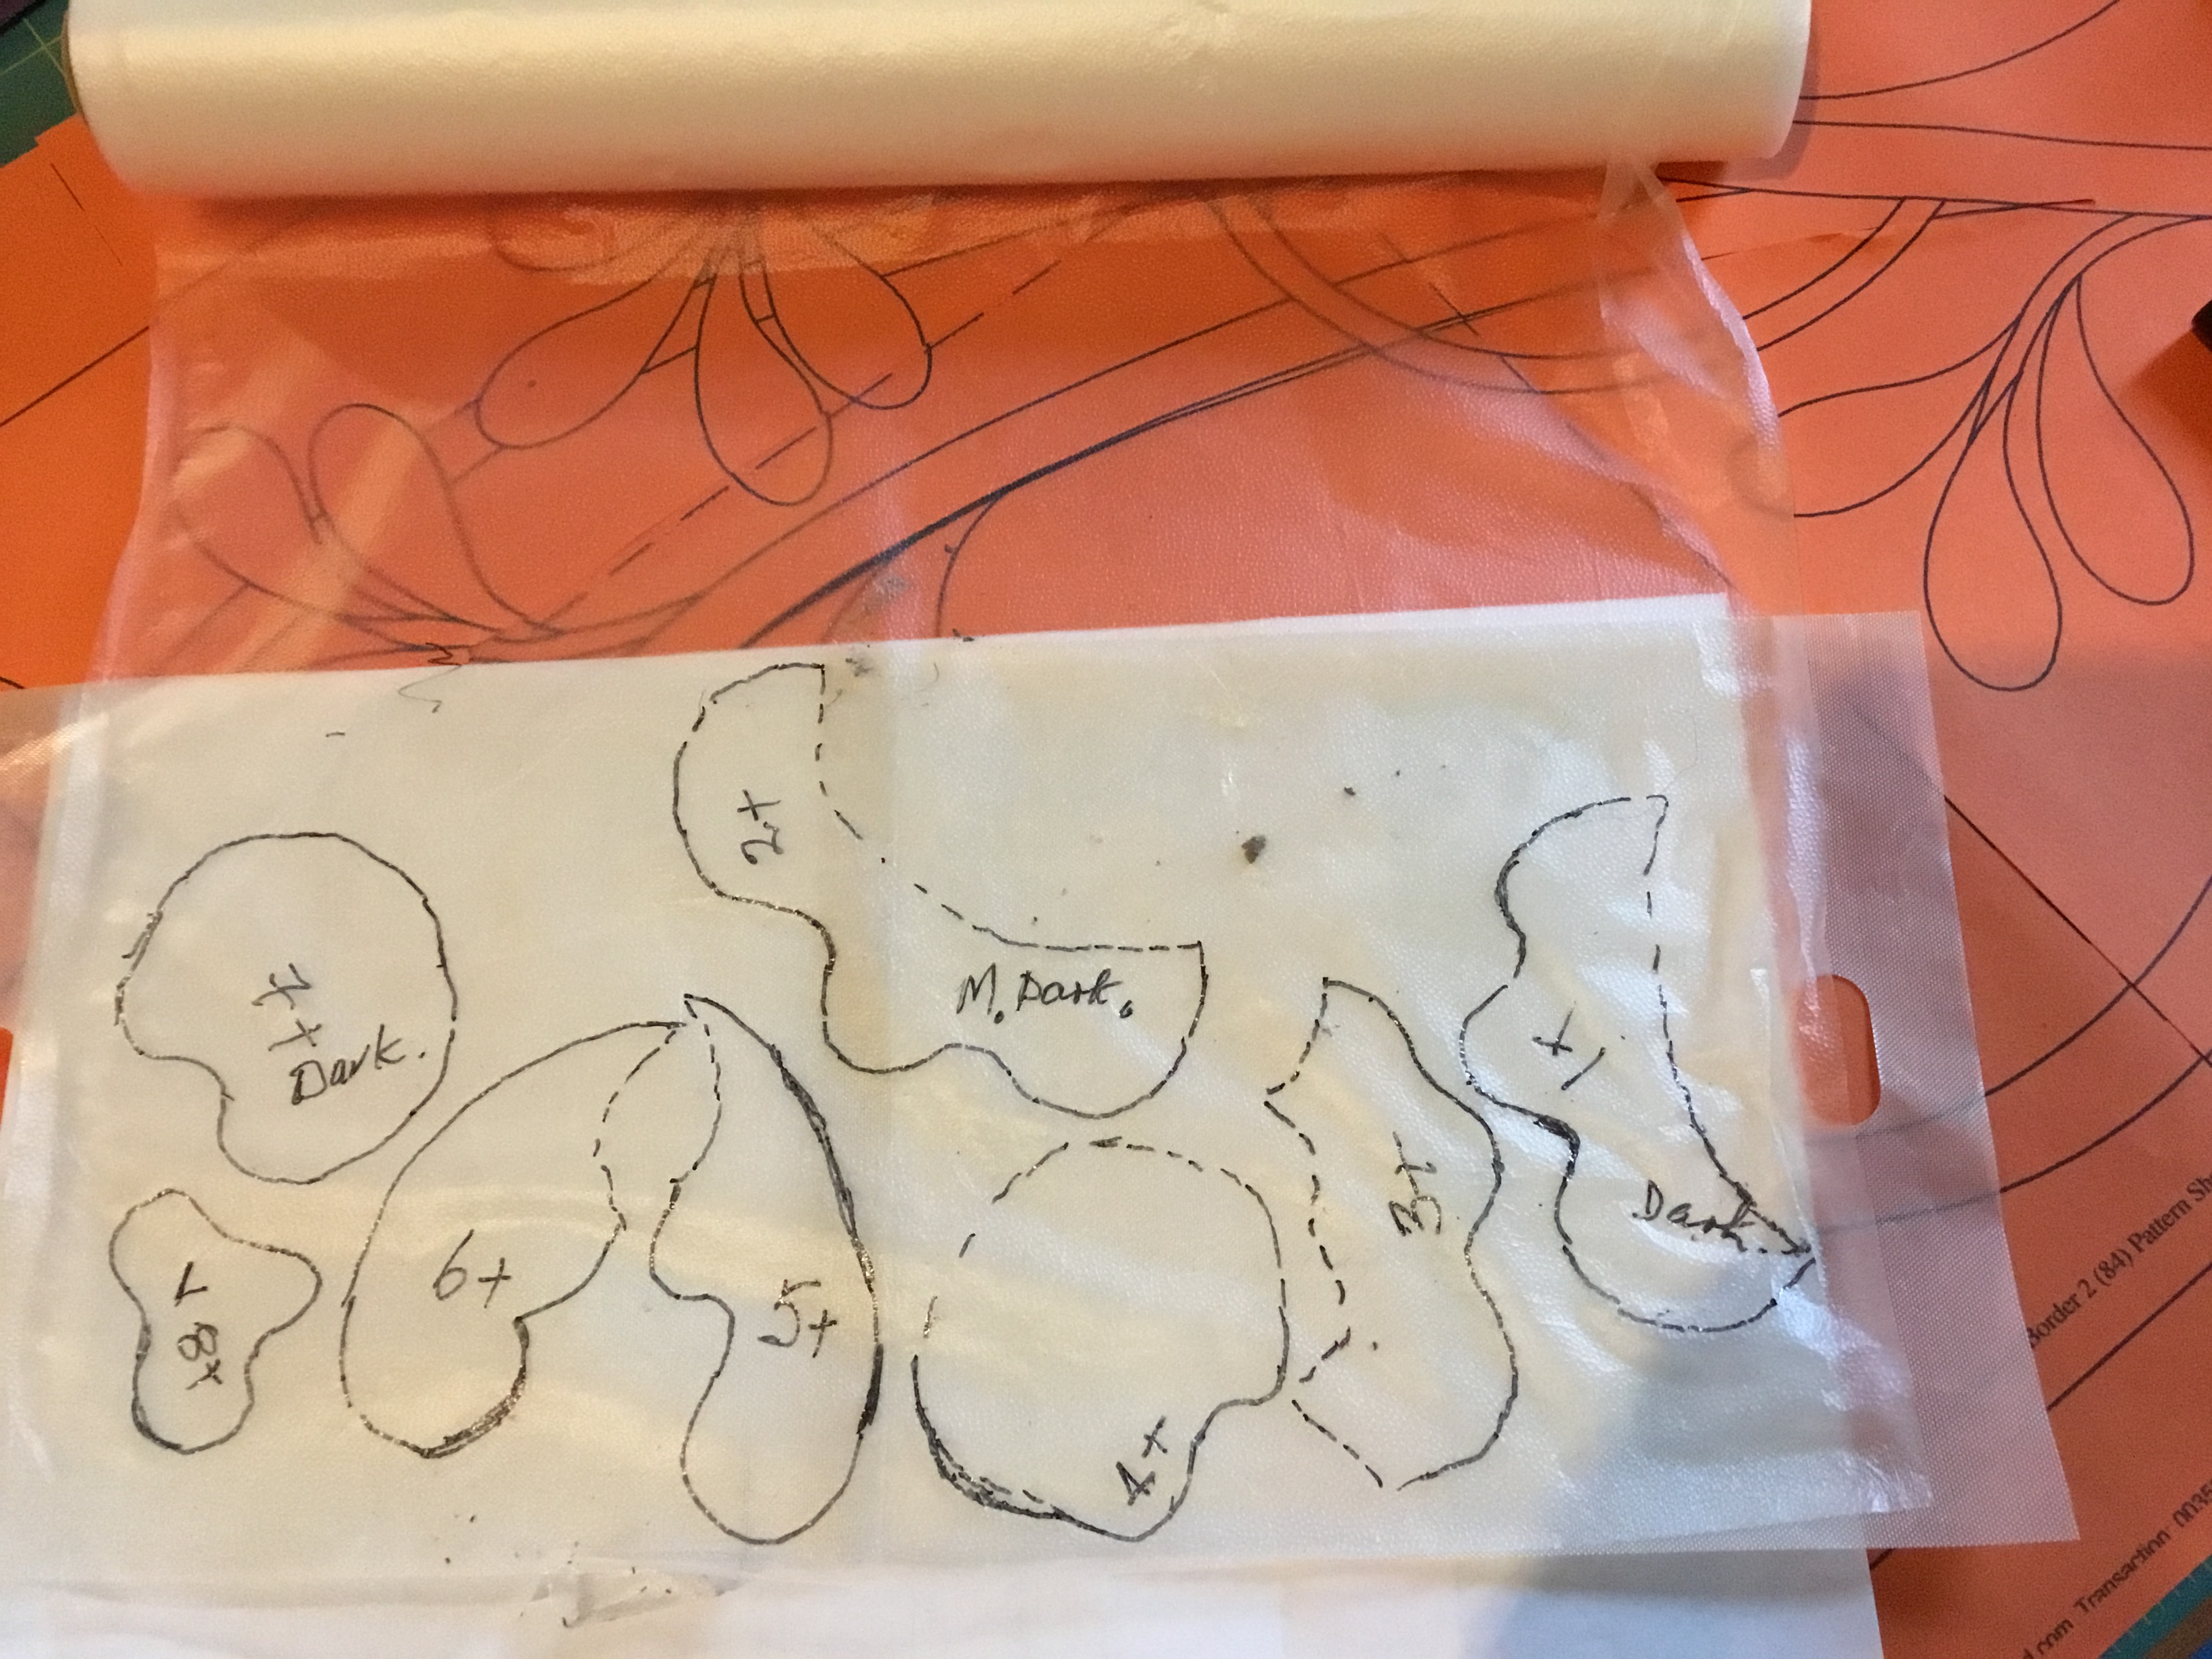
Traced all my pieces on to the Press’nSeal, these now need to be cut apart with very sharp sicissors roughly, then placed on to the top of the fabrics you want to use for your rose?
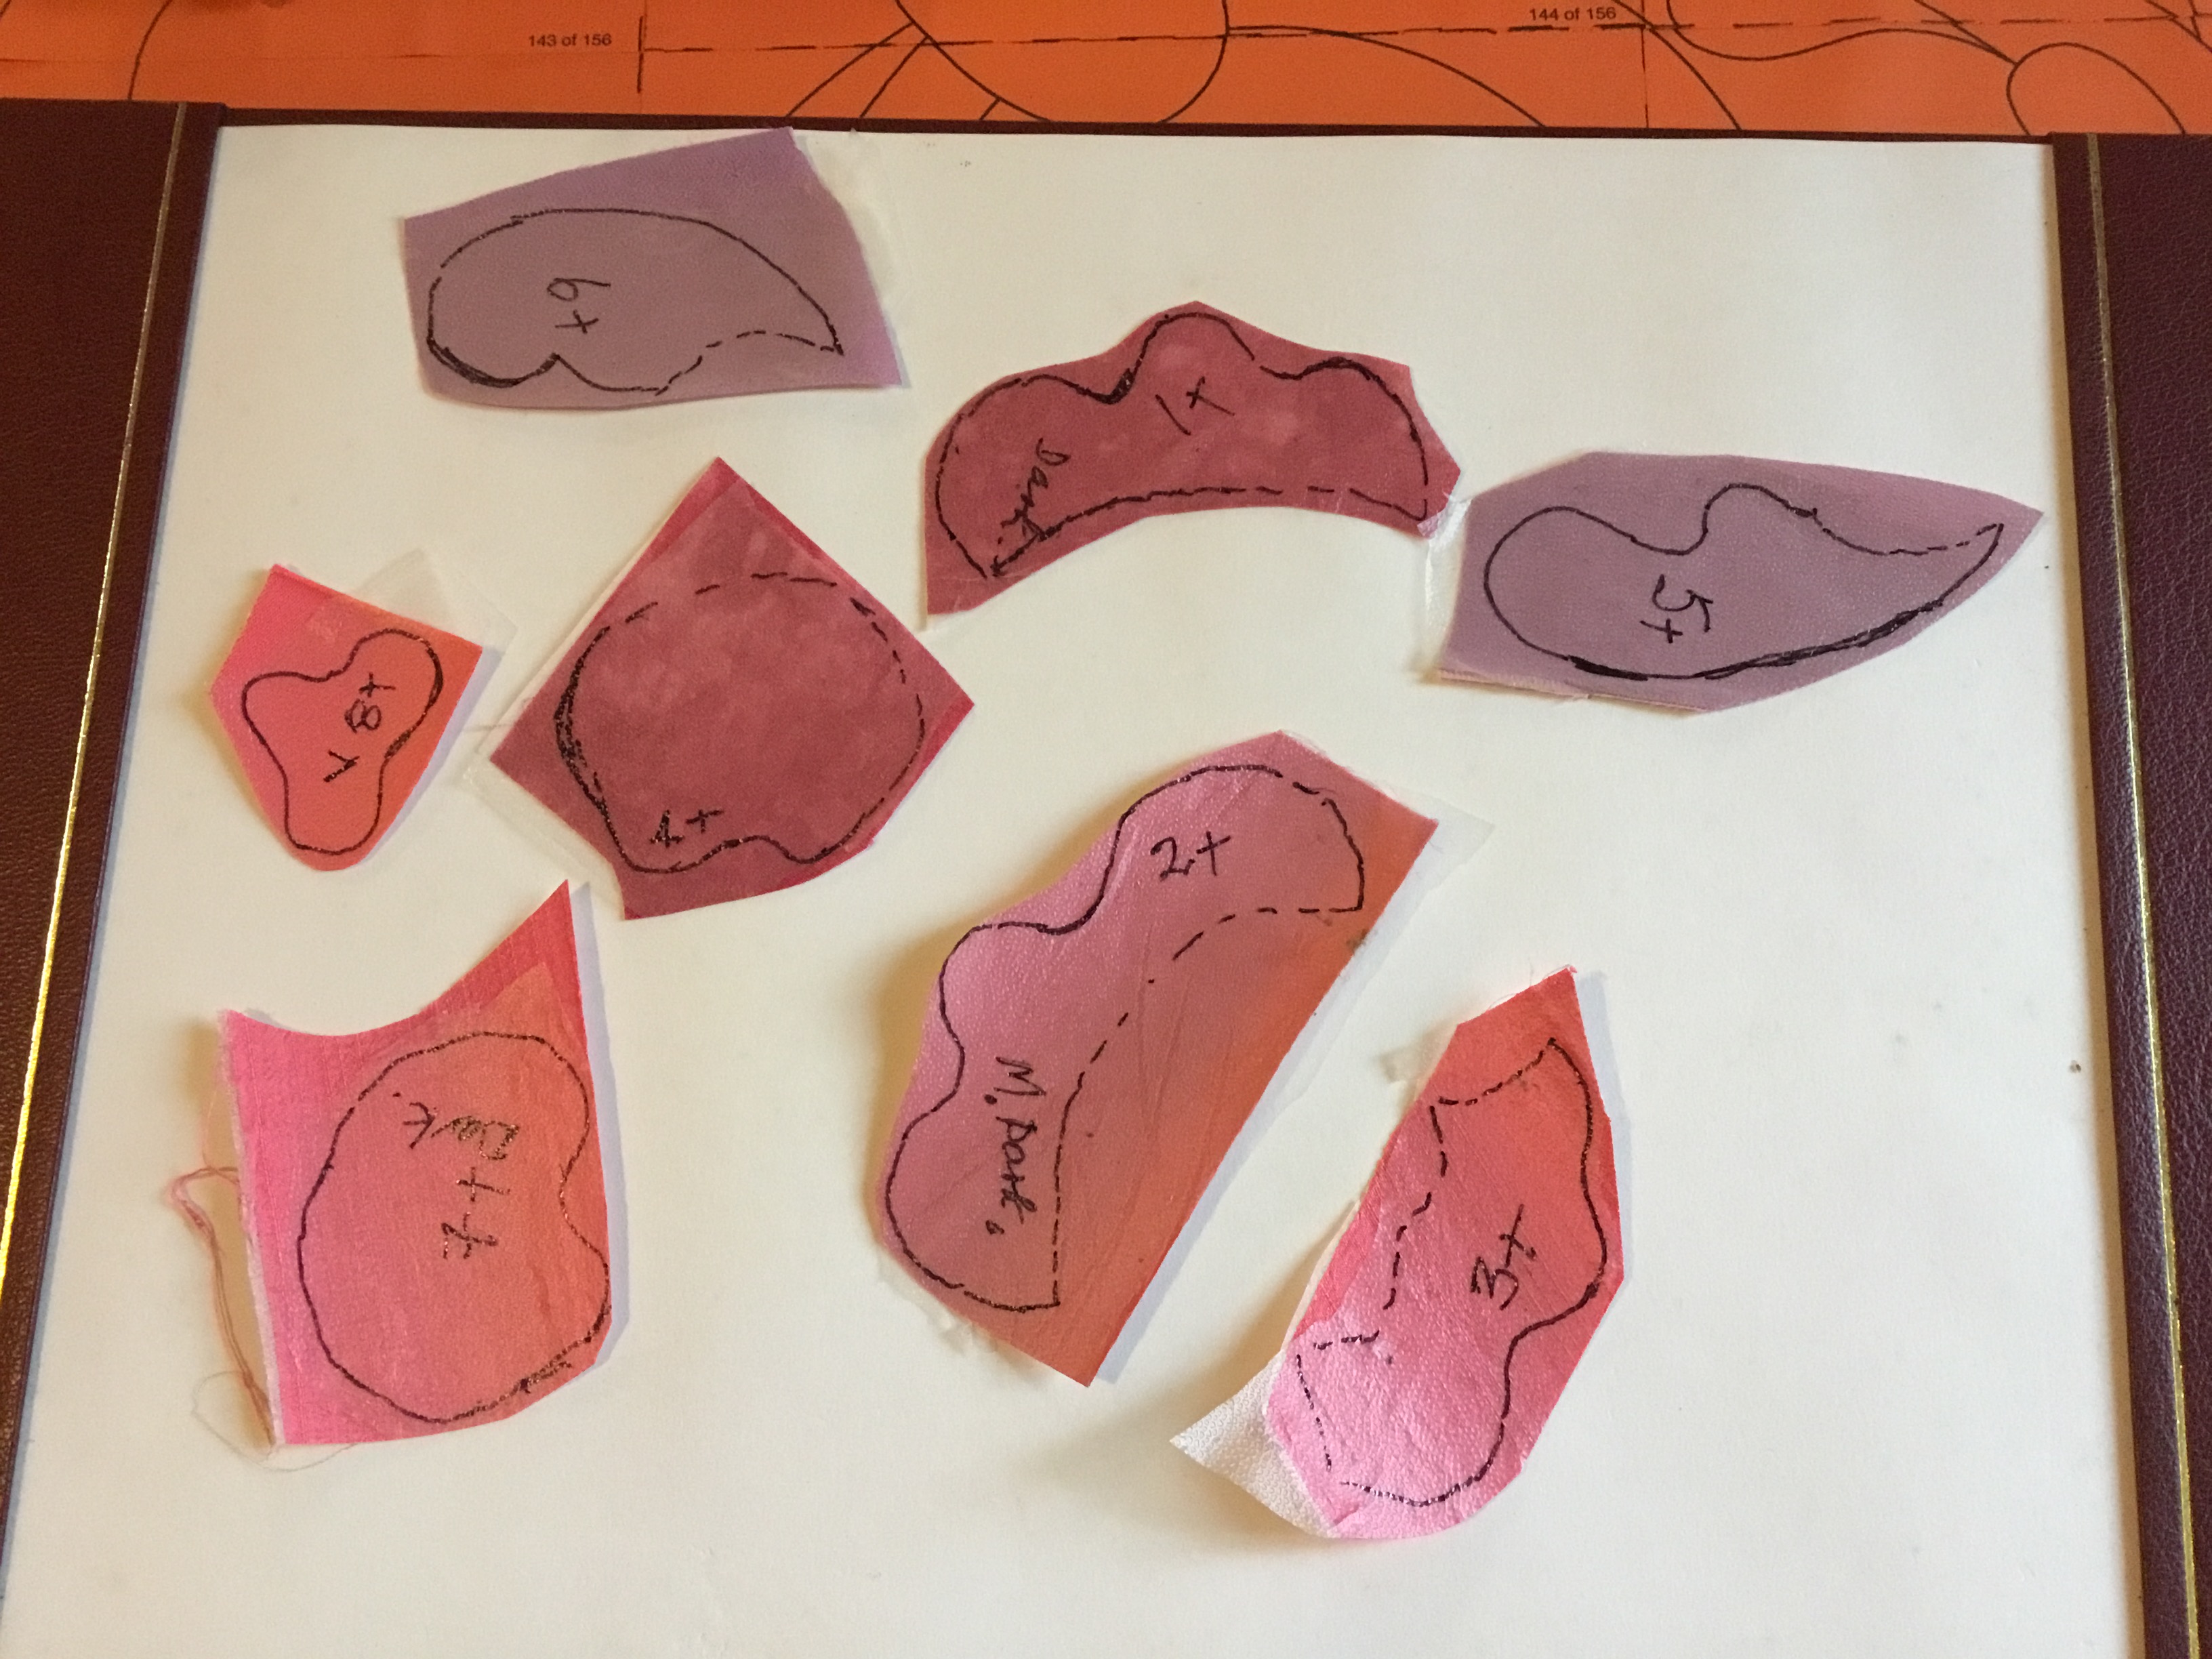
Press and smooth the press and seal with your hands only. Cut out roughly from material then care full with very sharp scissors cut the pieces out .
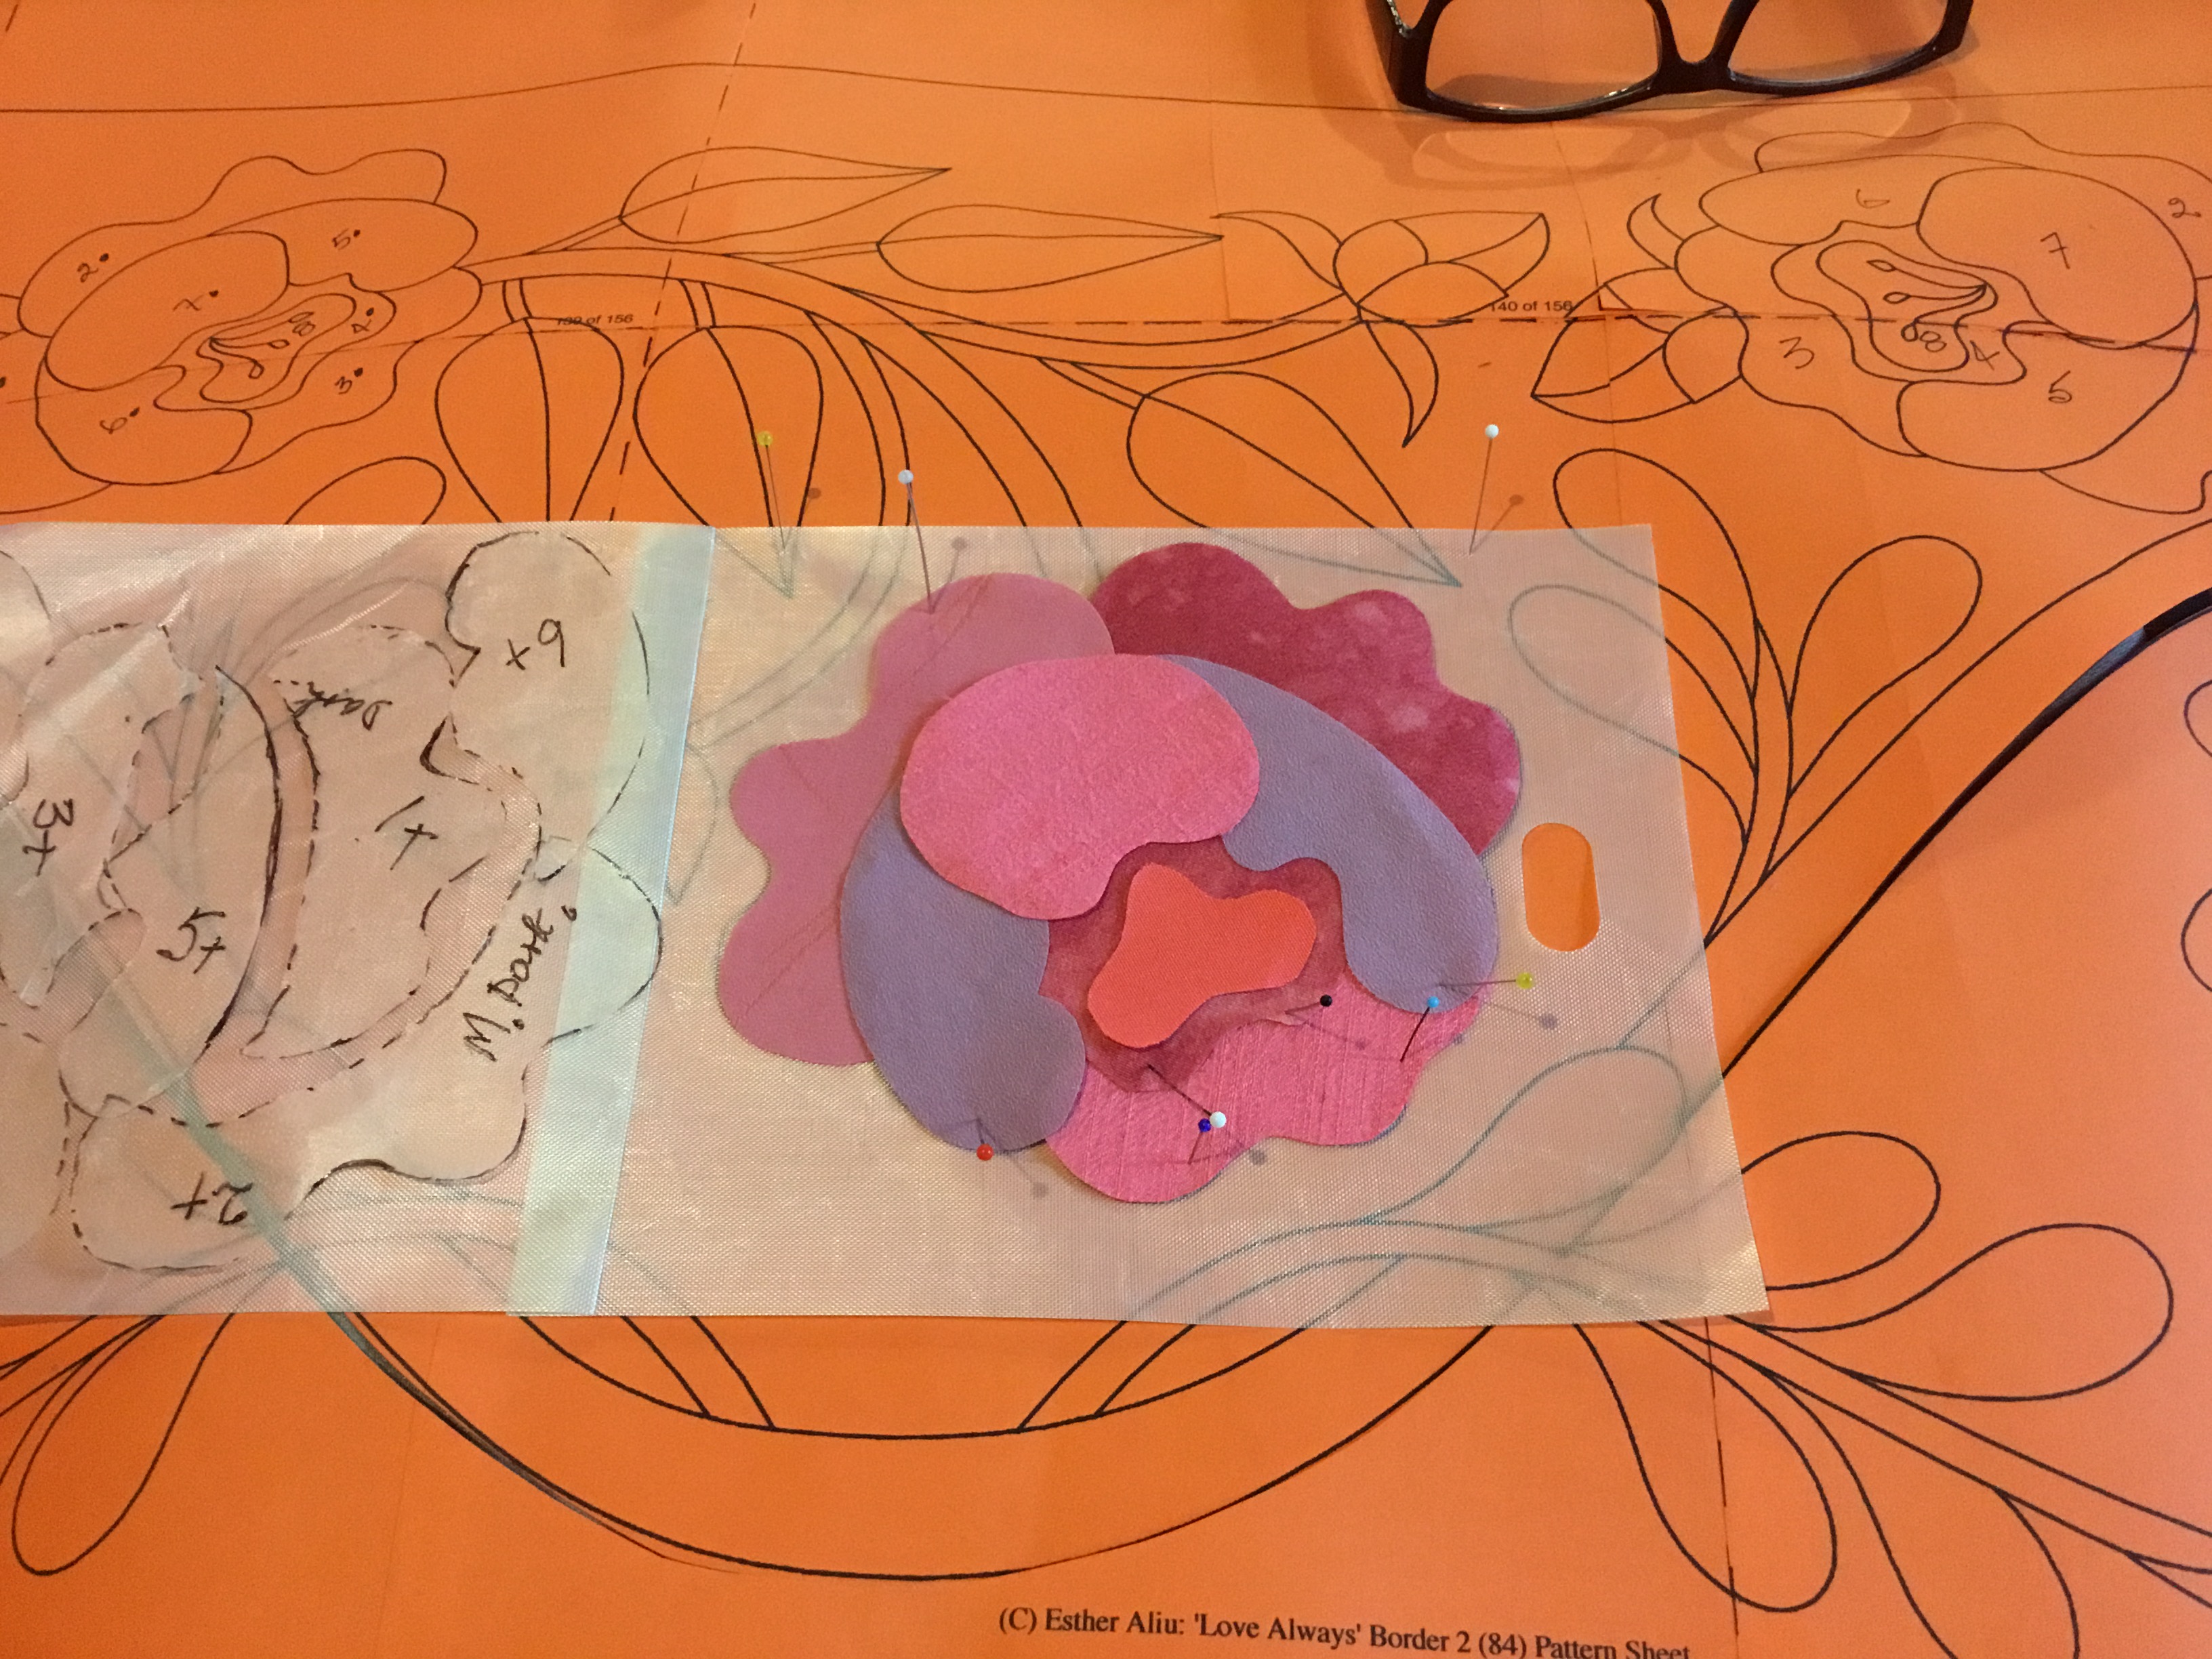
First Cut out pieces very carefully and smoothly, my first two pieces ready to be ironed down using a Teflon sheet.
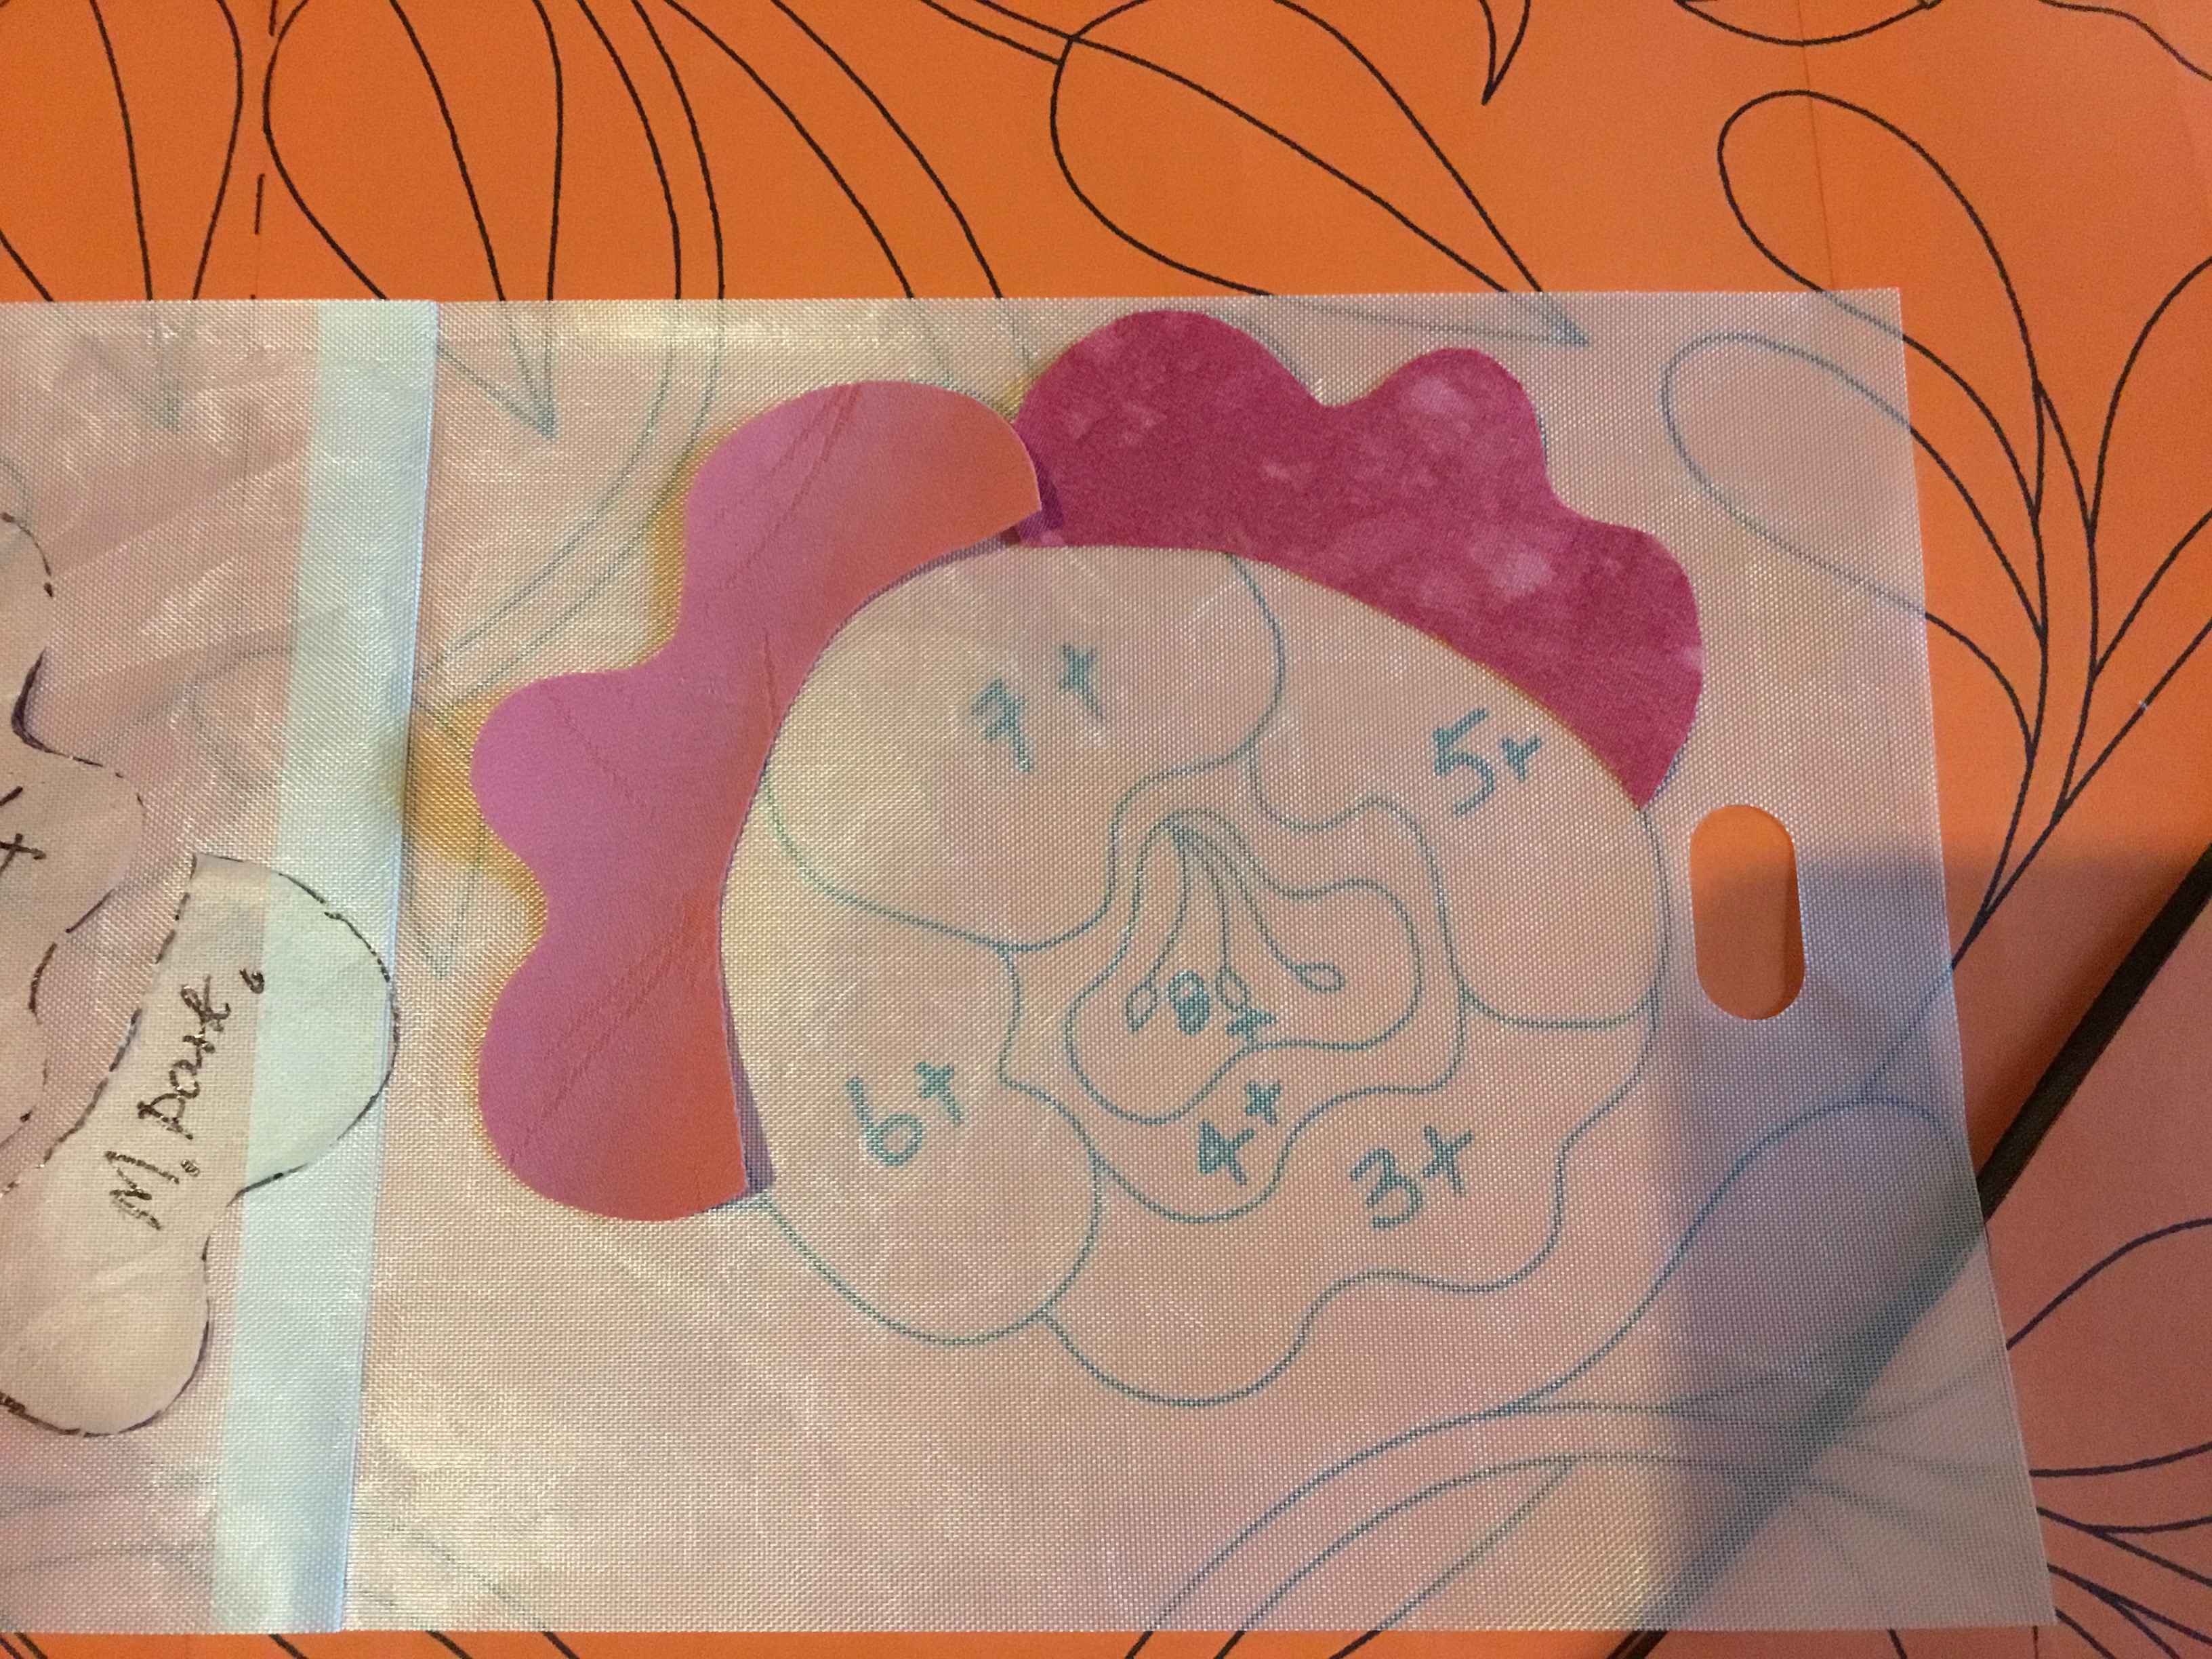
My pattern paper is pinned over a mini ironing board. Added my top pieces and those bottom pieces first then added the rest. I pinned the pieces in place behind the printed paper is a mini ironing board
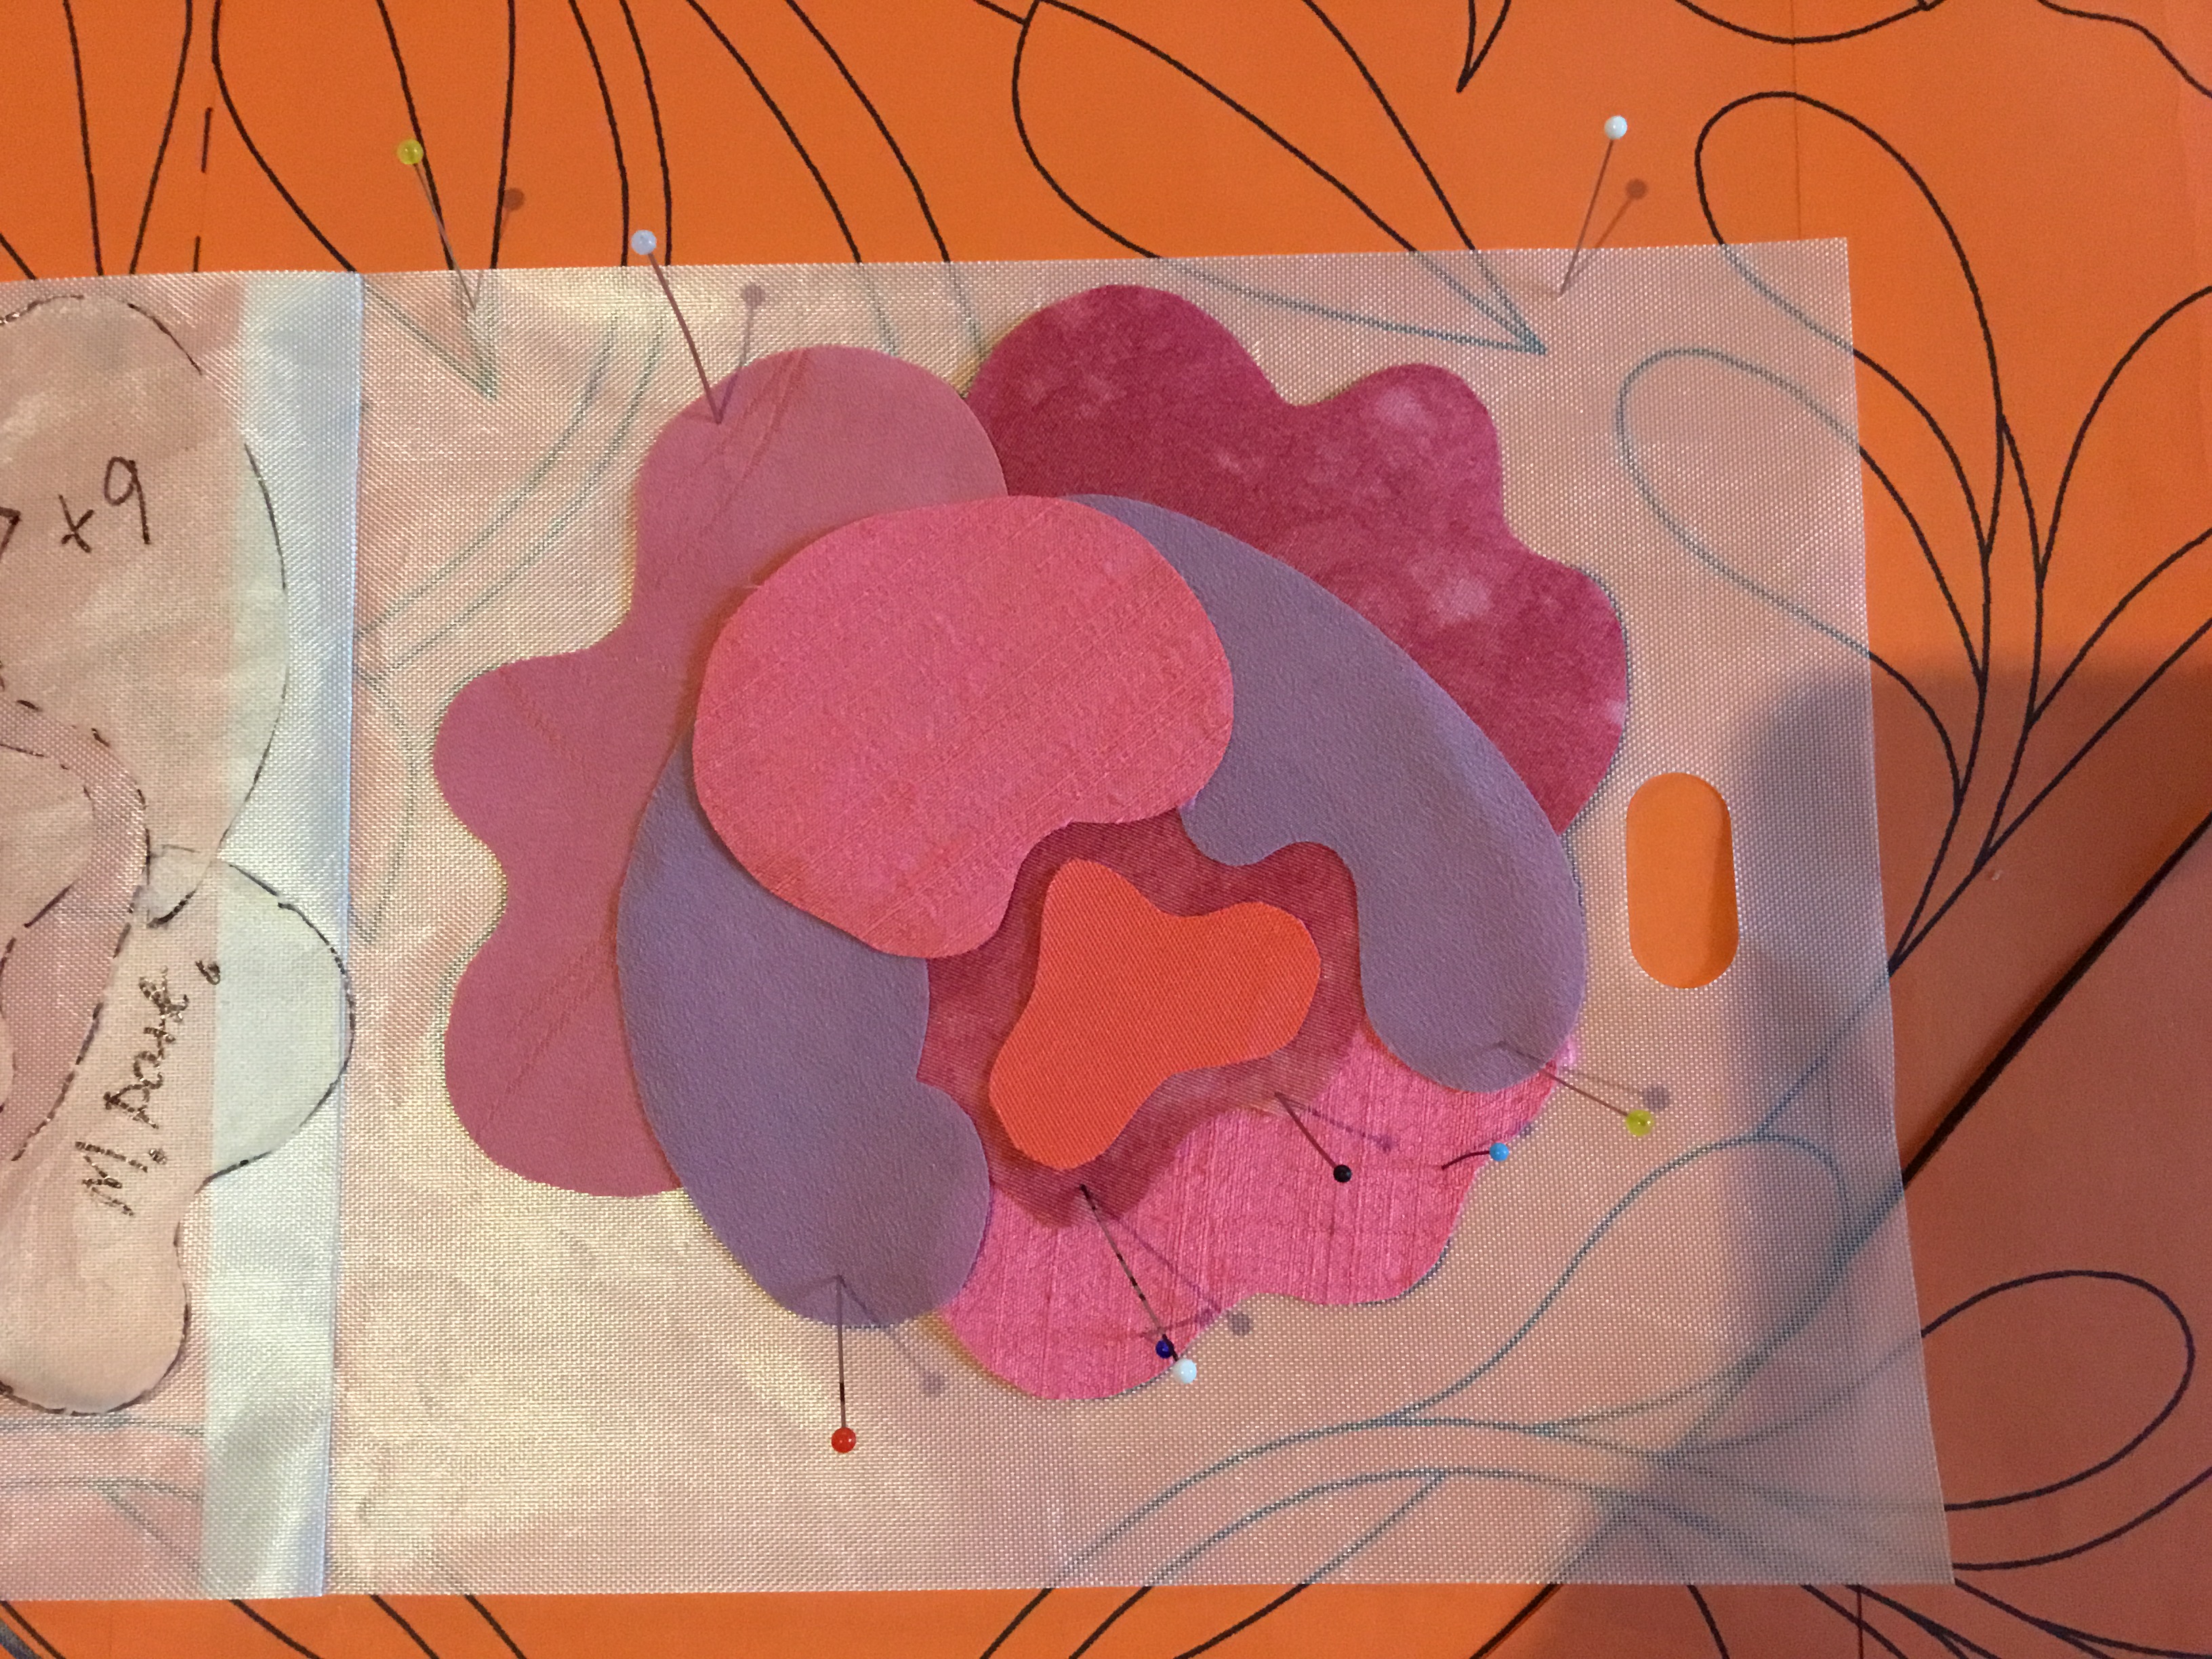
I’ve carefully peeled off the press and seal and placed on to the teflon to use again, it takes practice to use twice or 3 times the same pieces!!!!!!
Rose all ready to fuss together then use on the quilt border.
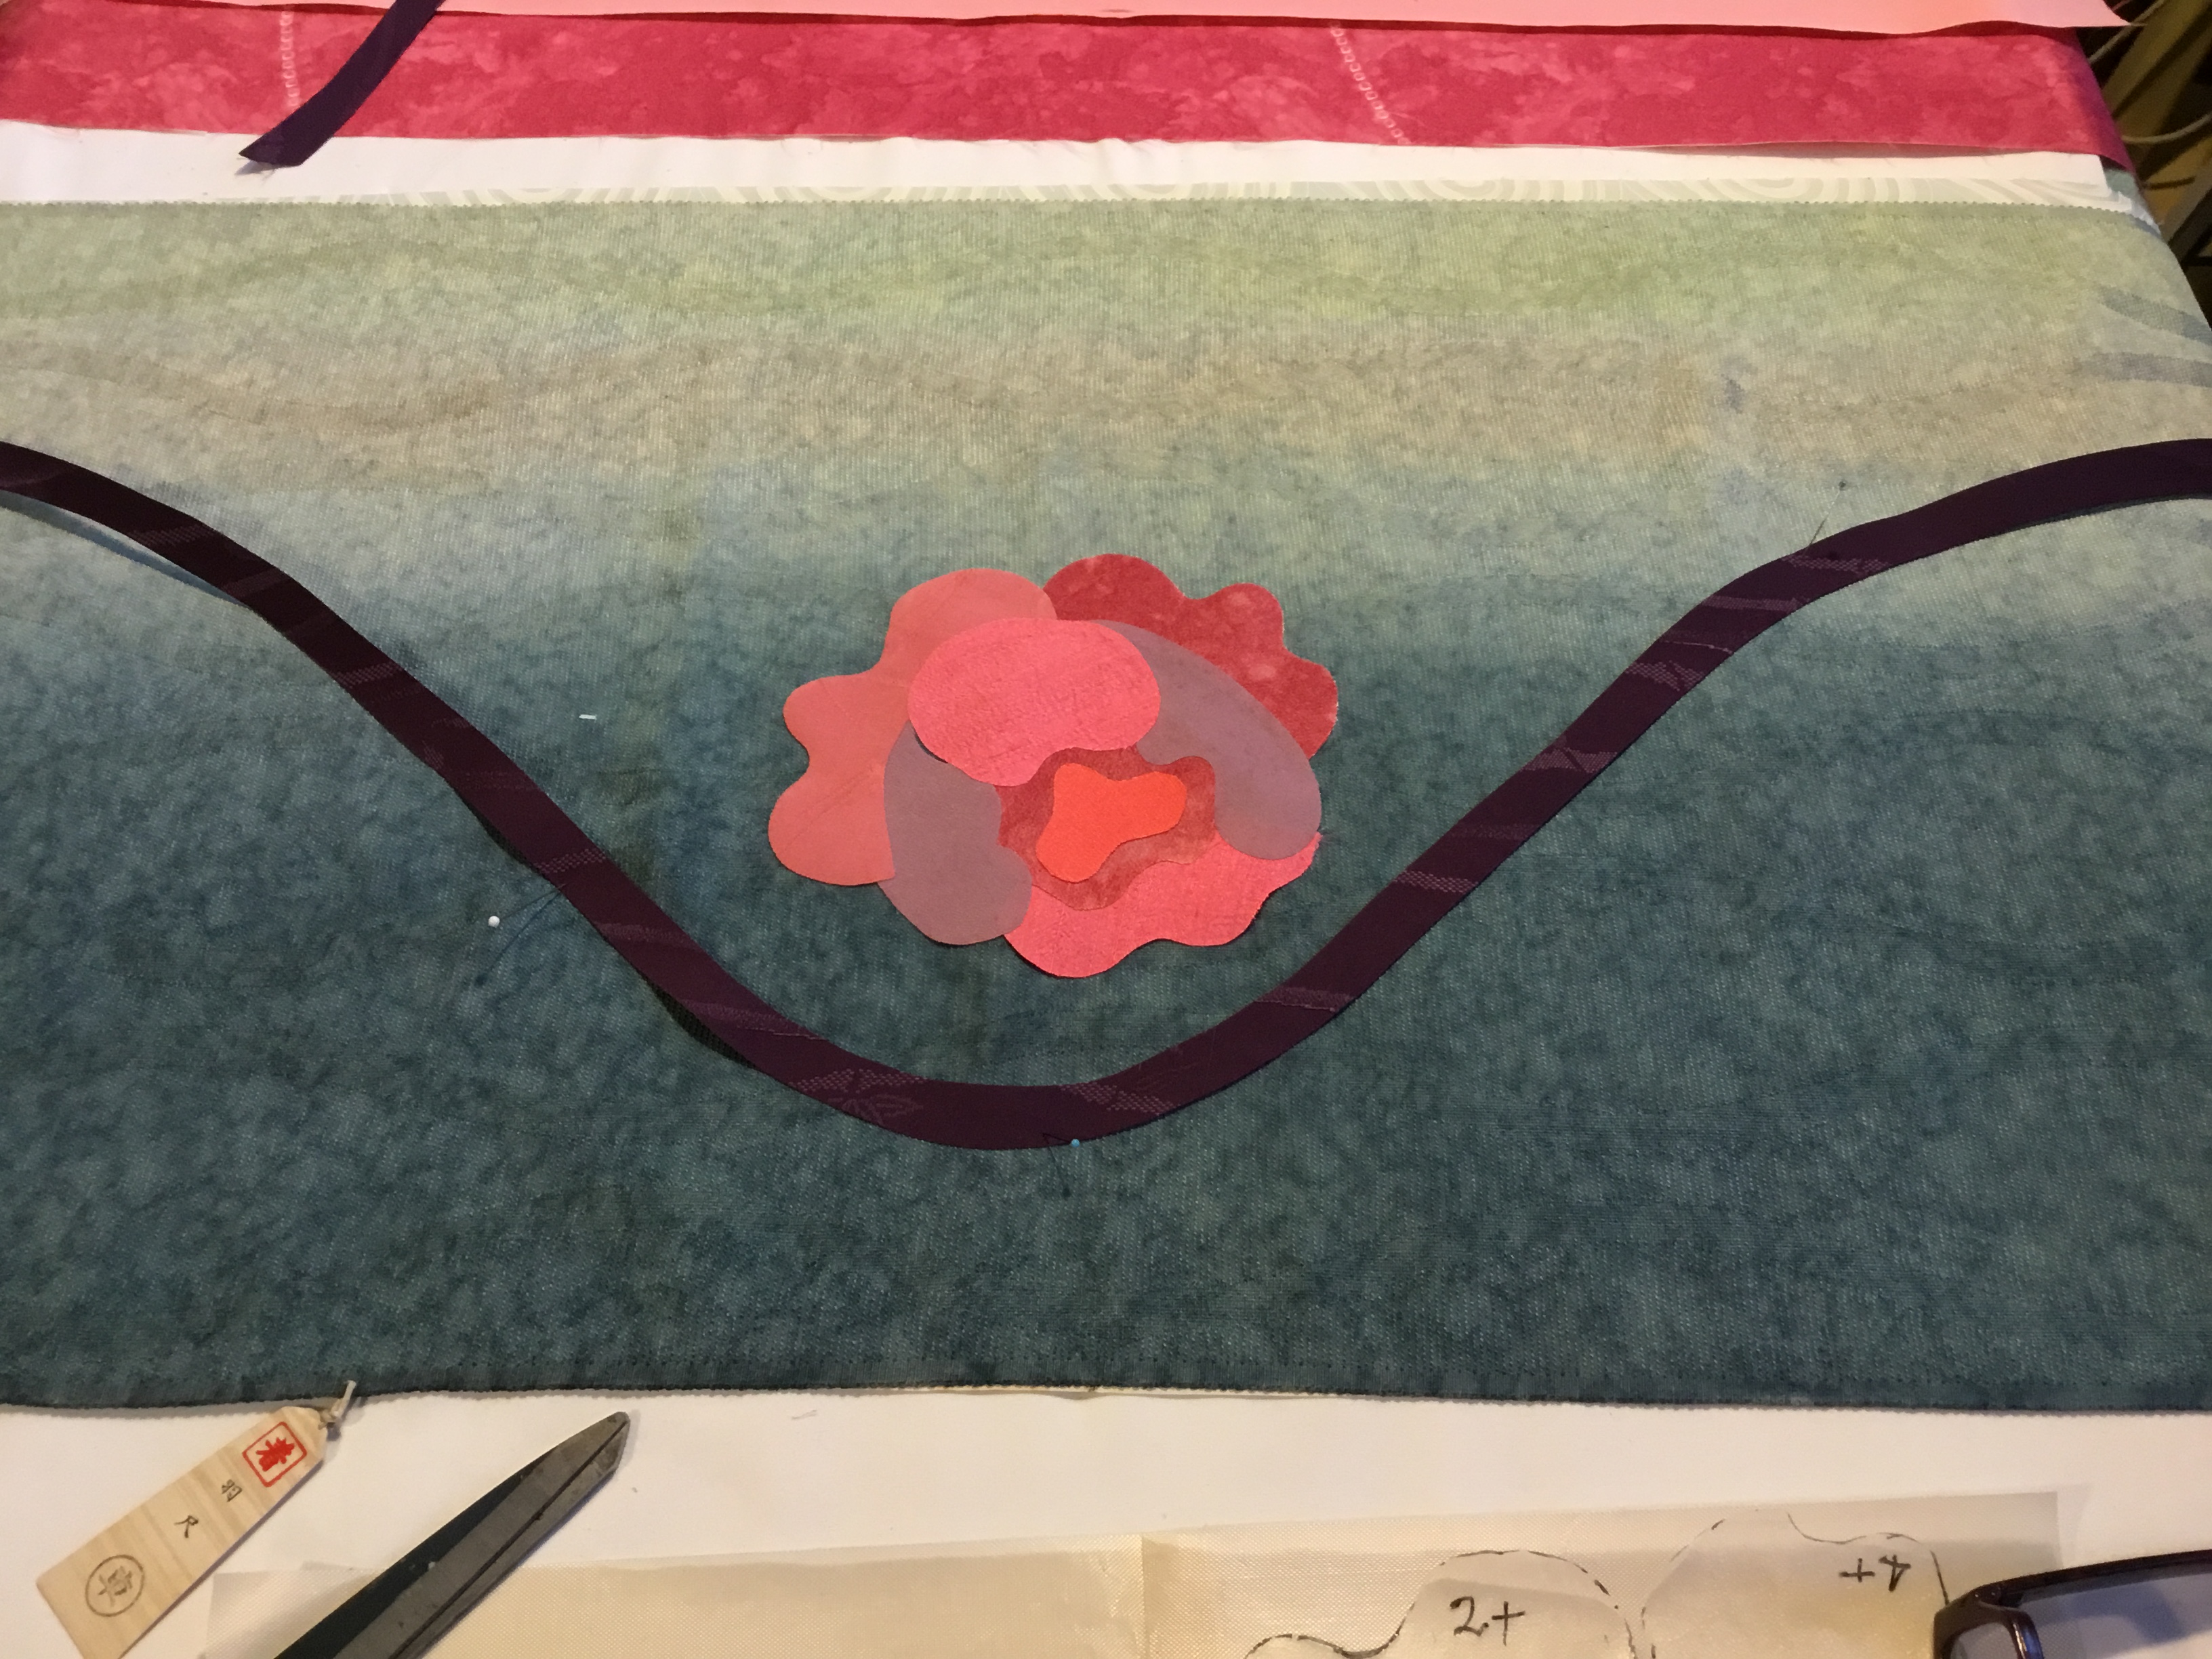
I can use it any time now, now I need to make 3 more like this one and and then make some others in reverse or differnt roses?????
Updated for Dawn 27th Nov 2019
Hope this helps you Sabana Cheers Glenda
I never used press and seal for applique – thanks for showing how you do that
Thanks Glenda. Yes it does help. I usually hesitate about changing colours once I cut them out. This encourages me to do it. I guess using the press seal means you don’t have to reverse patterns.
Never thought of using press and seal Thank You
Helen Lessells
Hi Glenda! Do you use fusible? How do you do that gorgeous silk I see? Again, I have to try doing two colors of blanket stitching for my applique
Hi Suzy, during 1900 to 1930 in Japan silk was woven in Hugh quantities as cotton was been woven in the west, some 100% silk some mixtures, endless weaves, and weights, some transparent they were so fine others so dense it is hard to push a number 11 needle through it. I’ve been collecting and studied Japanese Kimono silks mostly for over 30 years so I know roughly what and how much different weights of silks will shrink and the colour dye run. This makes it easier for me to use these silks. In my art wall quilts I don’t think about shrinkage or bleeding of the fabrics as I hope they will ever end up been washed LOl. Silks I use in my bed quilts are chosen carefully. Now days many of the silks you can buy for quilting or clothing have been woven as even weaves and treated so they can be washed. I started machine quilting 16 months ago and I love colour so just used lots of different coloured threads when appliqueing as it adds more depth to my pieces for my look??? We all see art differently LOl. It does mean you are constantly changing your thread but that’s a good time to stretch your body too LOL. Cheers Glenda
Yes I’m using iron on fussing Suzy to do my machine applqiue, Iv’e been buying Japanese silk kimonos for around 30 yrs and sewing with it for 20 so have been learning how to work with it for that long, I use to weave a lot when I lived in NZ so learnt a lot about how fabric is constructed this made it easier for me to understand and how to work with fine , very fine or extremely fine silks, each cloth has to be treated differently, some wash well others don’t at all!!! Some shrink only slightly others can shrink to 1/2 the size! some wear well some don’t over the years. Most of my silk quilts are really just wall art quilts or bed quilts just for looking at LOL