This blog Im putting up is for Esther who is in Europe attending her mums funeral. You will leave so much to your generations to come Esther through your beautiful quilt designs, what a legacy that will be. I will be thinking of you over these coming days Glenda.
My first two circles added and its laying flat much to my amazement? Im not a machine sewer so this a challenge for me adding circles by machine.
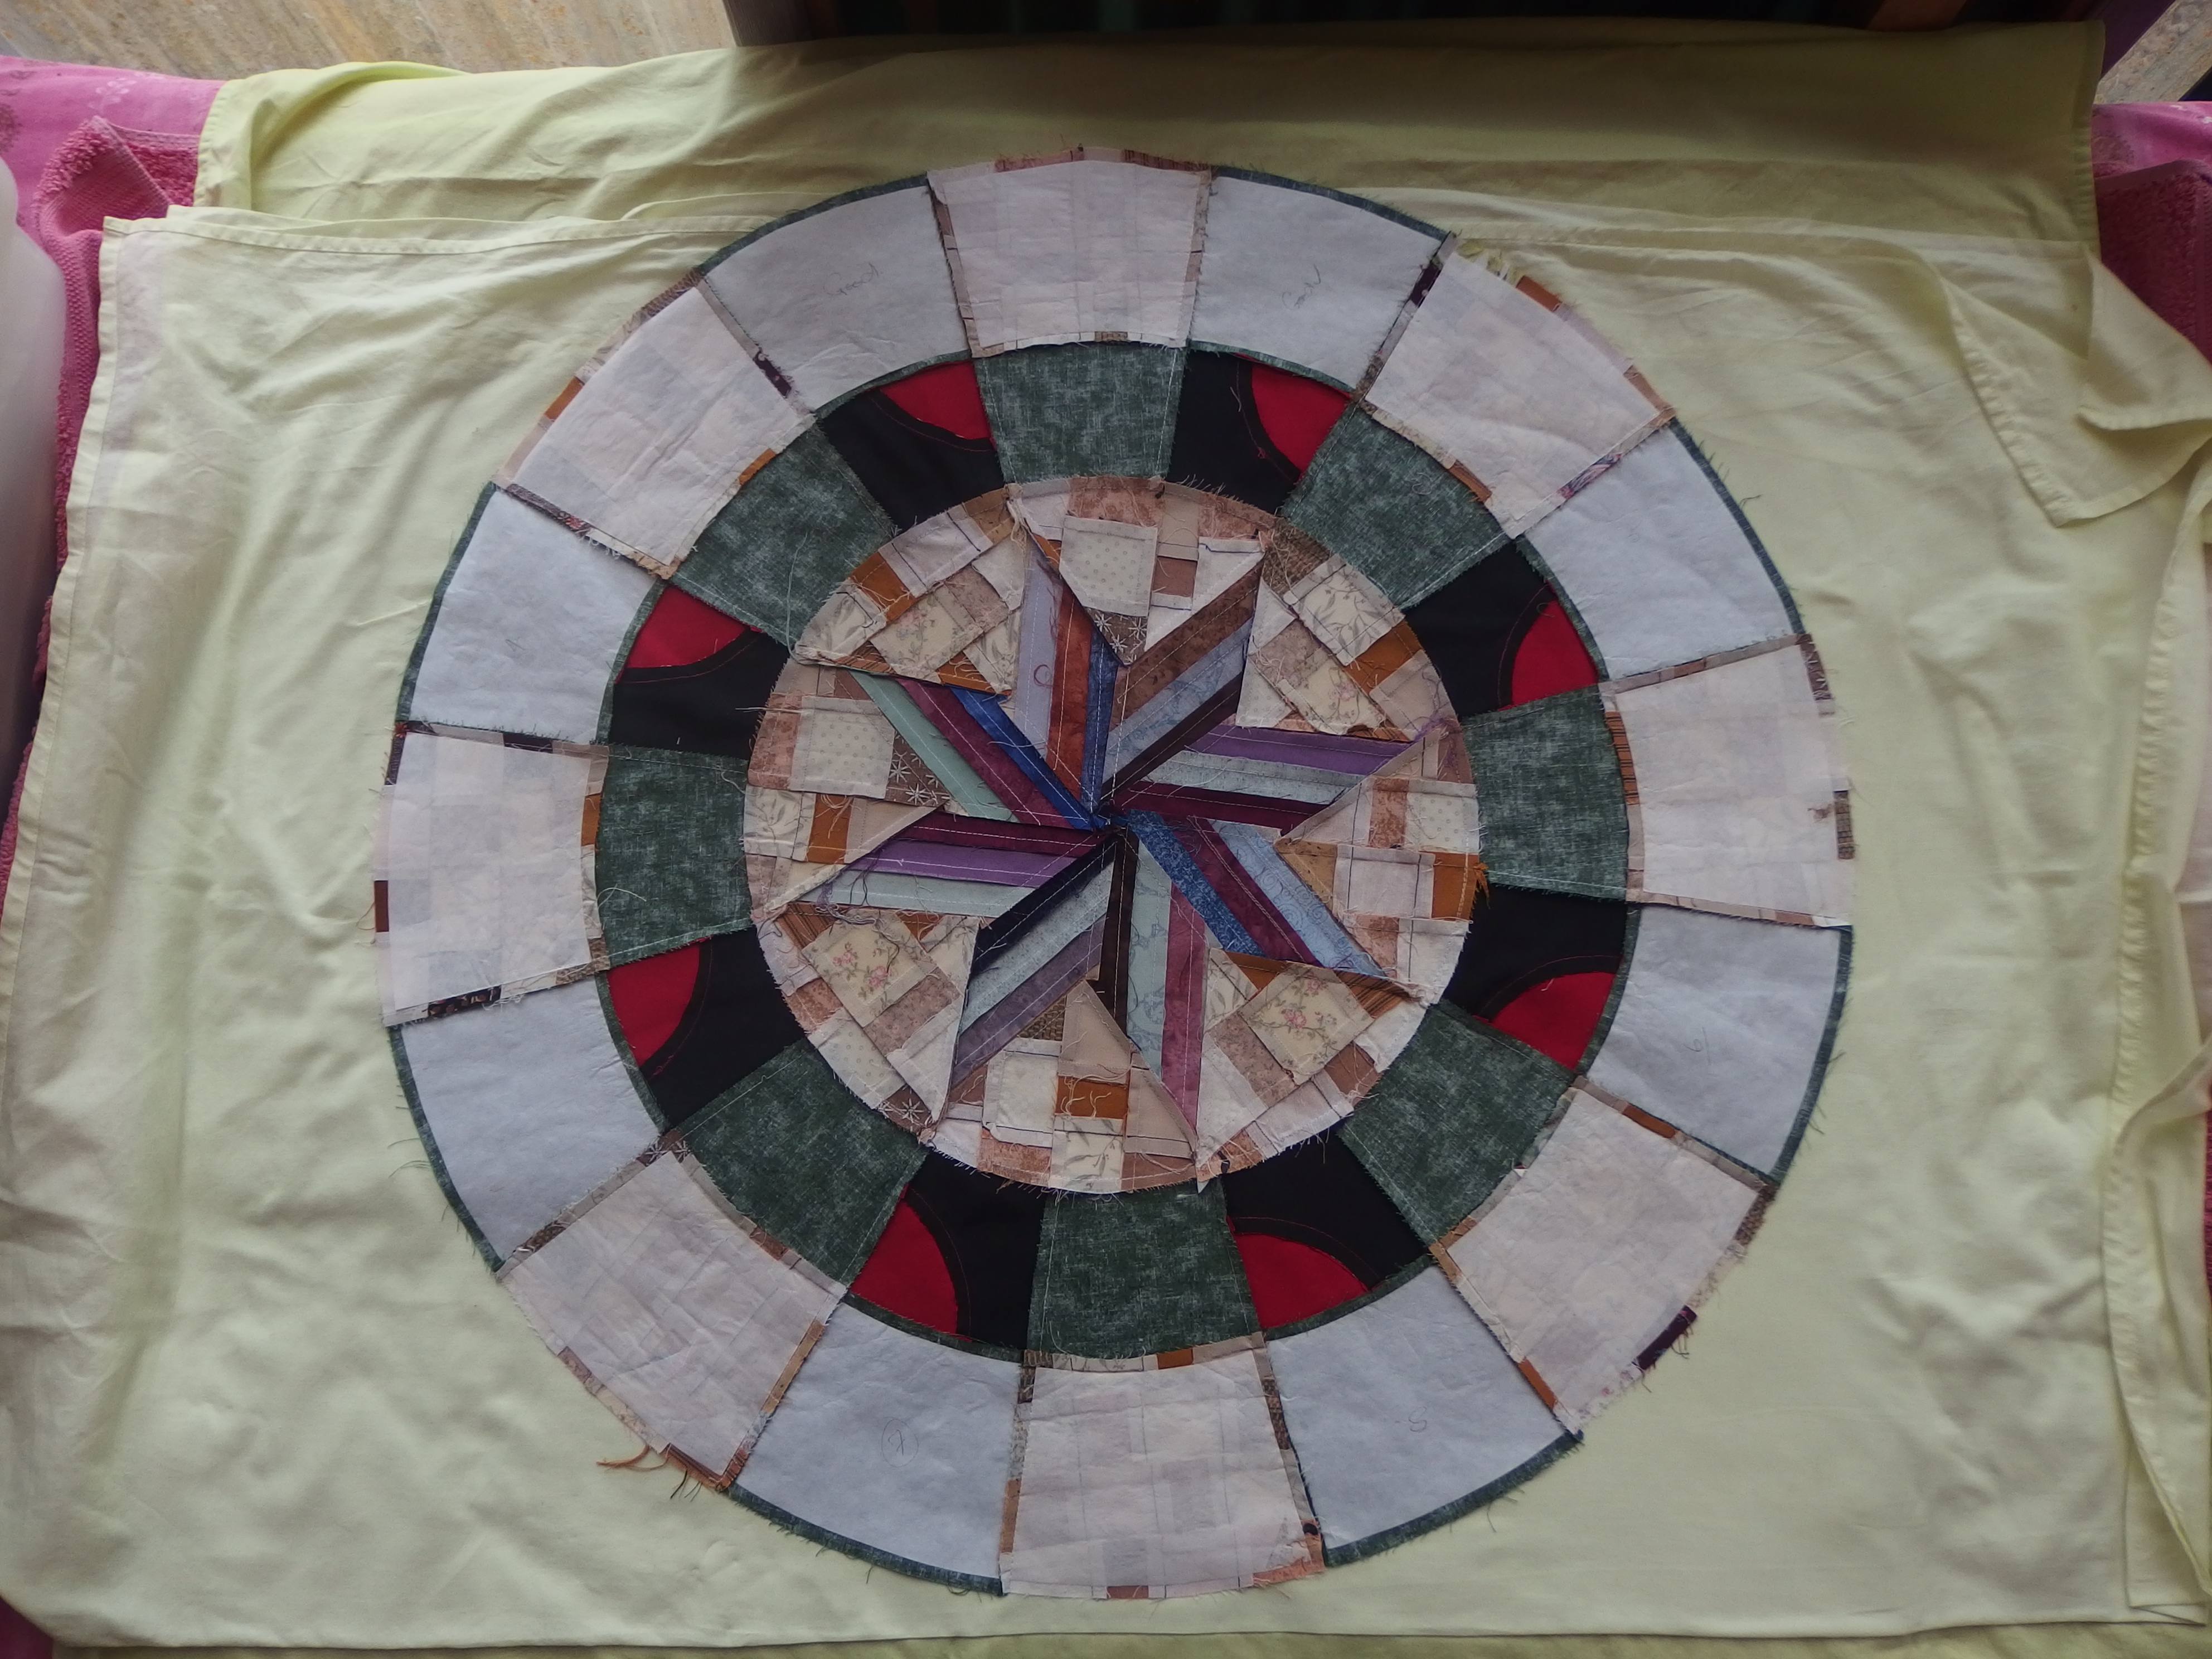
Back of my finished circle after adding Part 2. I will leave the freezer paper there till I add my Part 3.
Part 3 Right from the start I wanted to add yellow in this circle to go with the green!!!!But it was a failure. When I saw it in reality it looked like it was trying to fight the centre, so it was a no no for me.
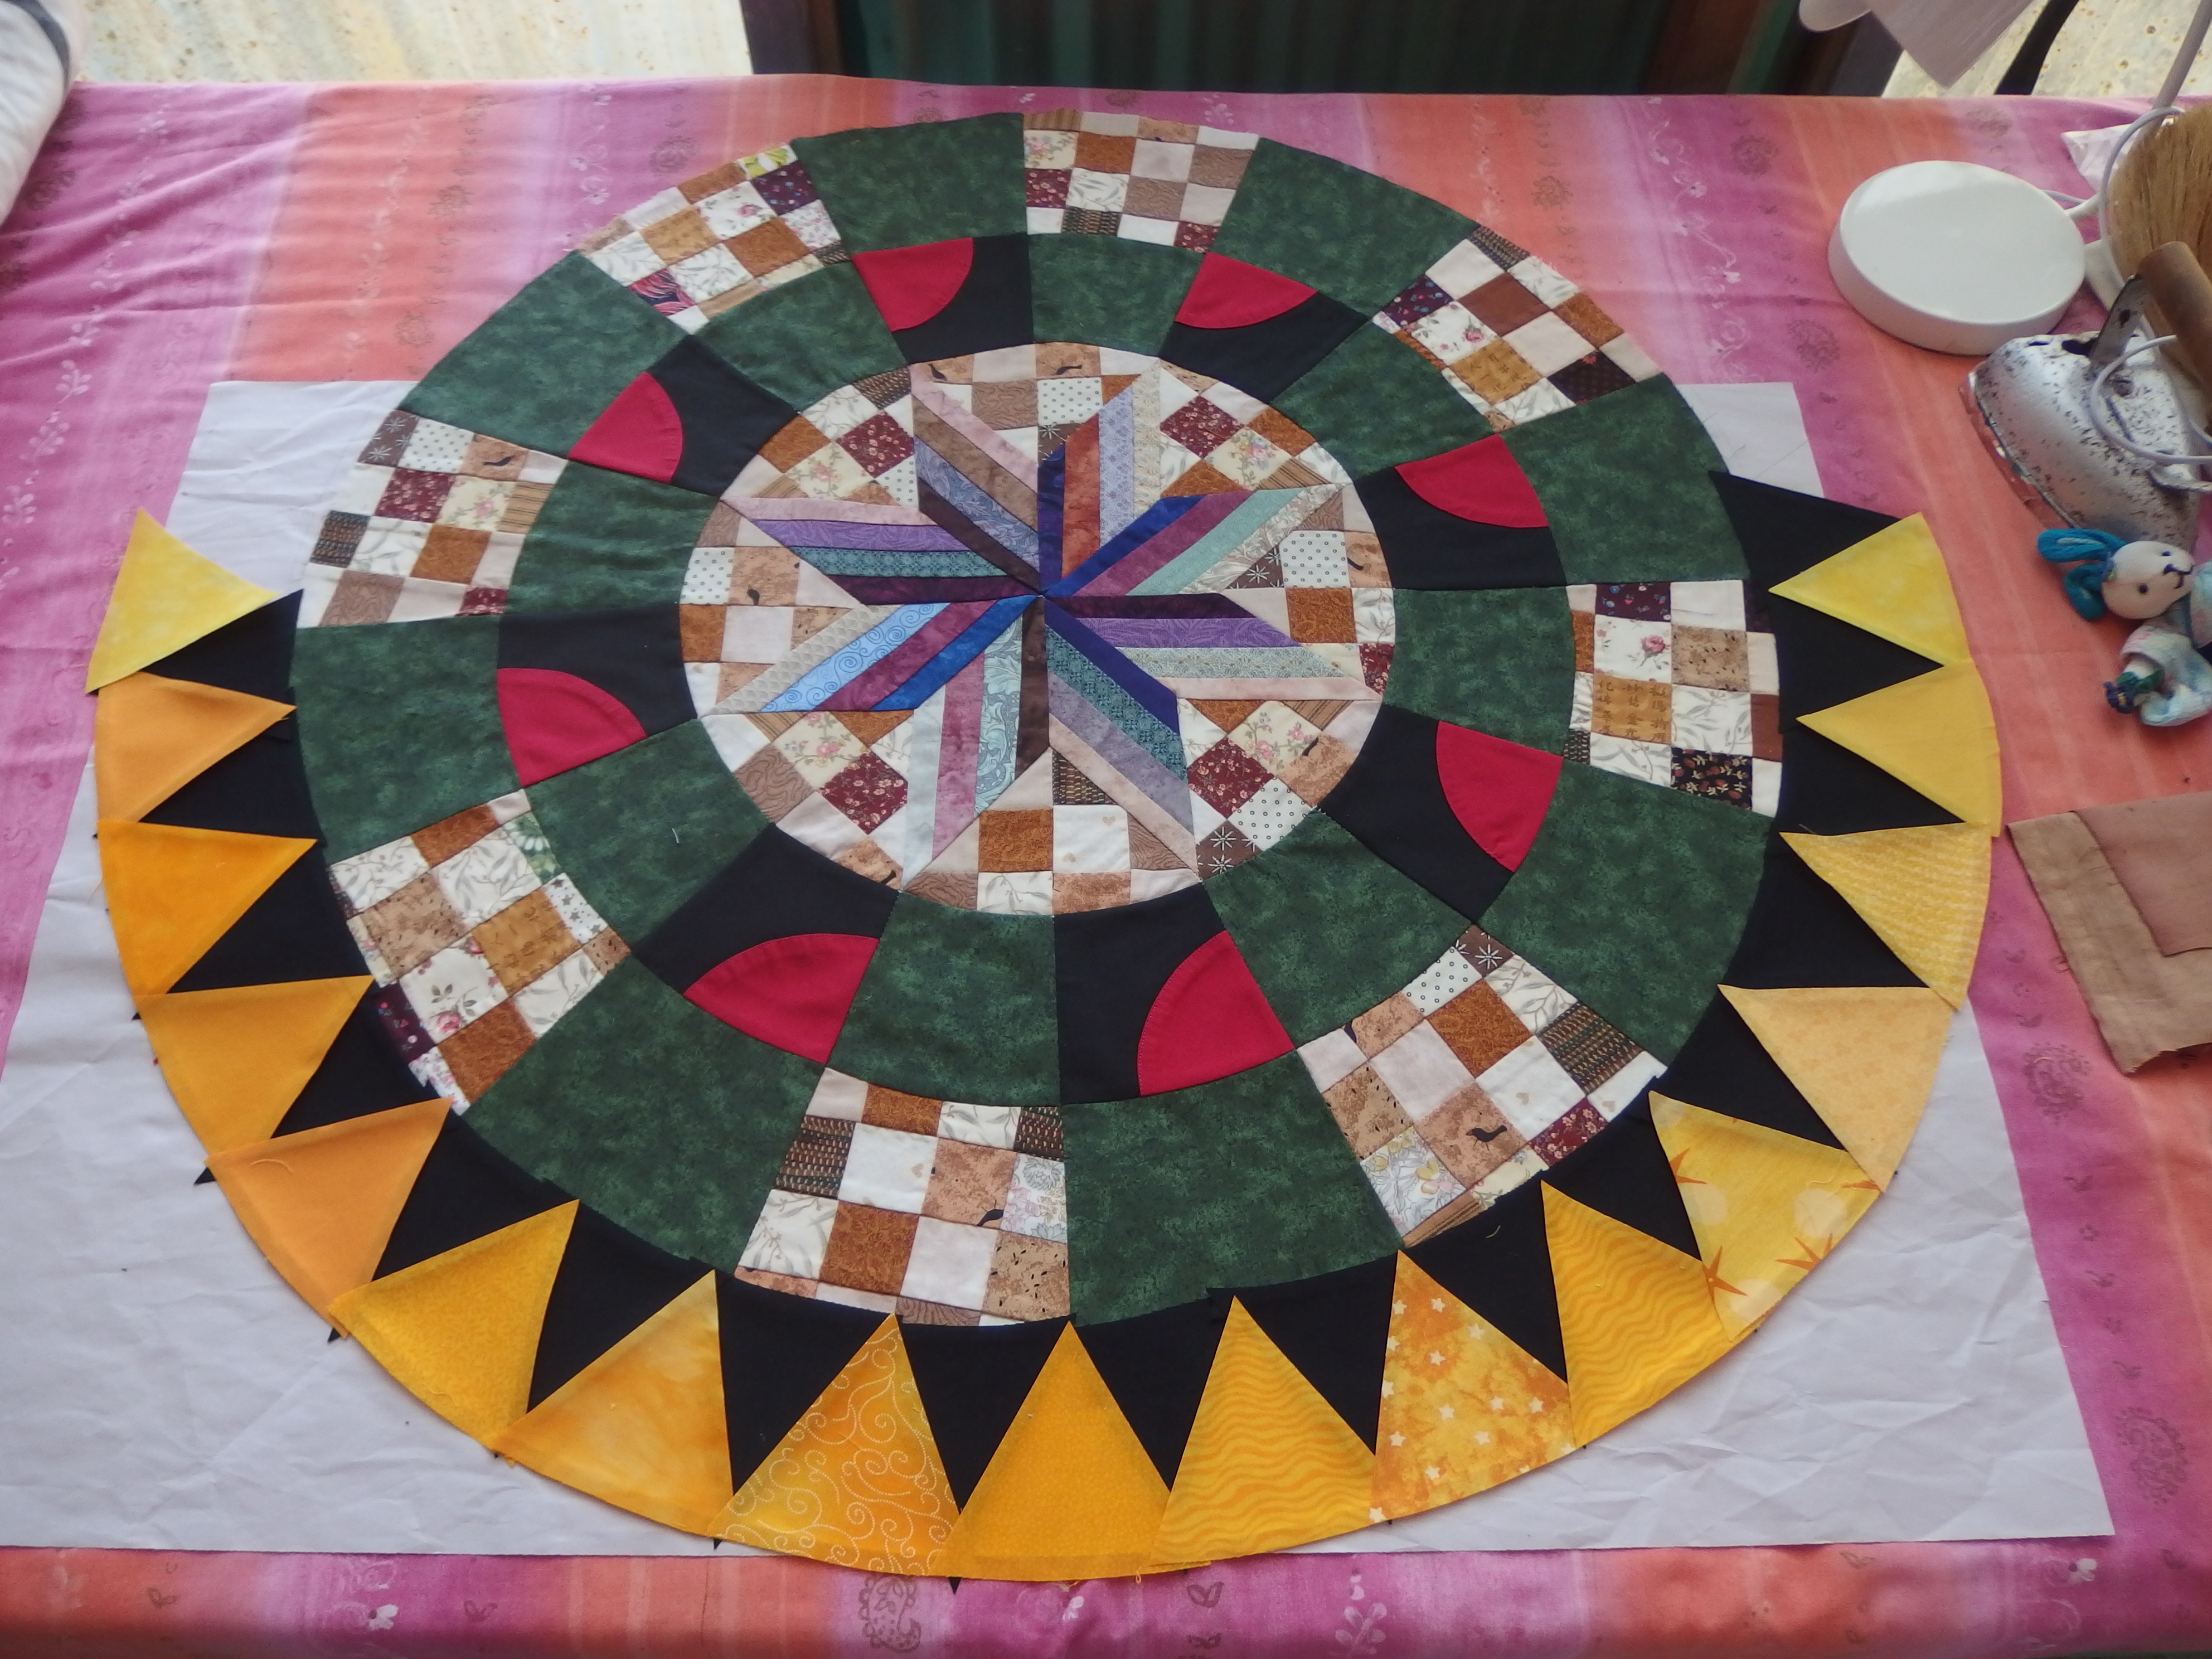
Hmmmmmmm I first had it in my mind from the start that I was going to use yellow in my triangles but it just did not work for me when I saw it in reality so they had to go!!!!!!
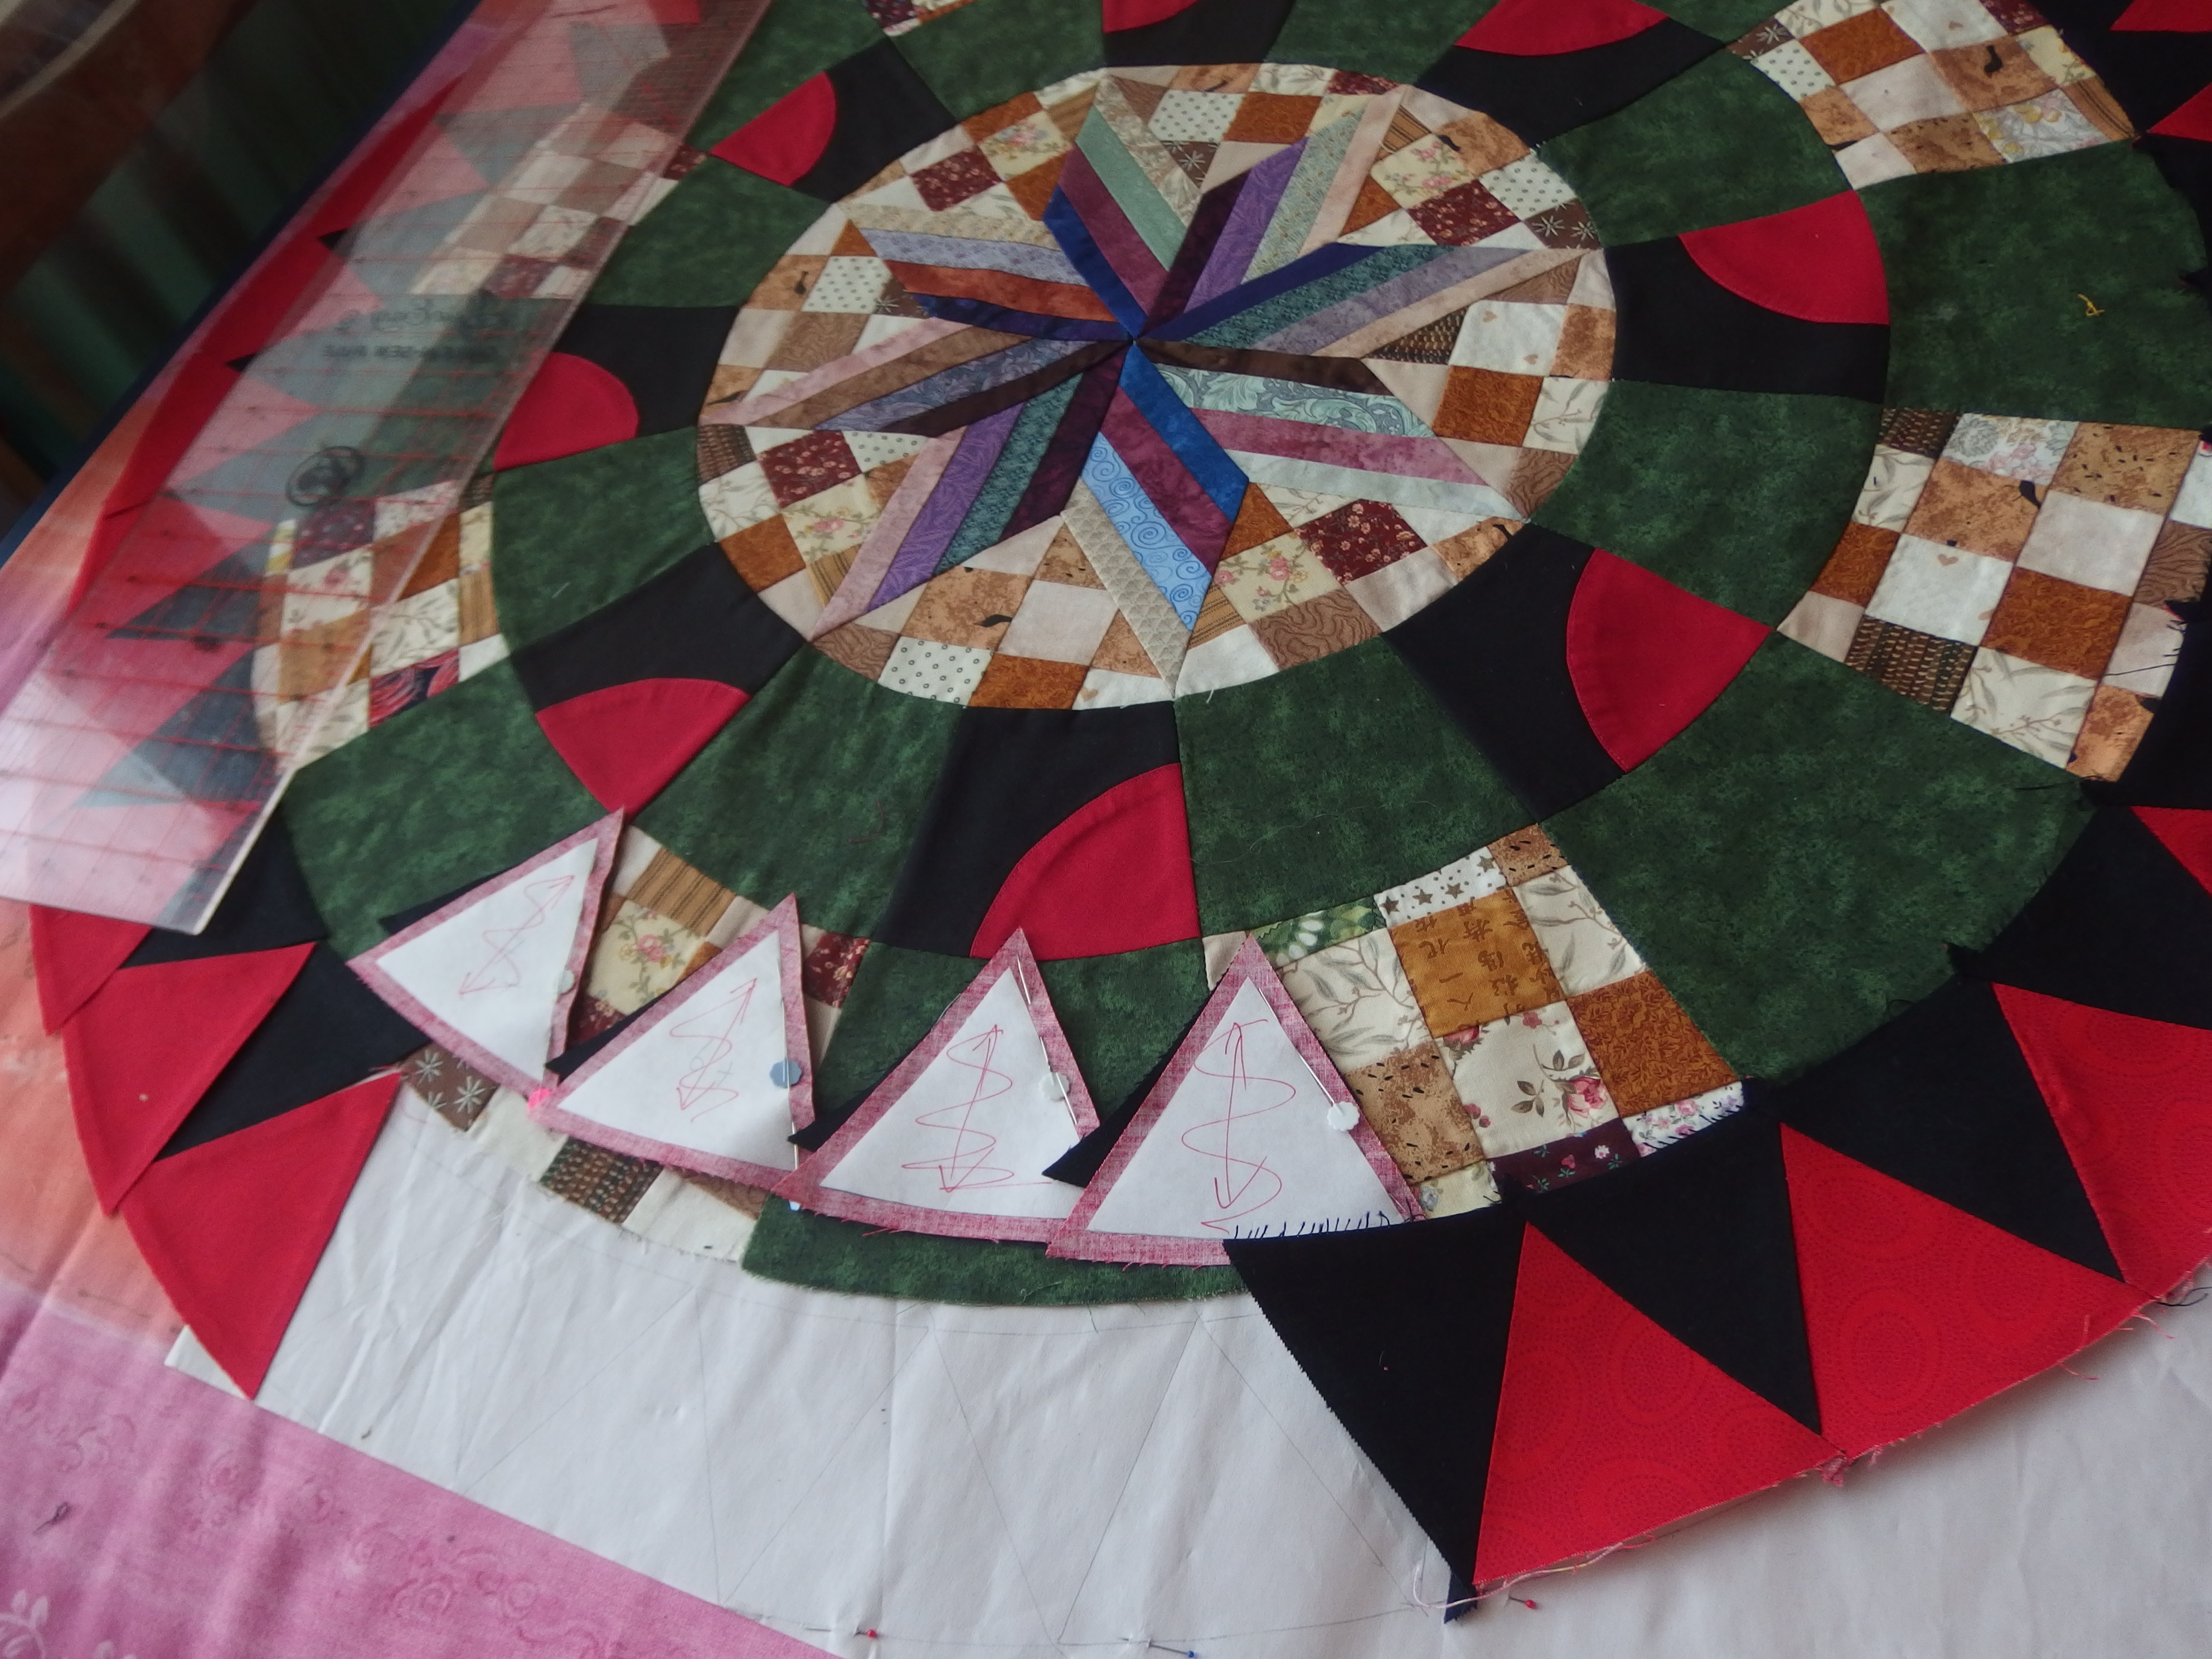
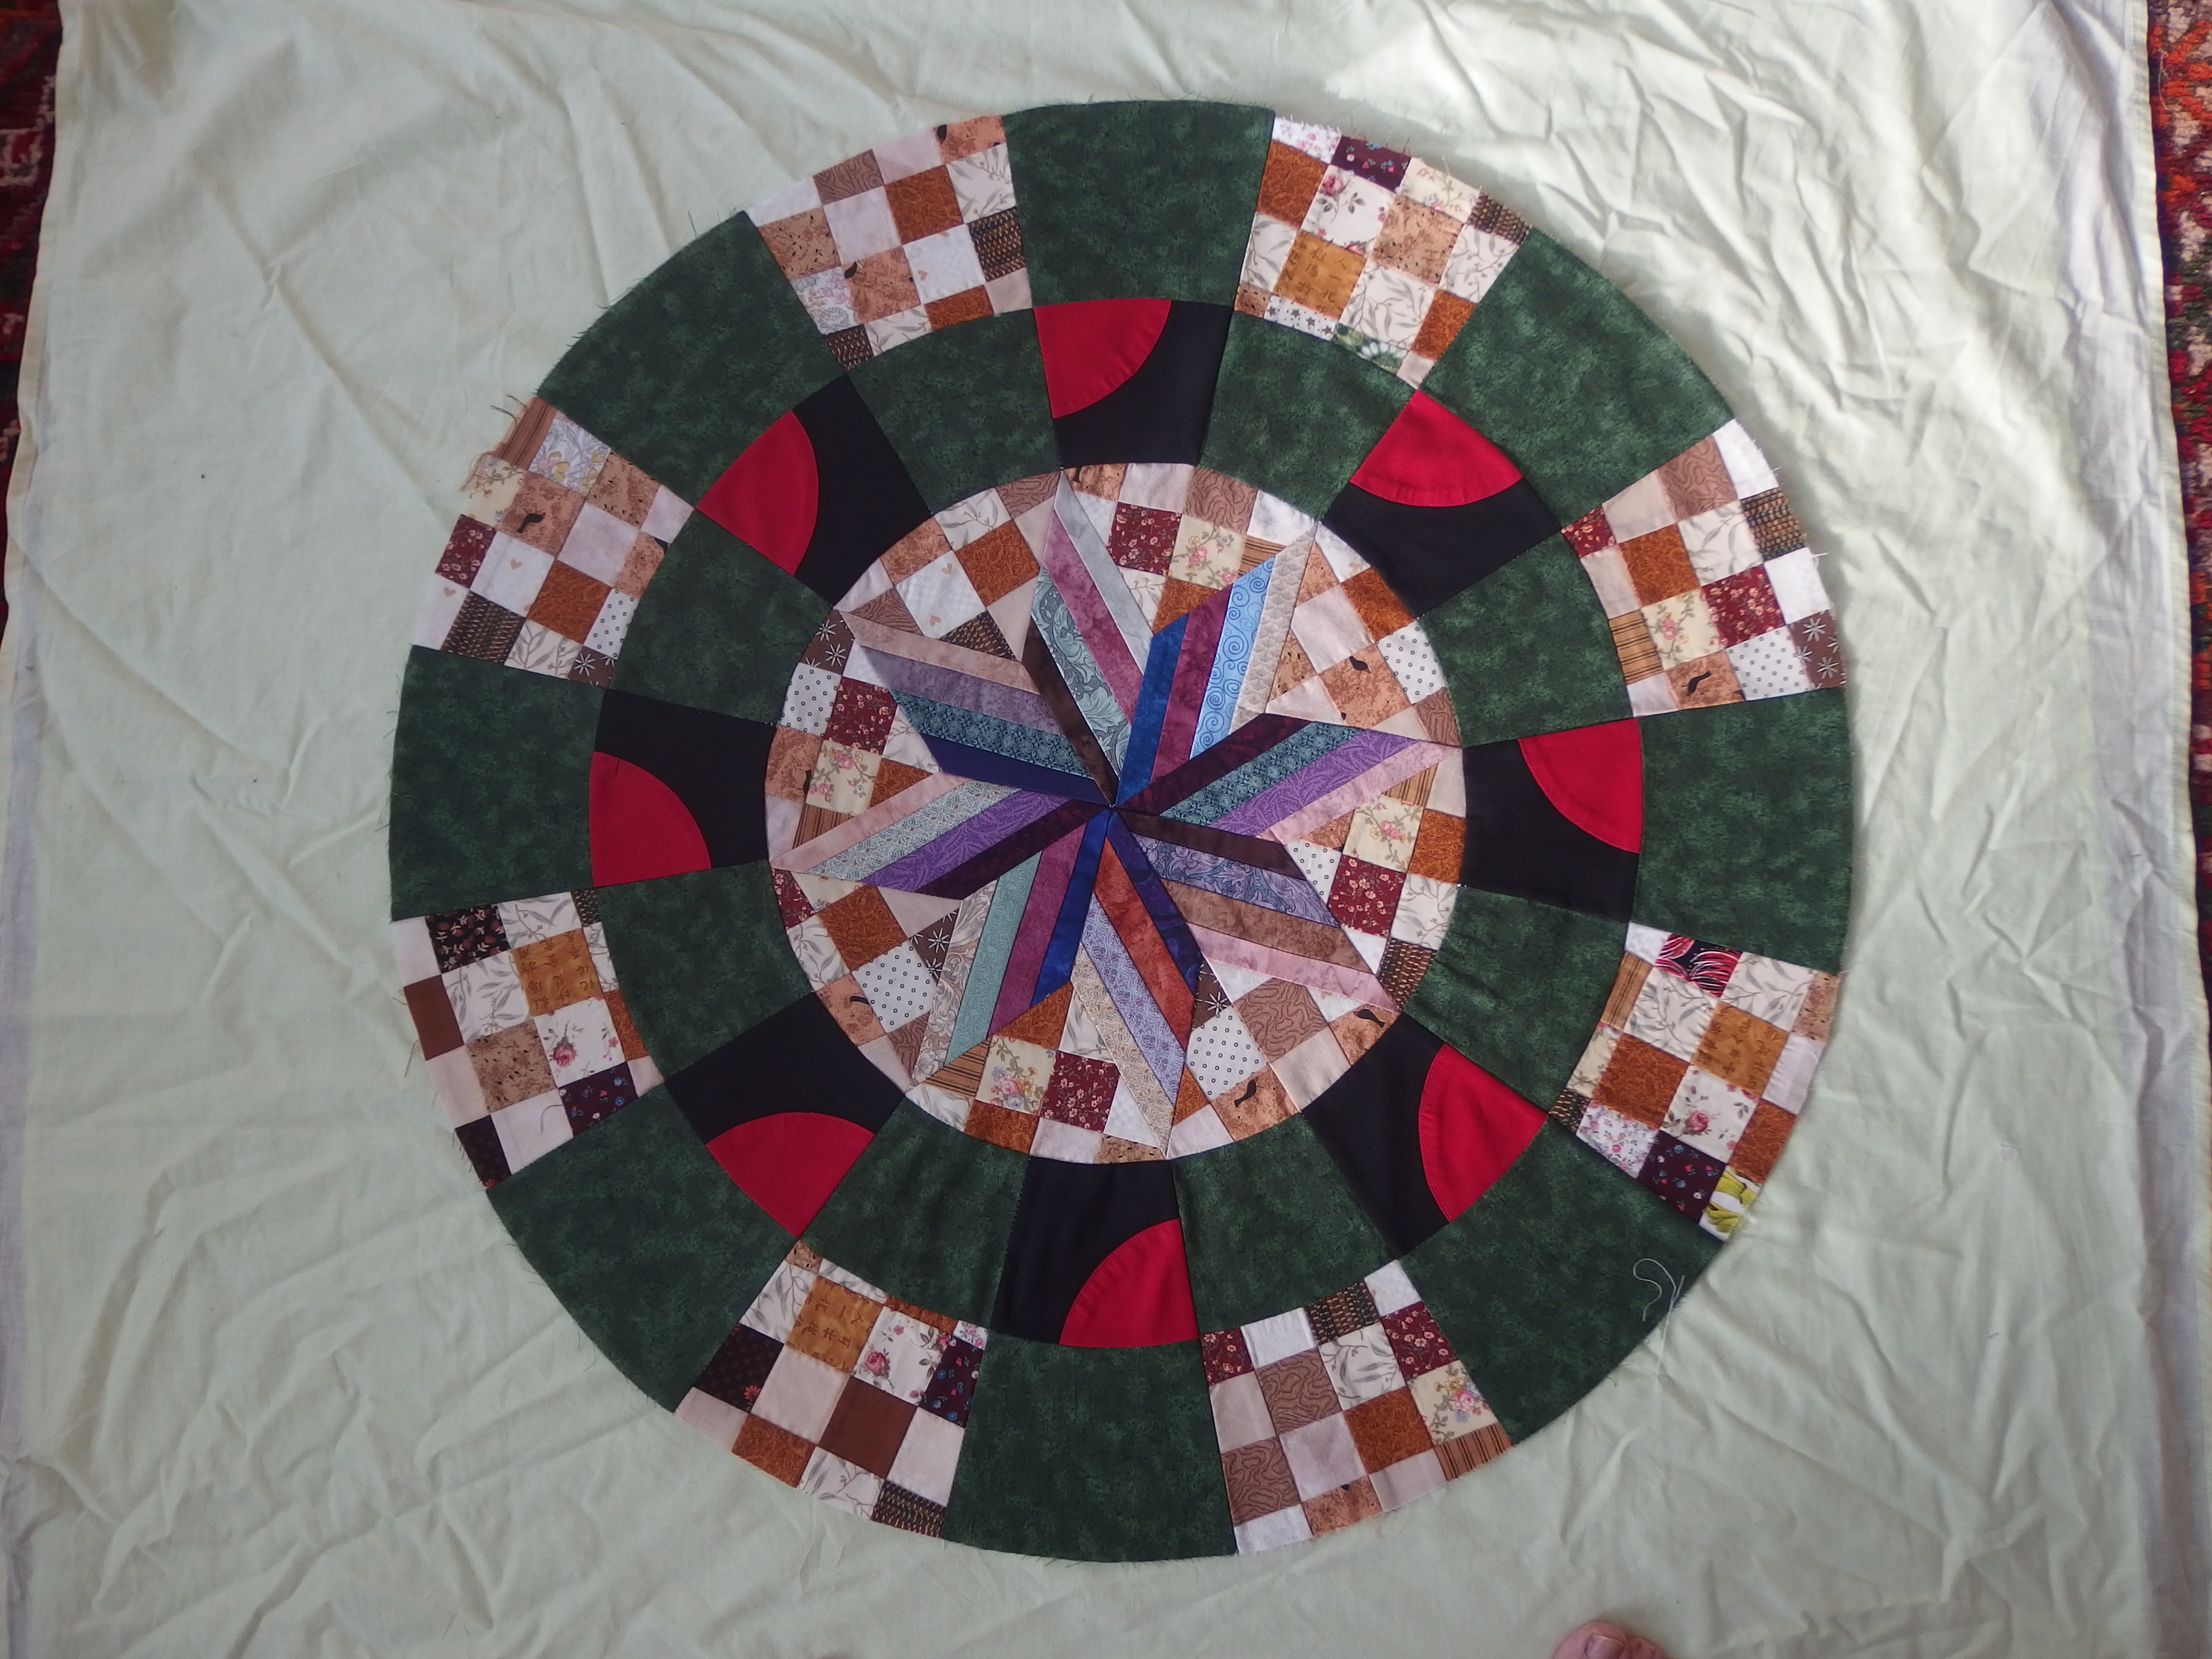
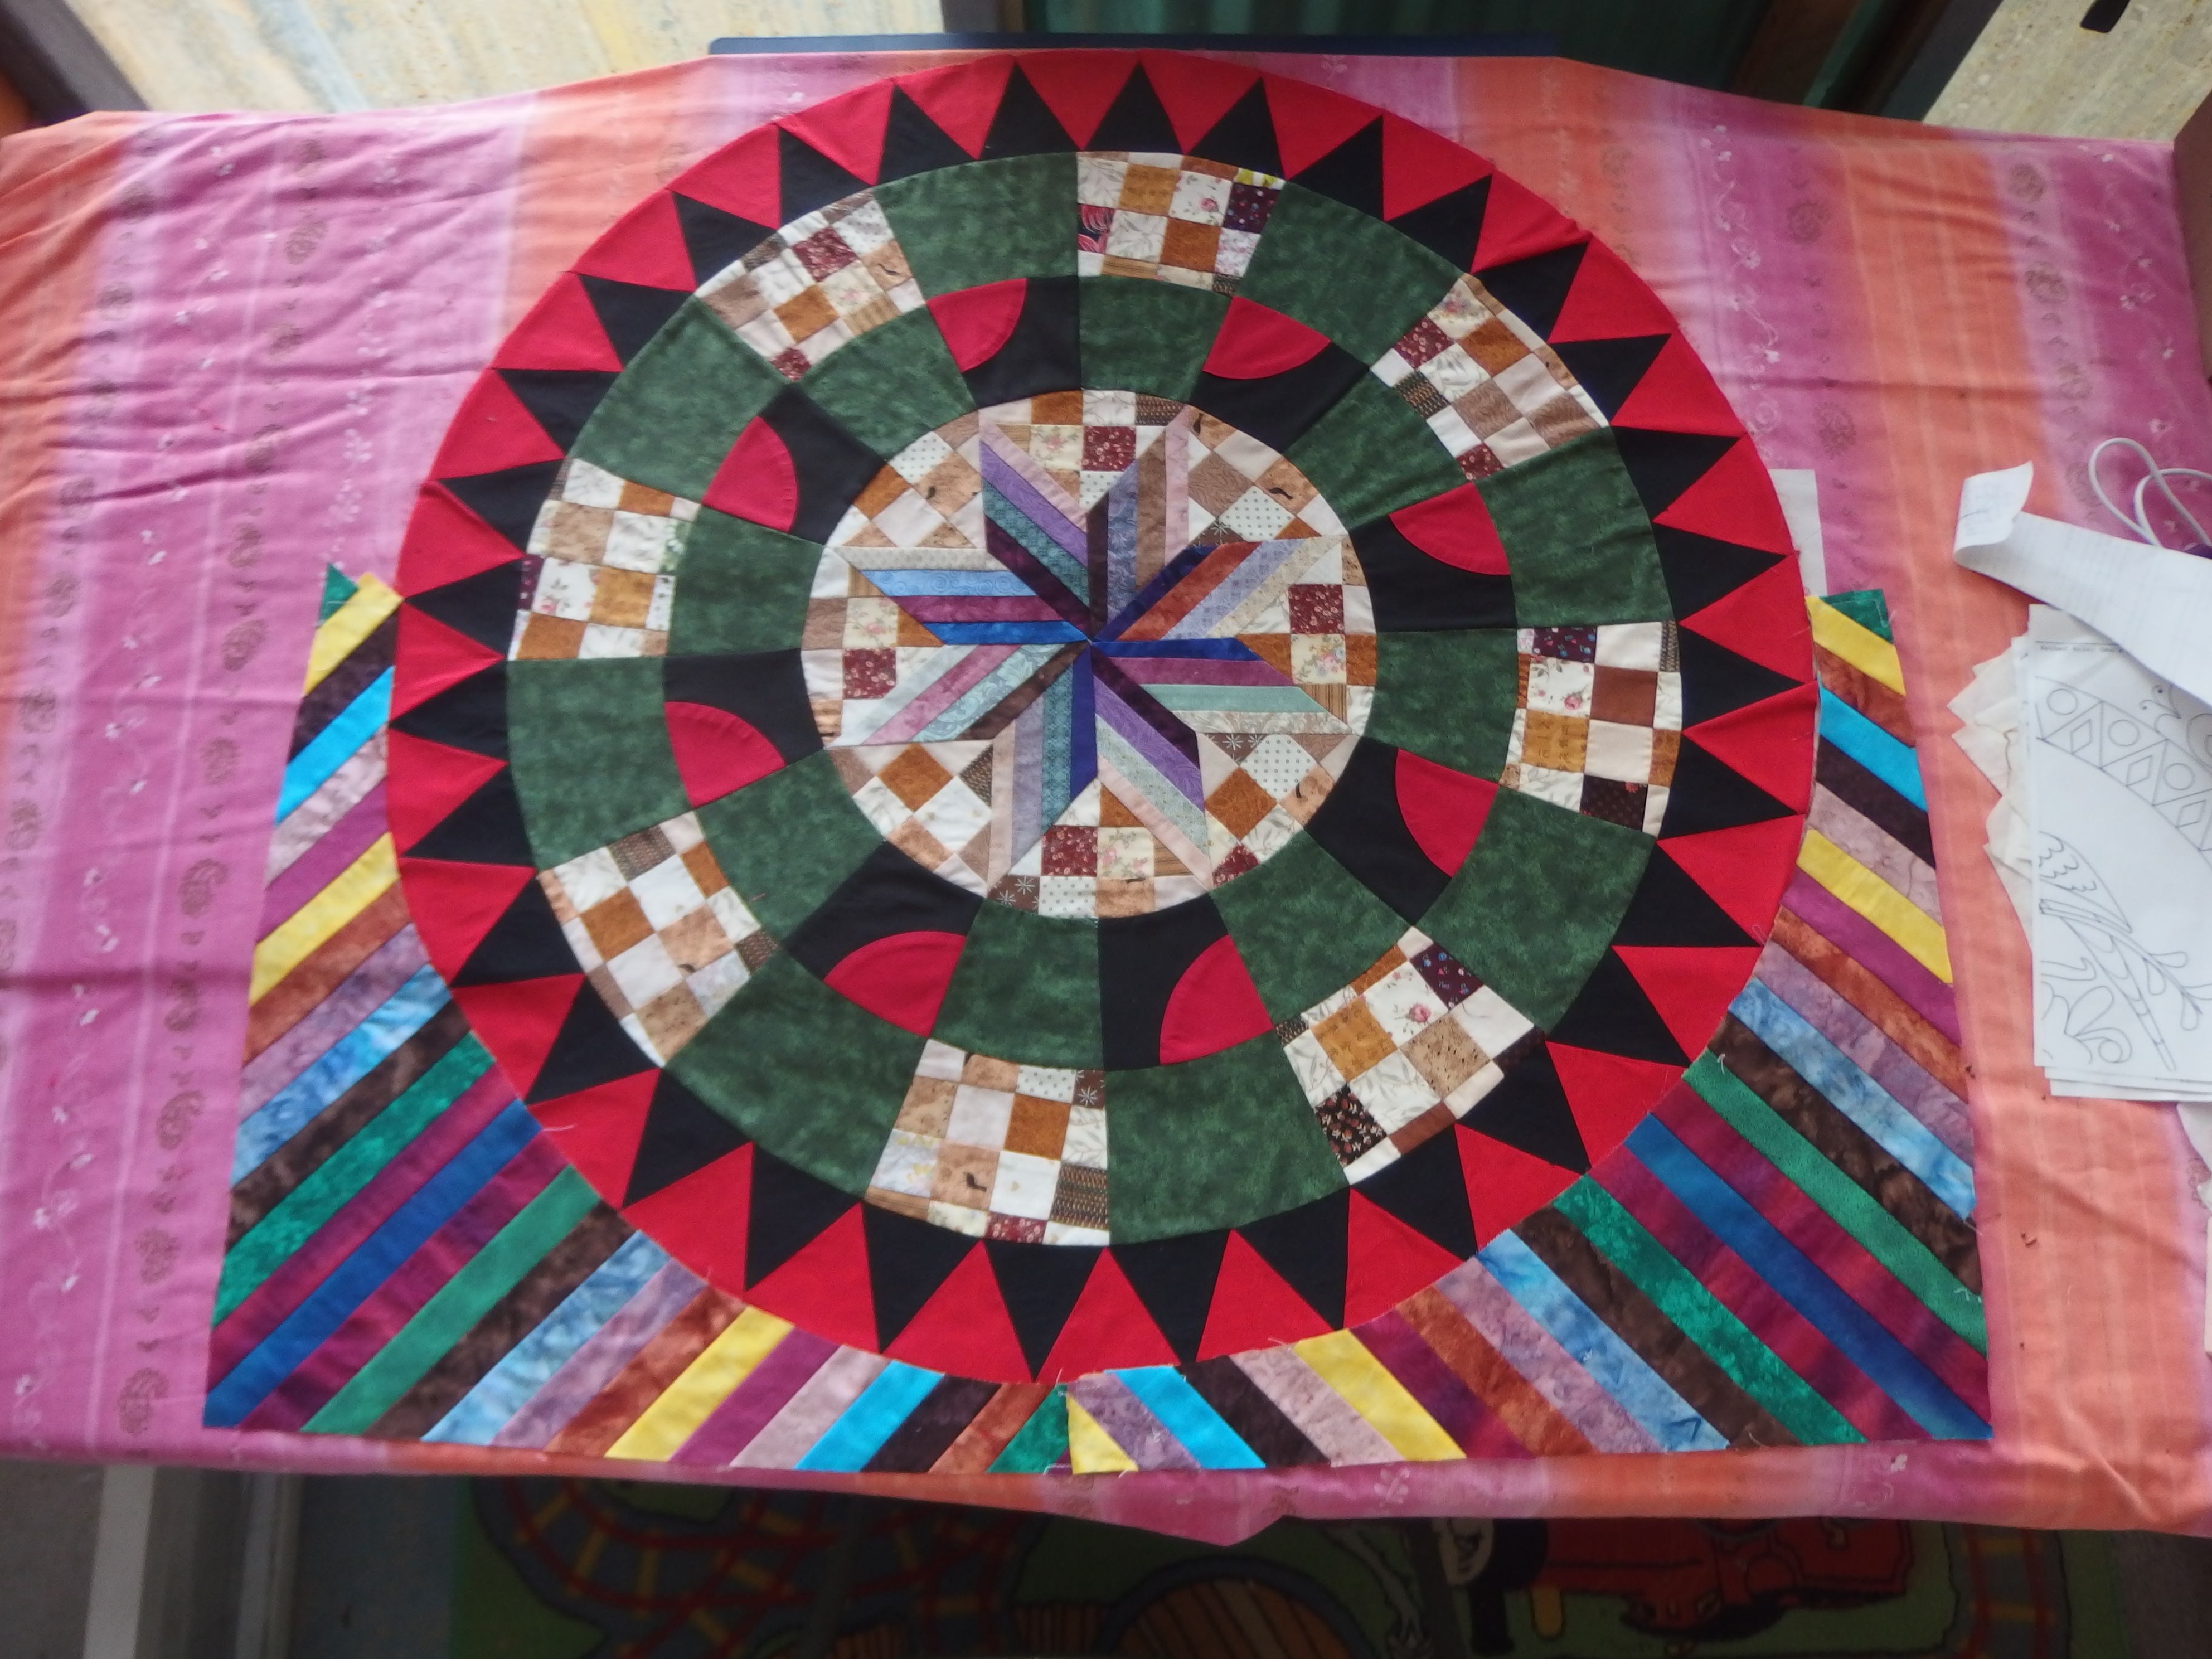
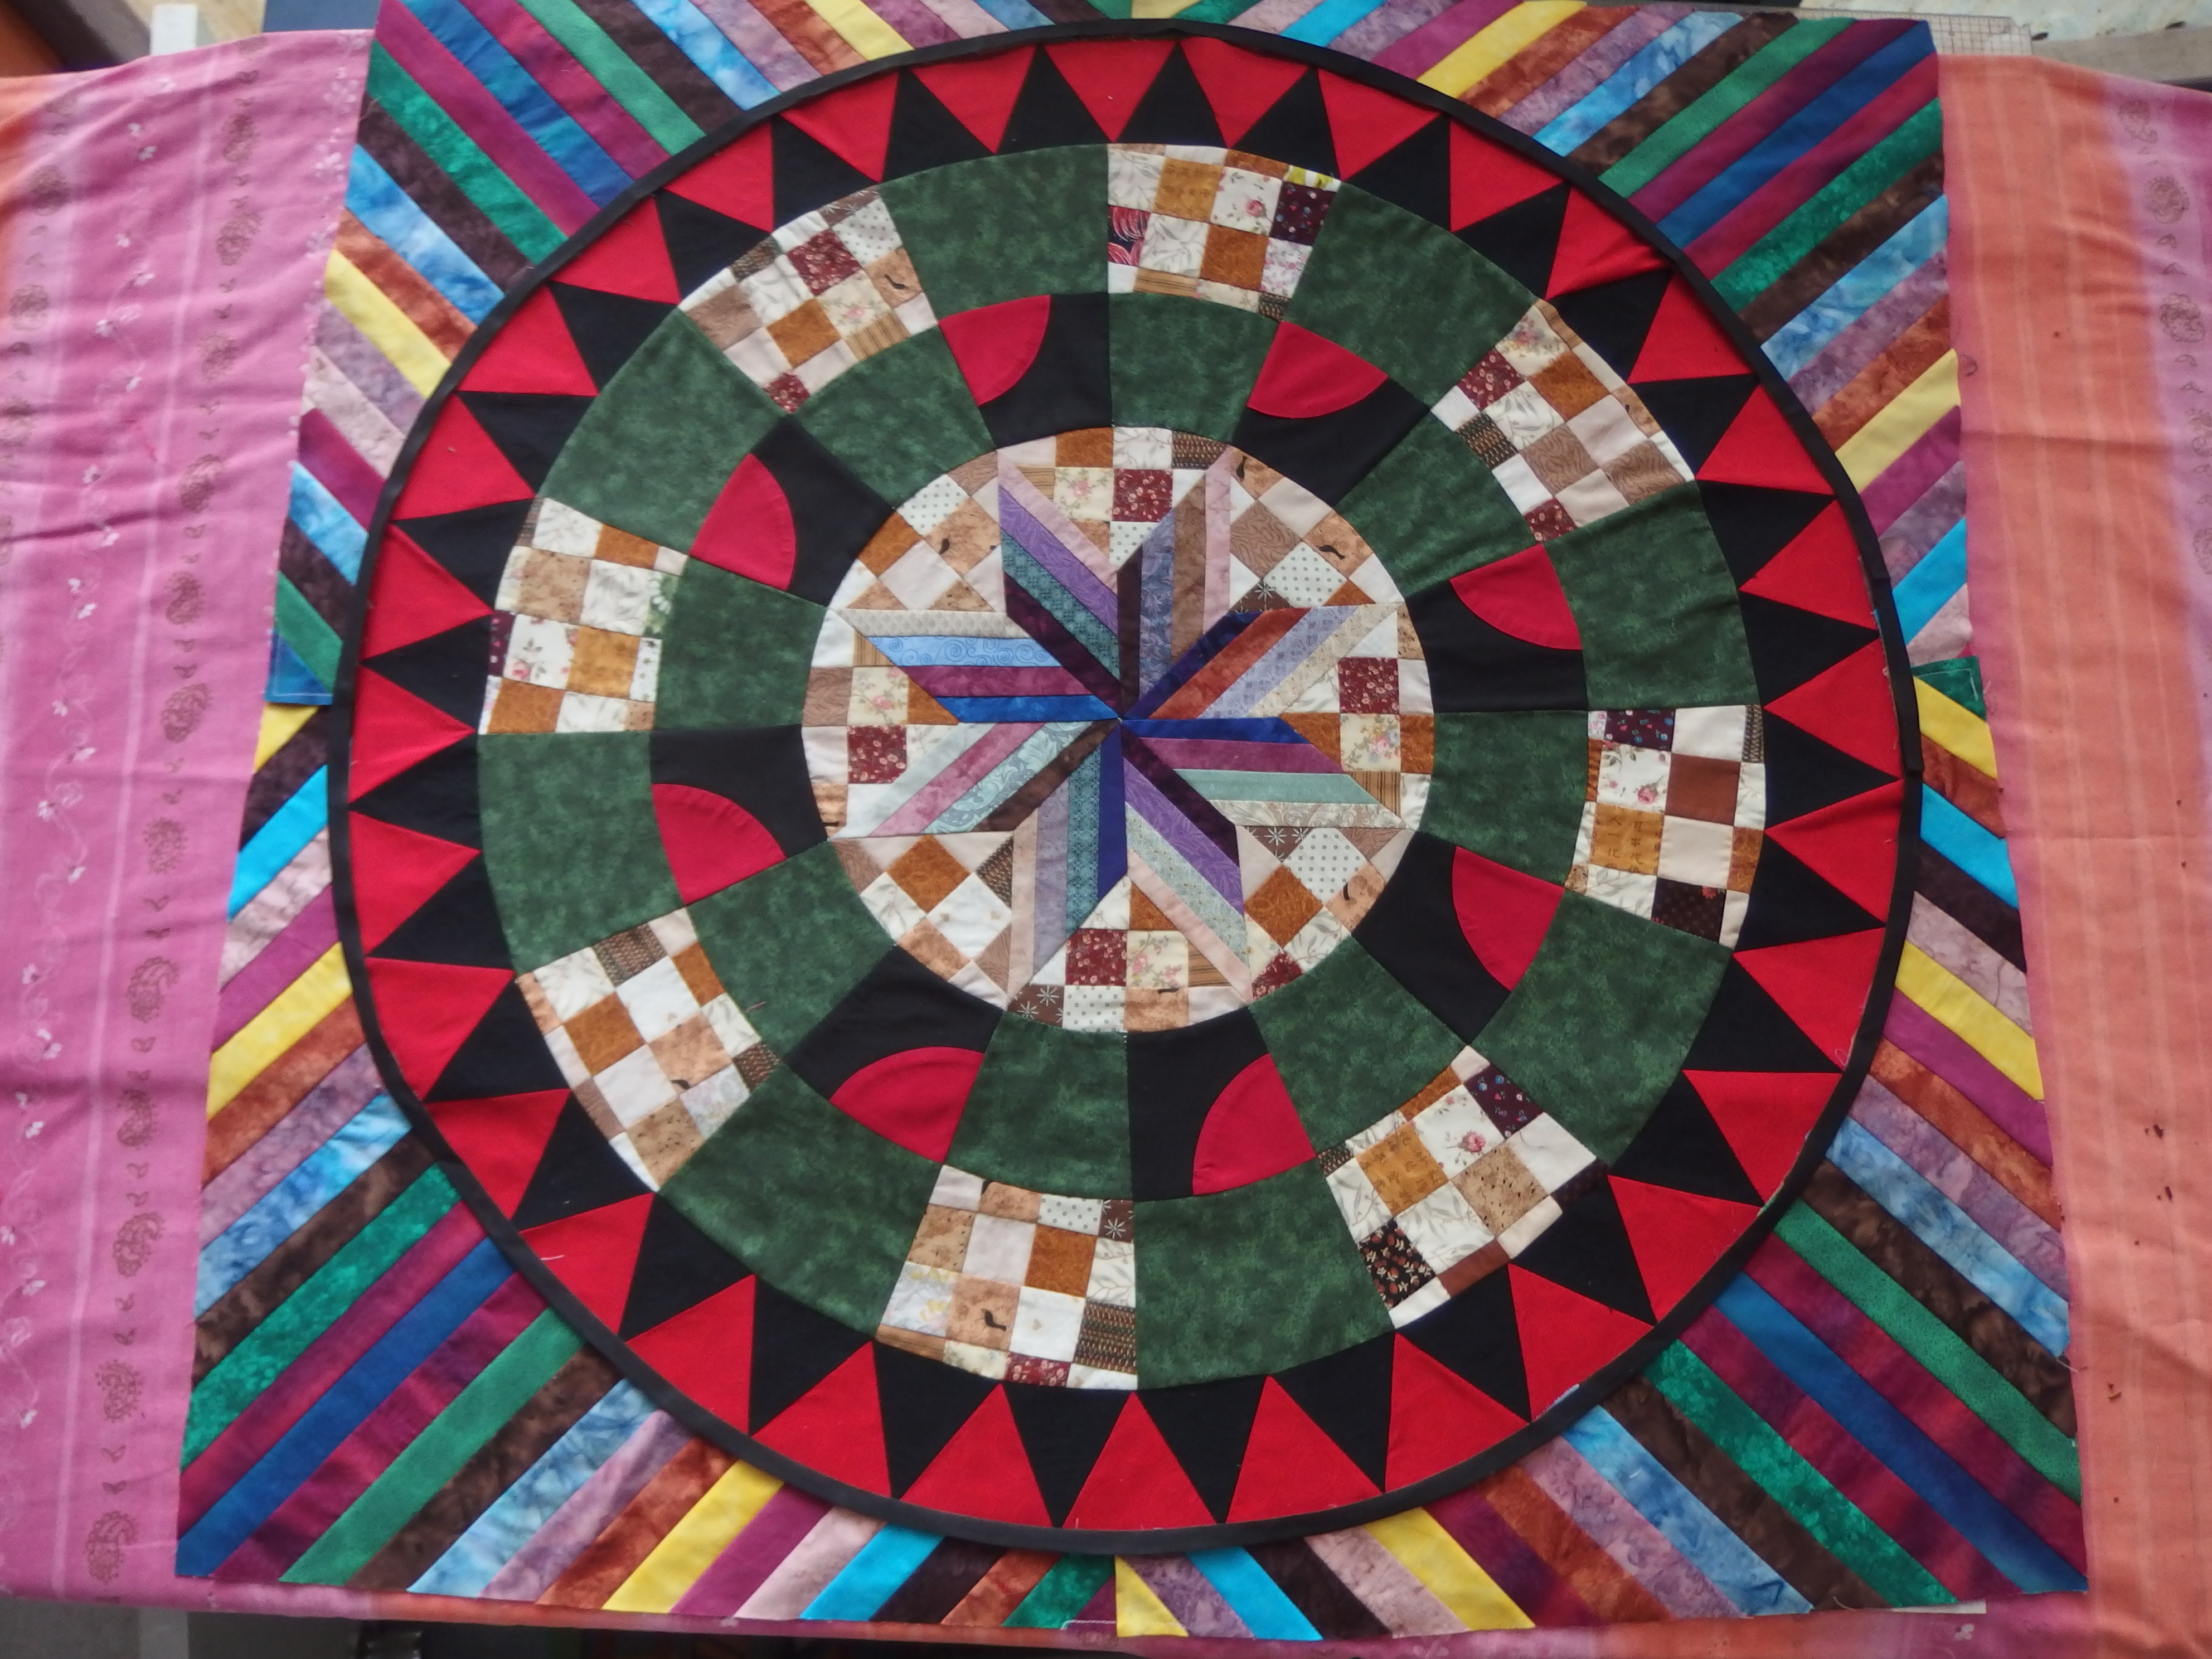
I was lucky enough to find some red in the same tone as my old drunkards path blocks I used in my first border and now Im happy with my triangles. Joining my triangles 8 at a time, 8 pinned so my first 4 units are ready to be sewn. Notice templates in freezer paper it made it so easy to know where to join the seams together for these shapes that are a little different to just normal triangles been on a curve.
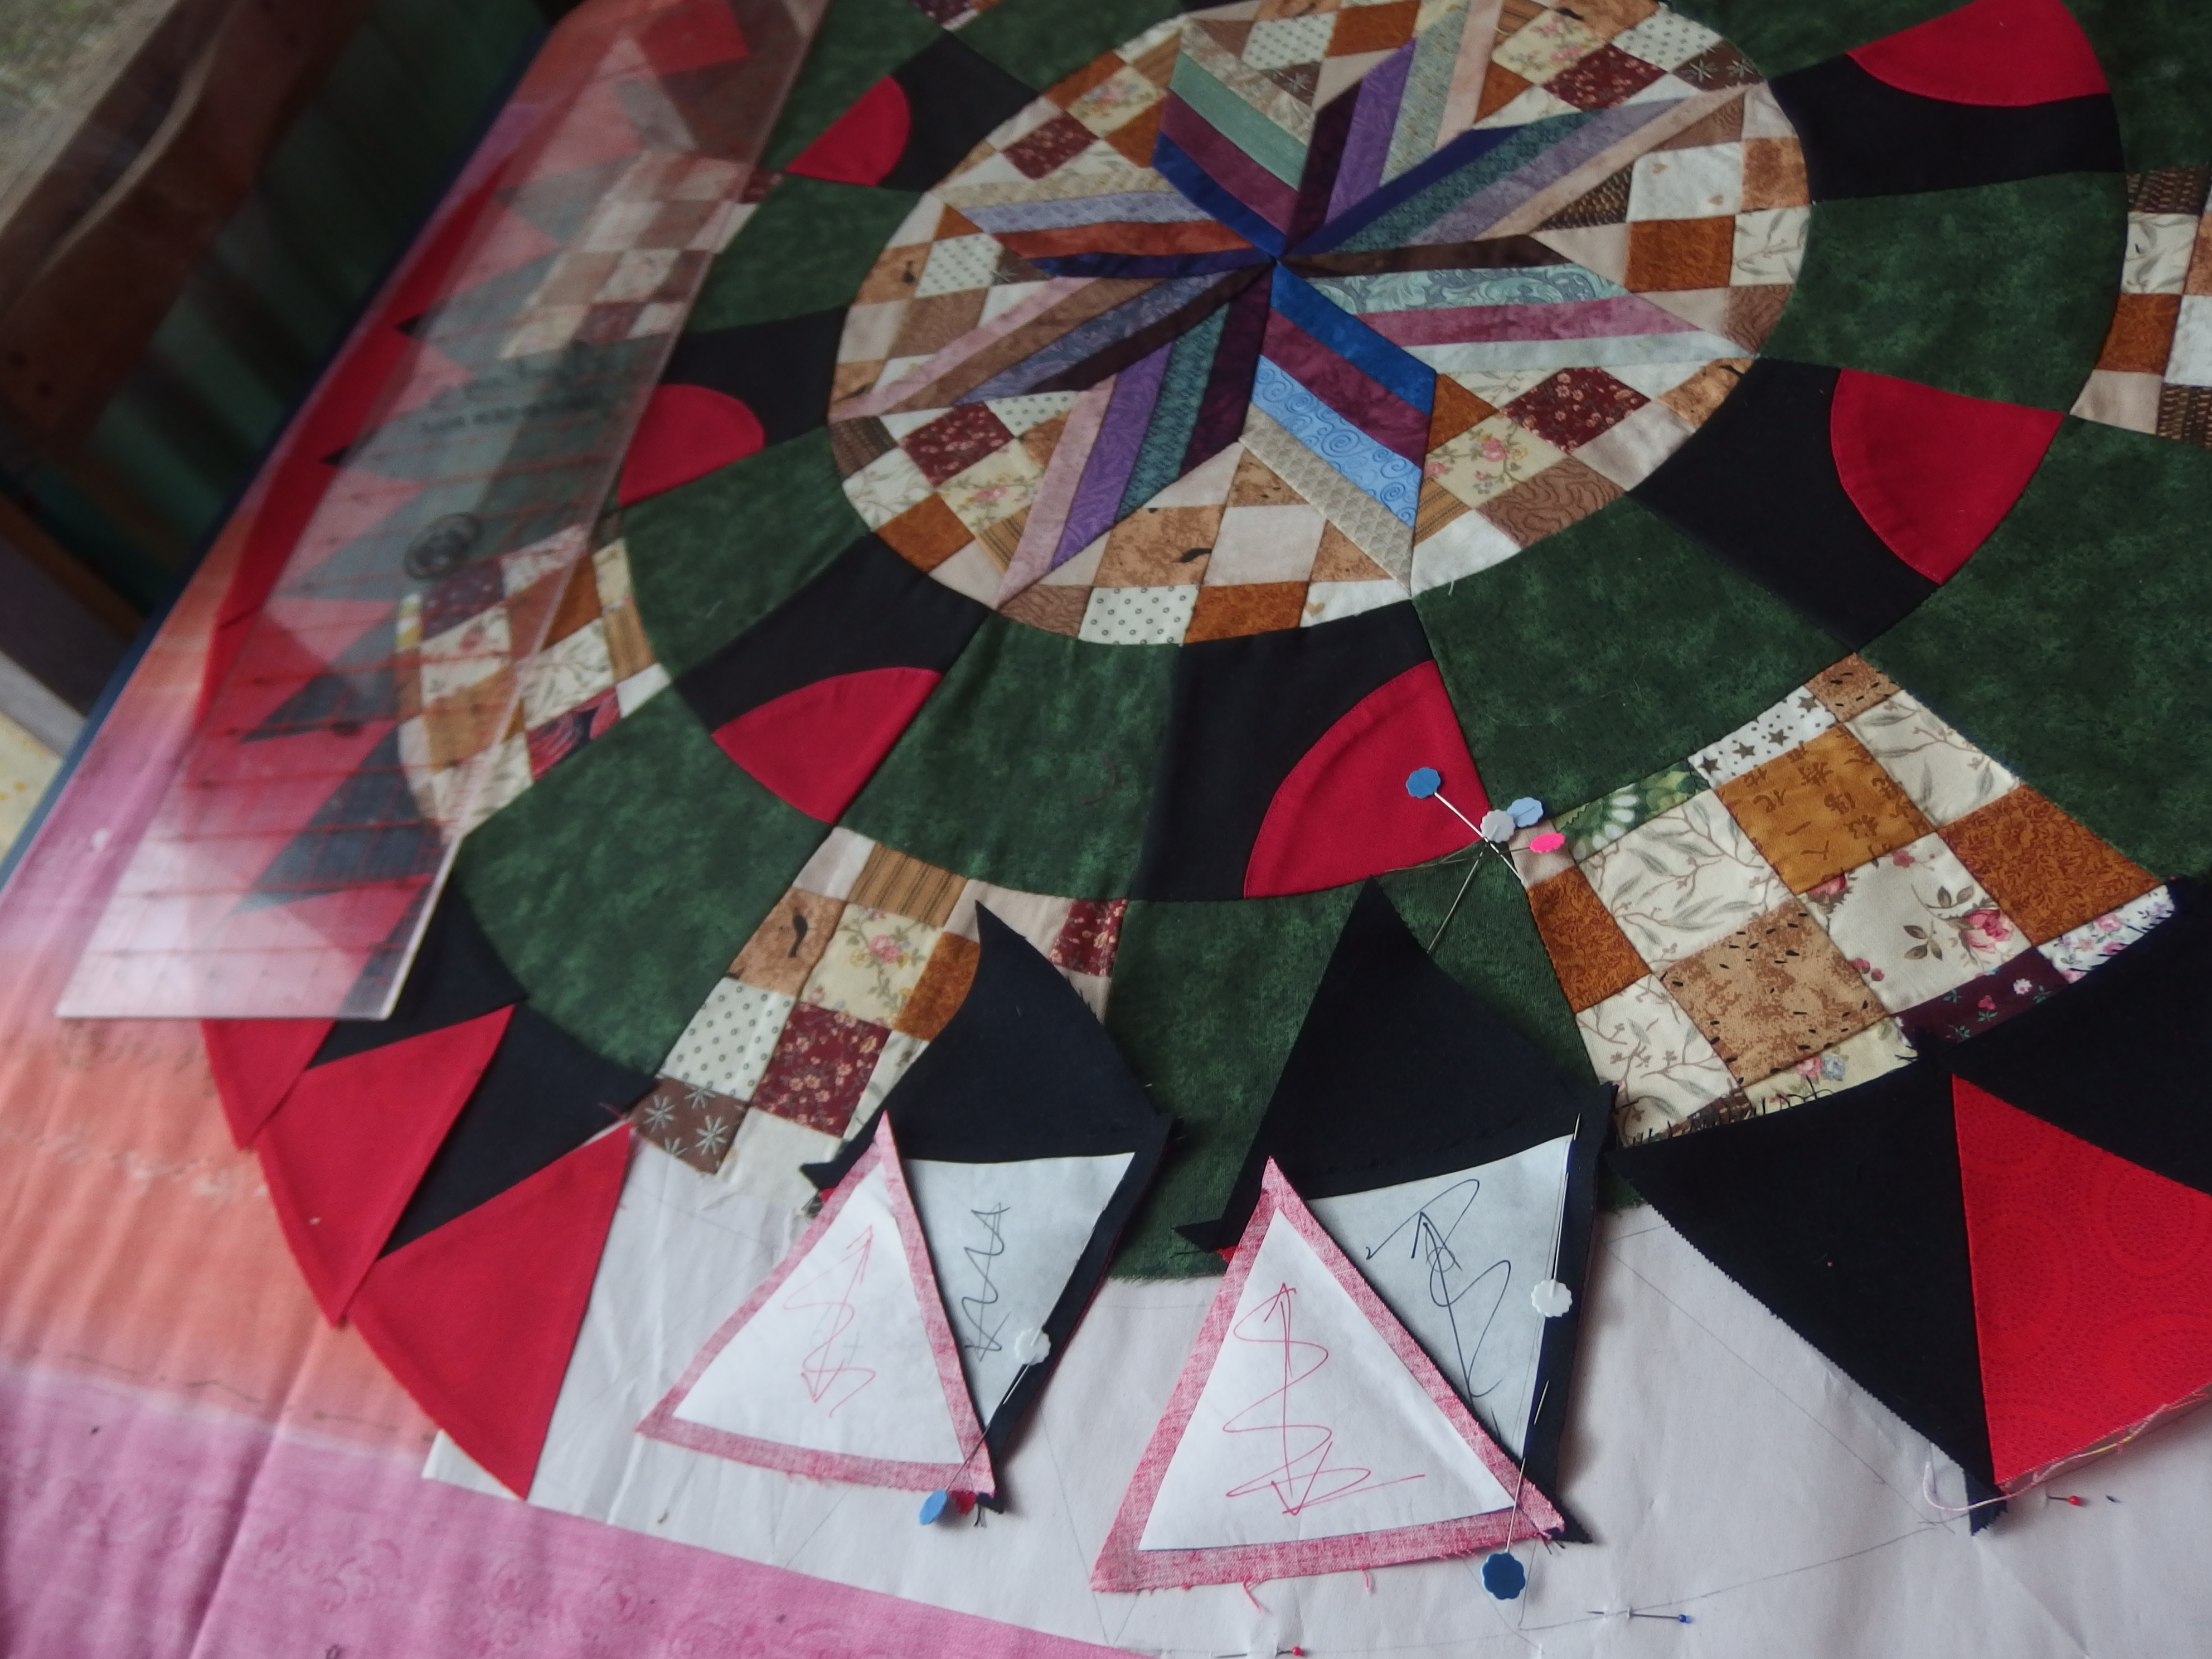
My 4 sets have now become 2 sets Notice I have colour coordinated my templates and marked the straight of the grain in the same colour. This helped me not mix the triangle shapes and keep the outer edge to the edge as there is such a slight difference it would be easy to pin them incorrectly. Its a Slow way to do these triangles but my circle ended up flat as a pancake and I only sewed it on once.
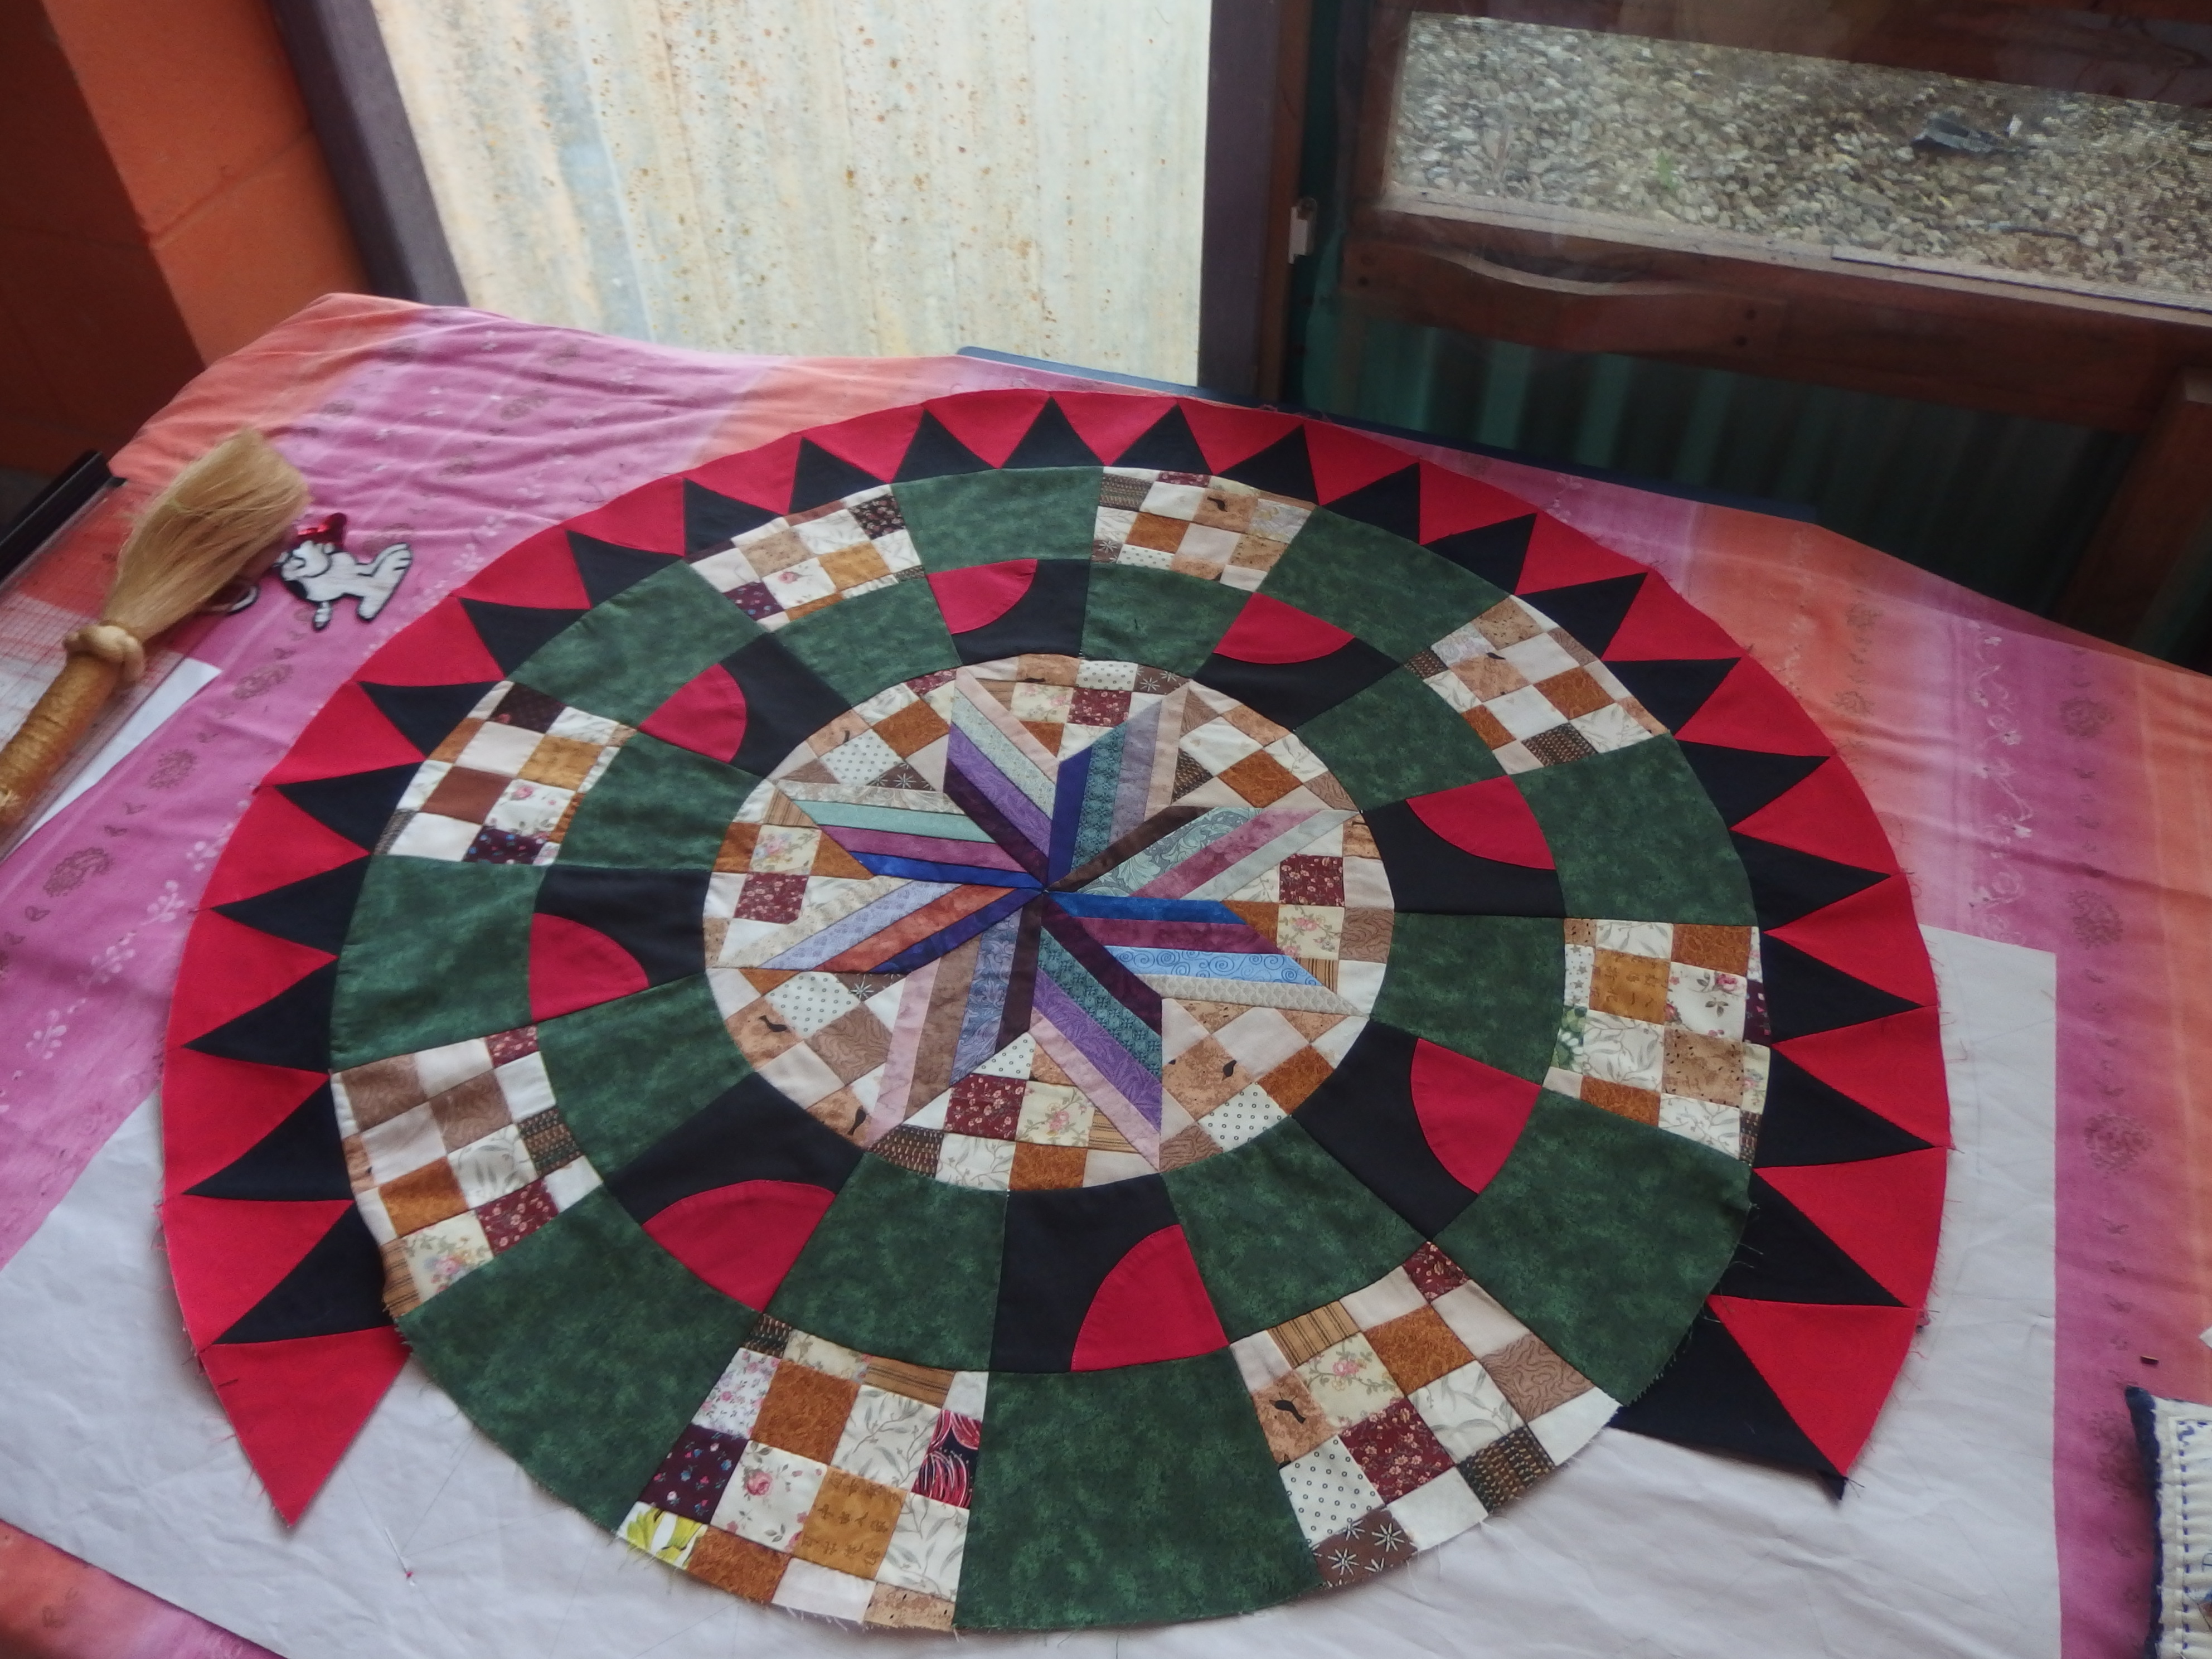
3/4s of my triangles sewn on and its all laying flat????? I made my triangles up in to 1/4 sections and sewed these on one at a time I had more control and could see when I sewed the first 1/4 on it was all going to fit. But I did add a generous 1/4 inch seam on every seam as I felt my fabric was going to add a fraction on every seam.
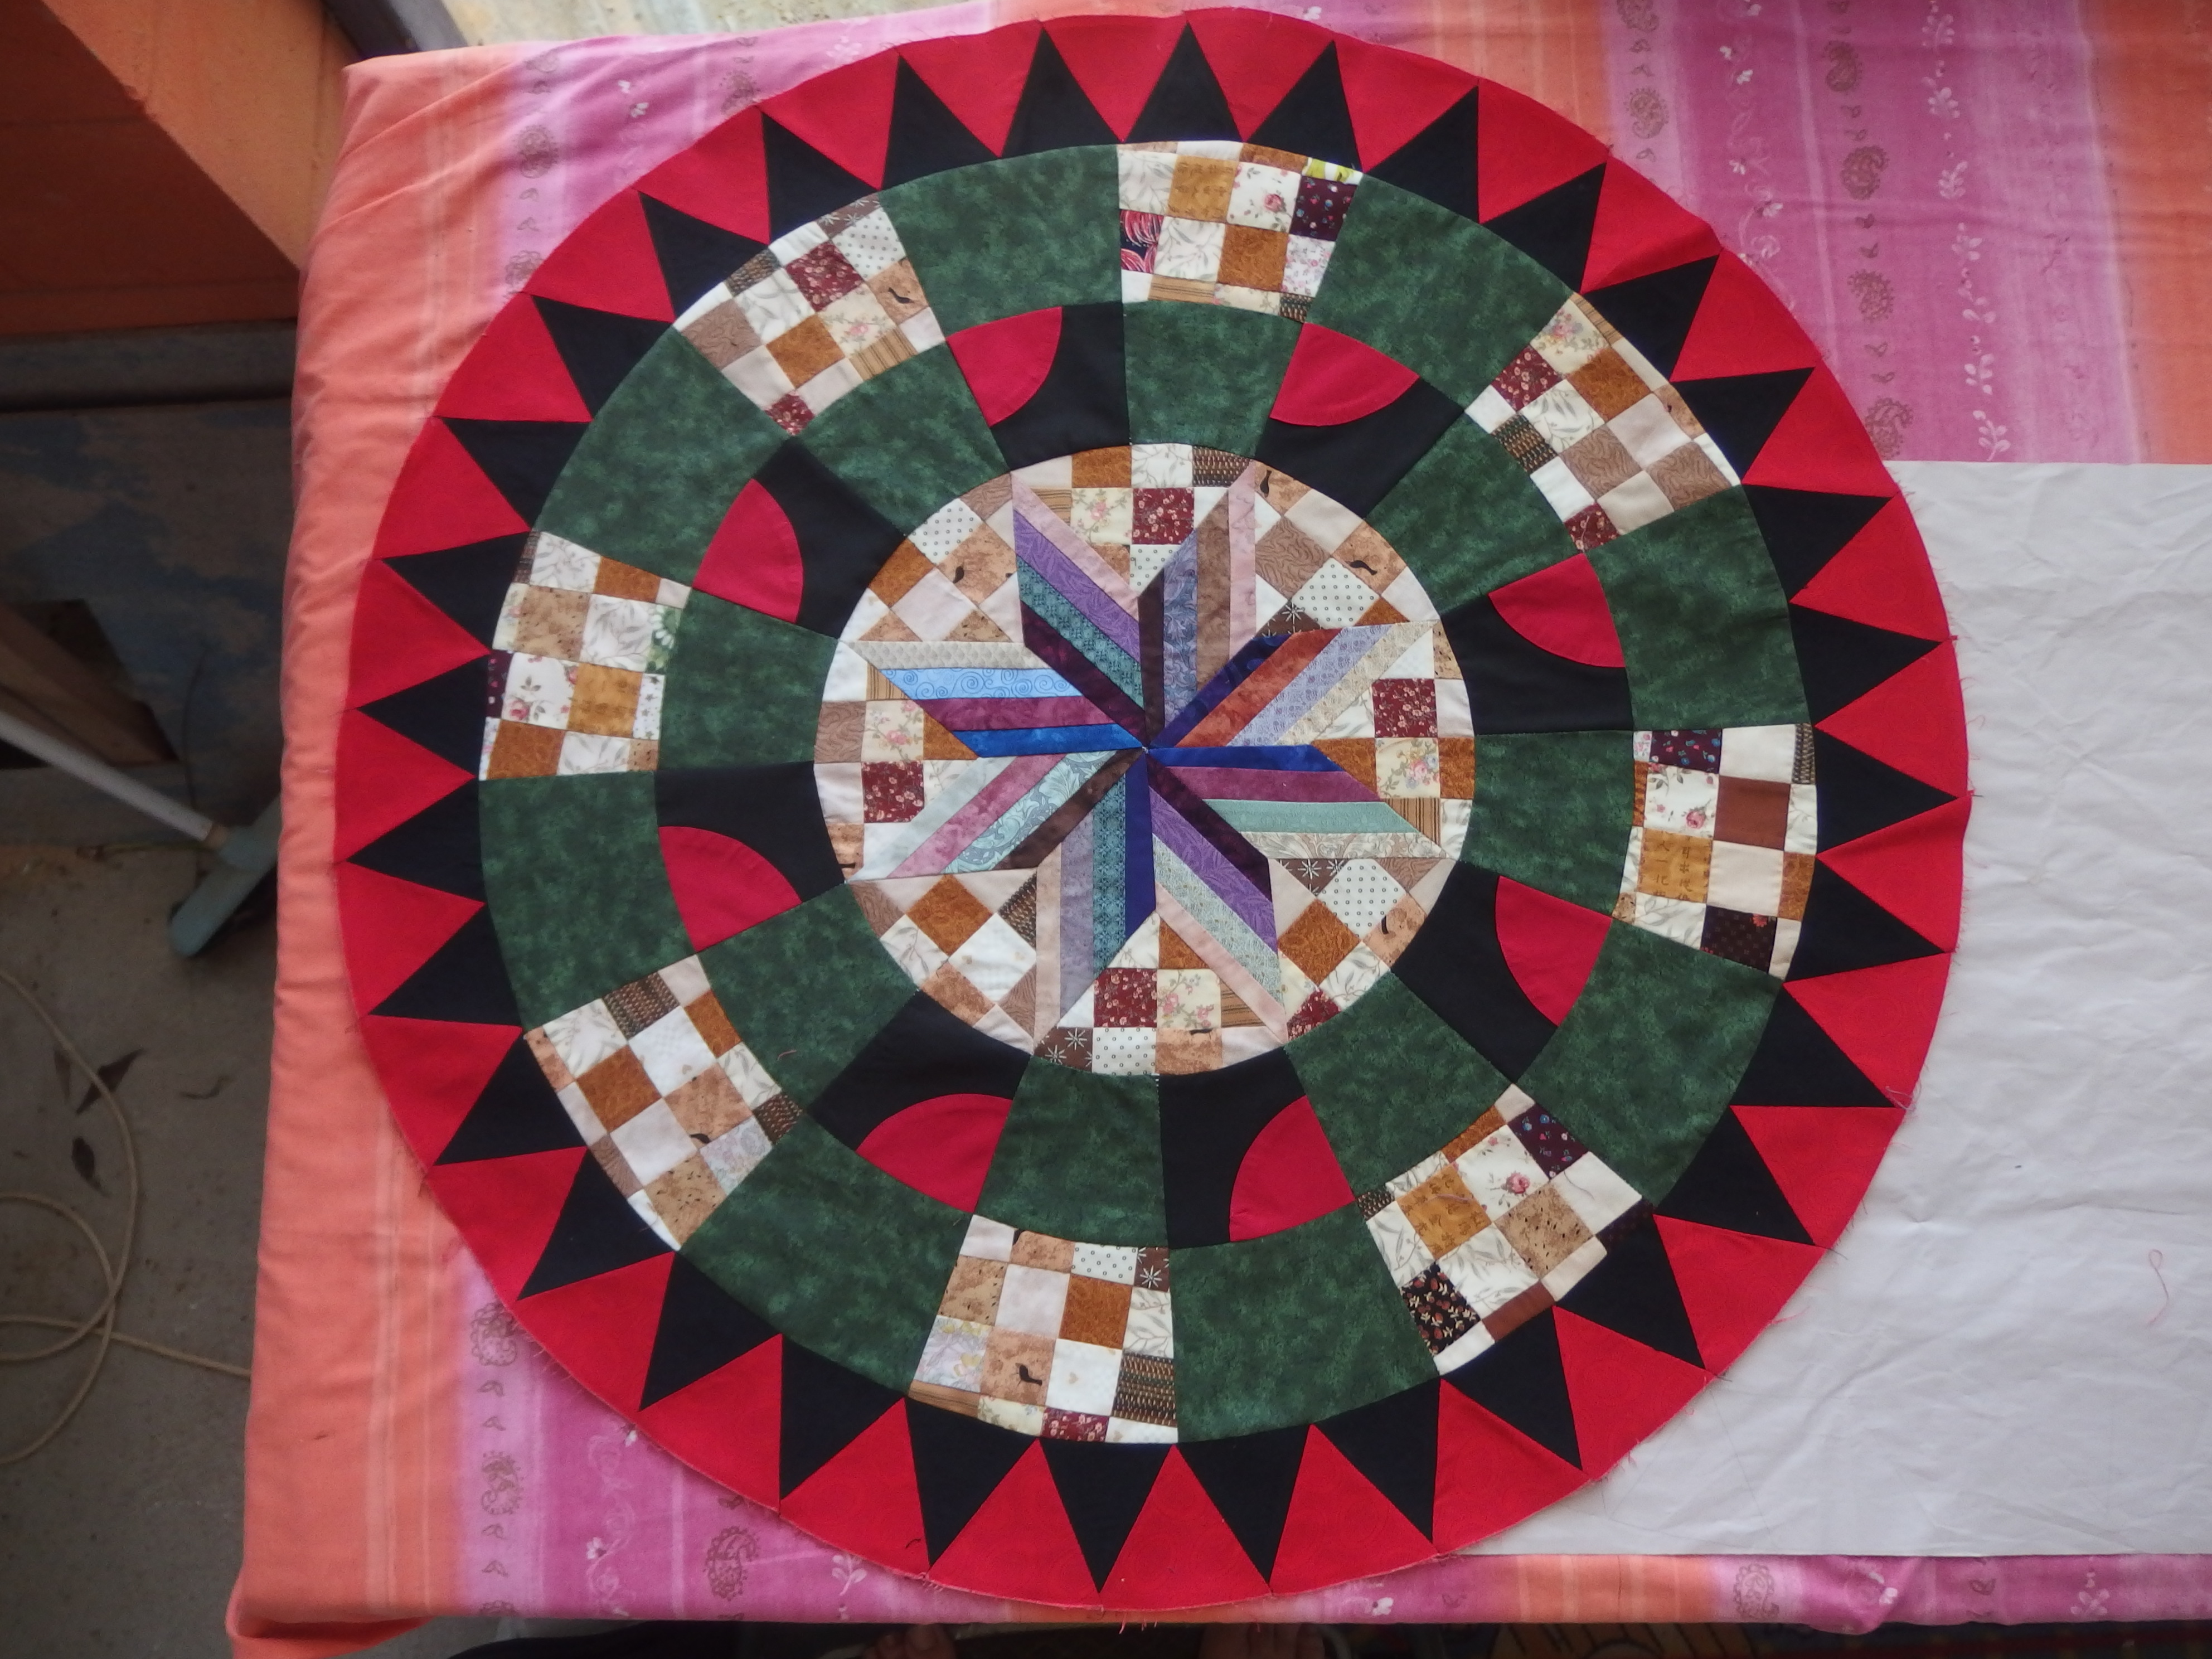
Finally those triangles I had been procrastinating over are on LOL Little Hazel keeps growing!!!!
Now to make my corners to complete my centre of Little Hazel.
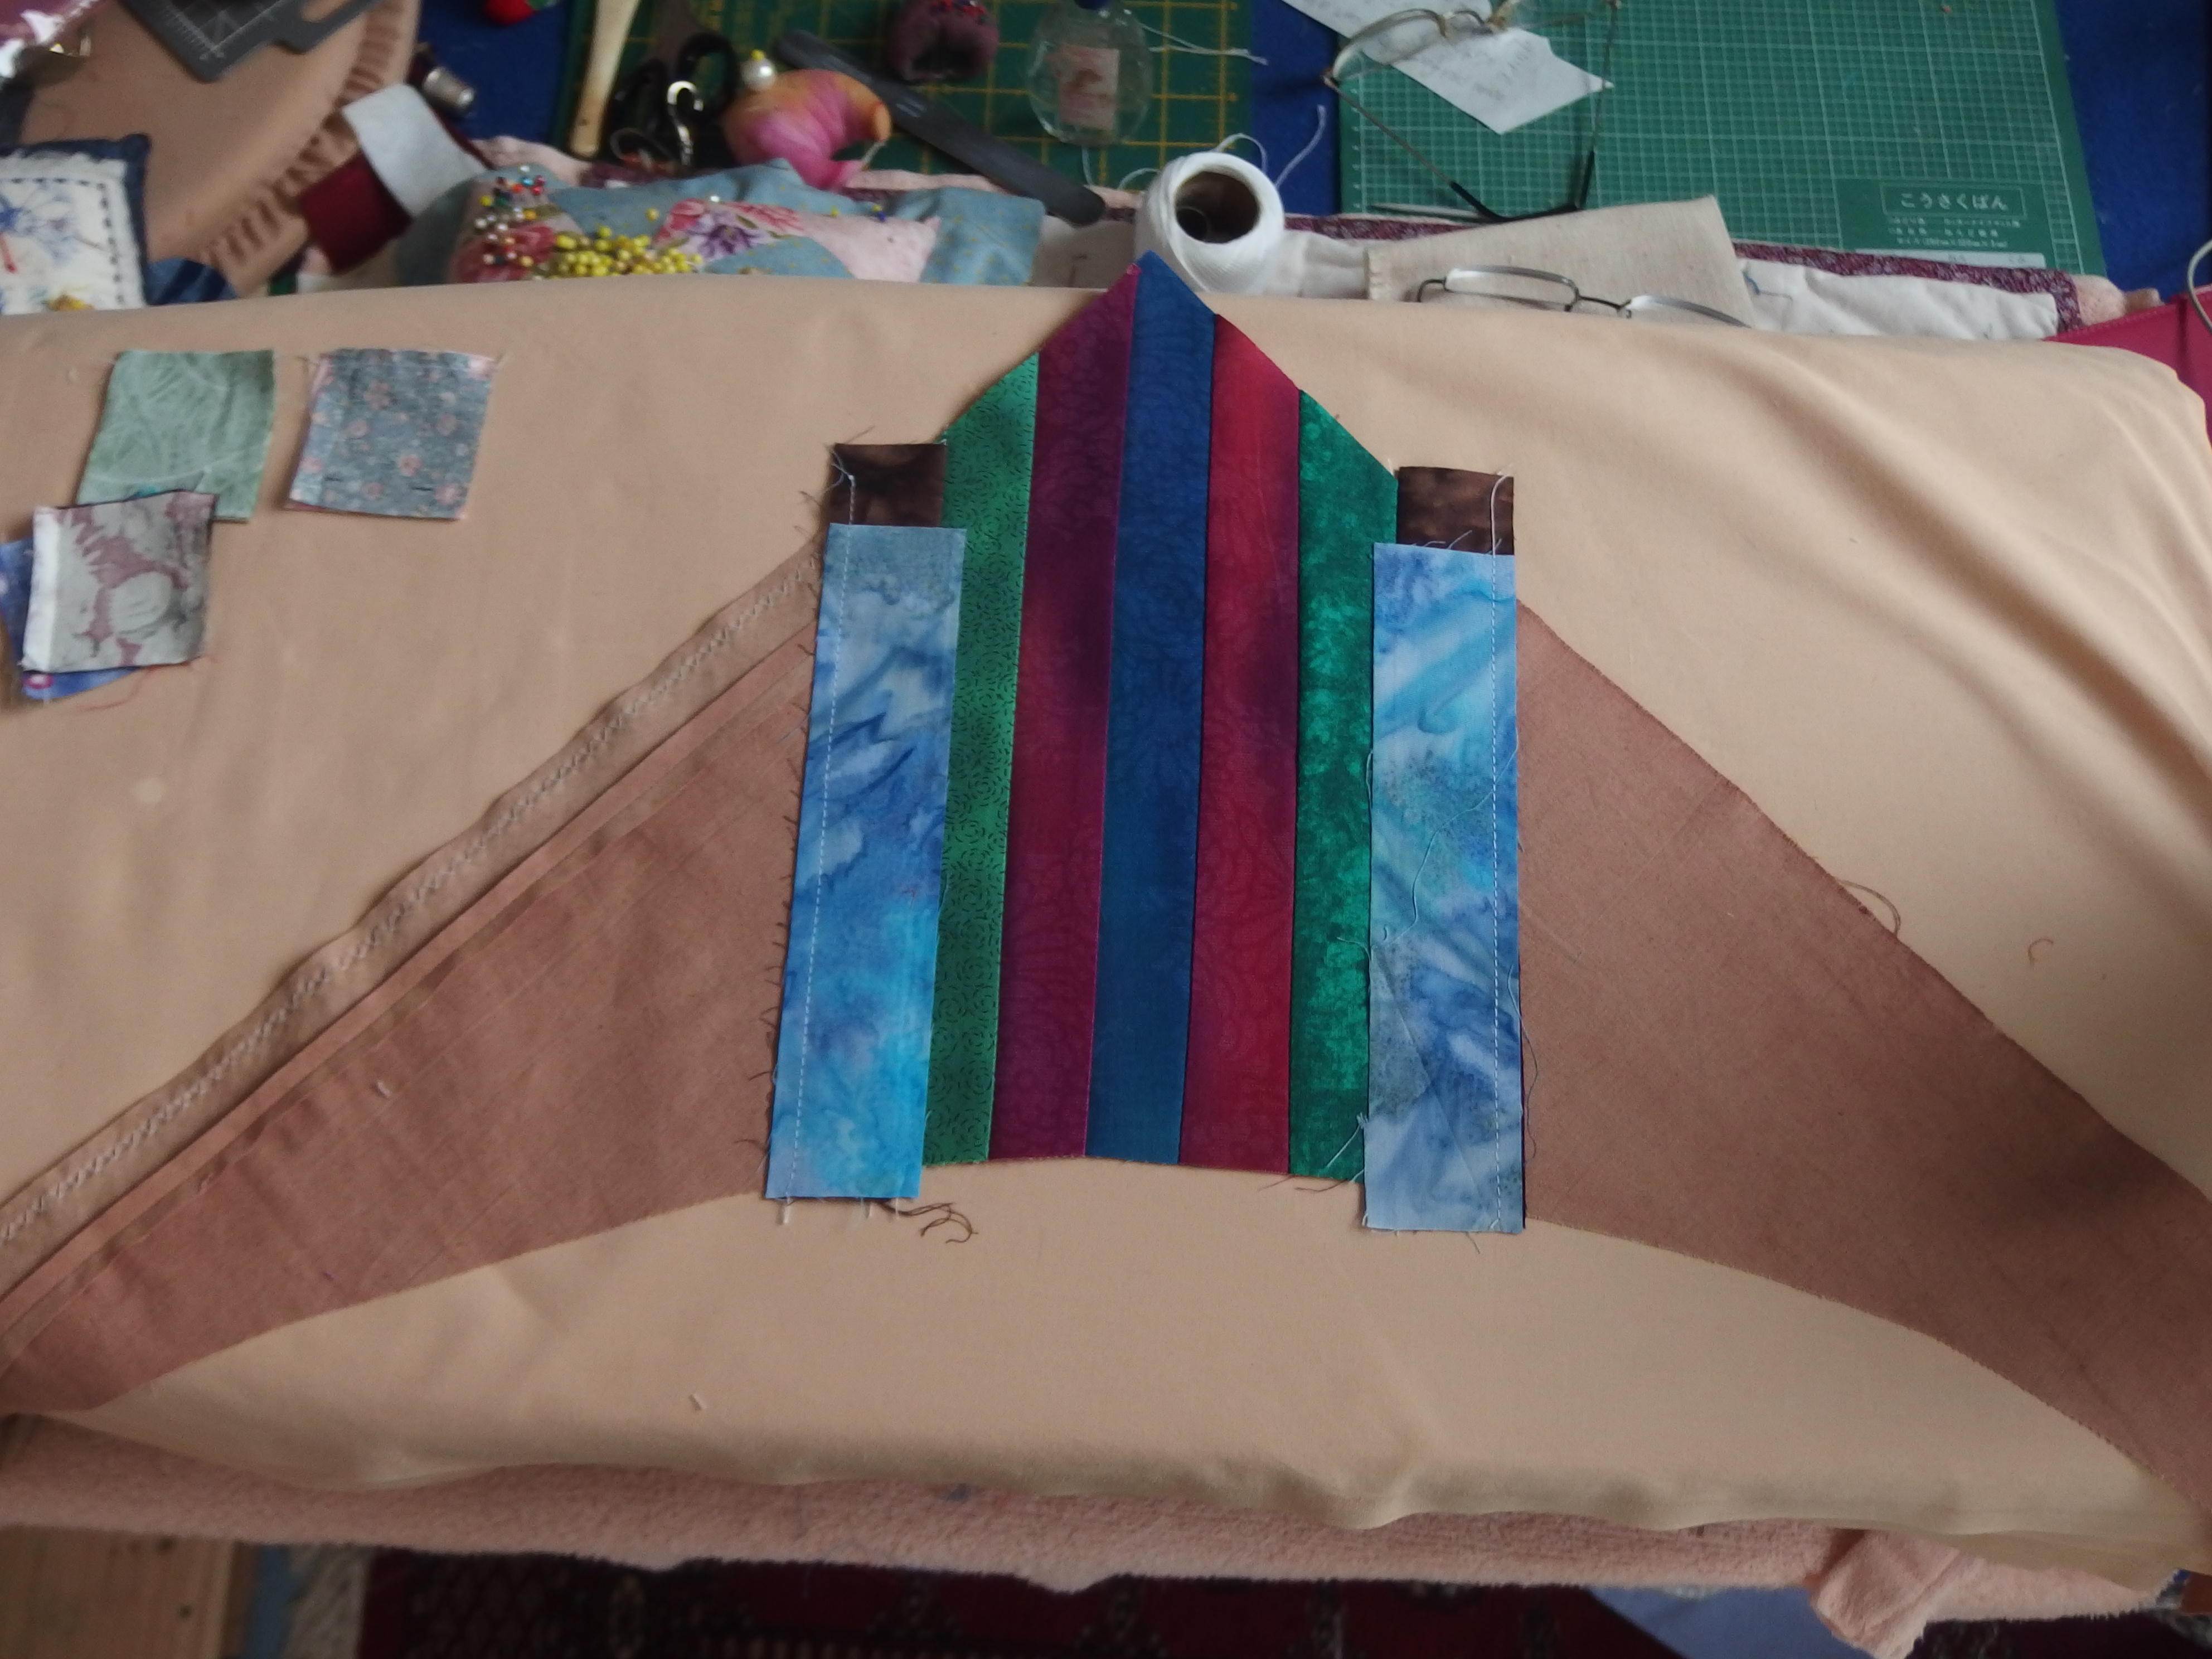
My centre is very heavy due to all the extra seams I have because of using up old blocks for my circle shapes. So I needed to make my corners heavy also to cope with the weight in the centre. I cut out 4 corners from a good weight fabric then started sewing 1 1/2 inch strips
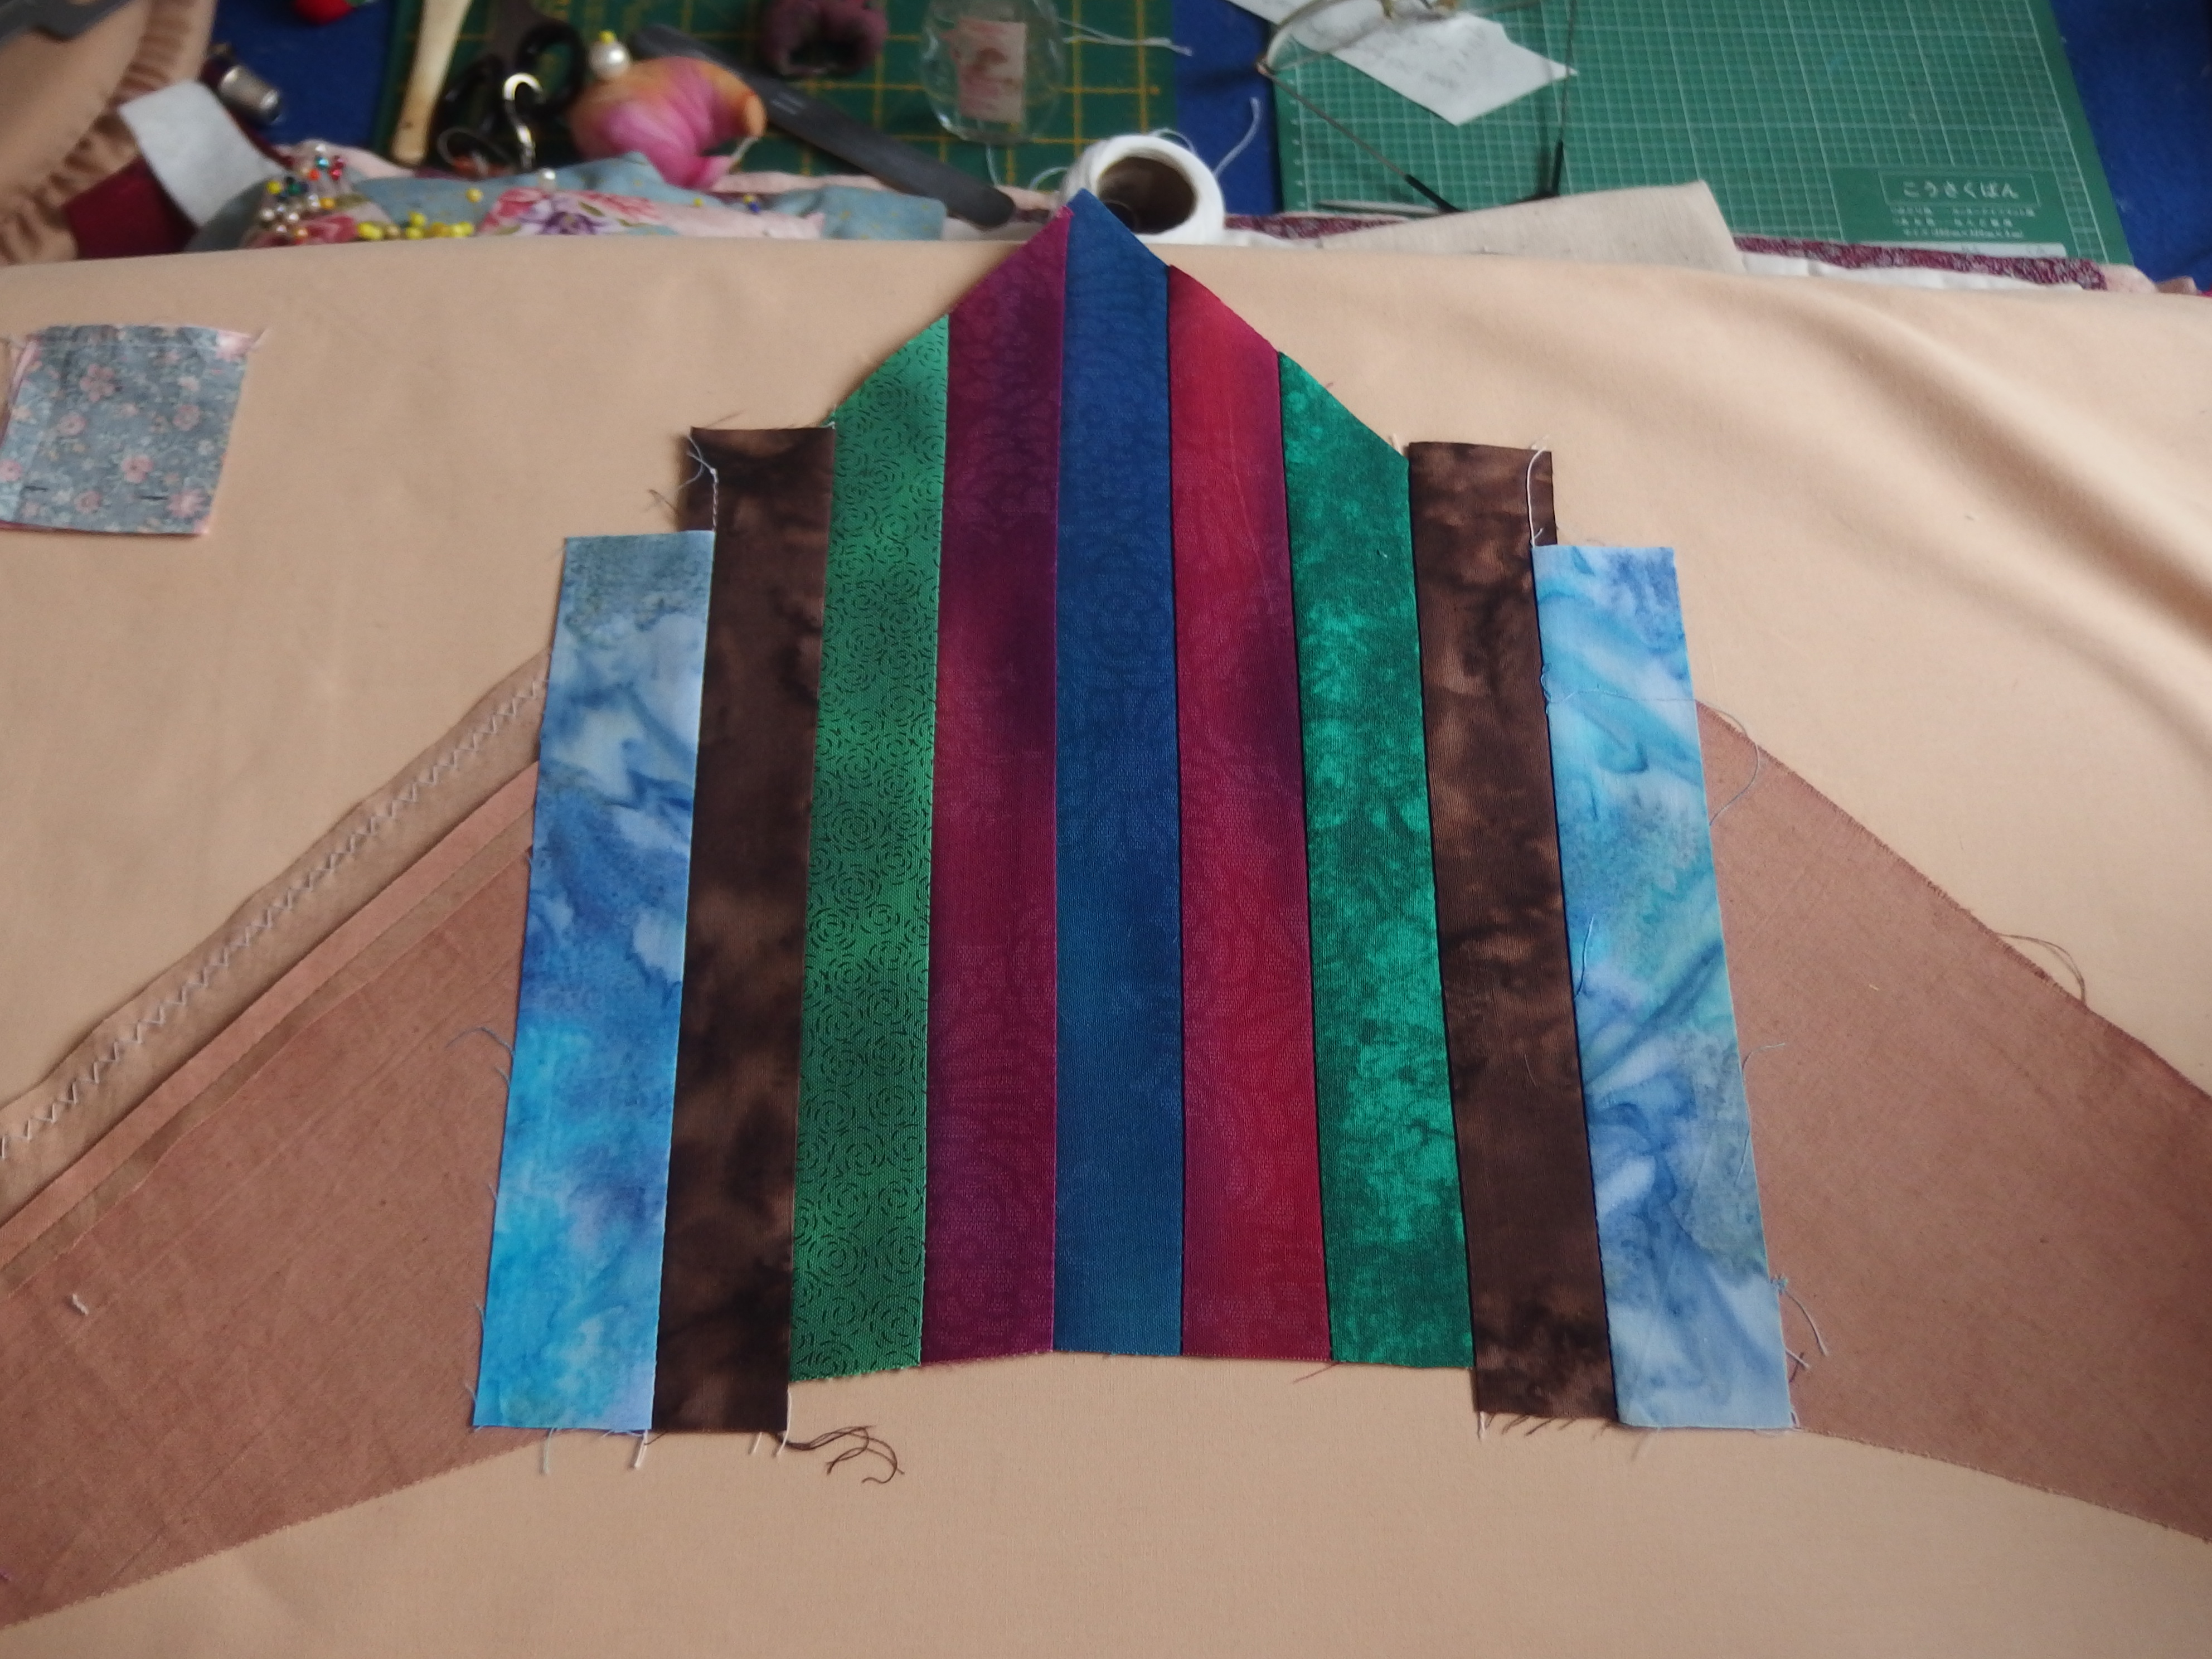
Adding two strips at a time using the same fabrics I used in my centre star plus others from the same range.
Adding the first corners and Im happy with them, I added some yellow strips as it looked a little dark to me
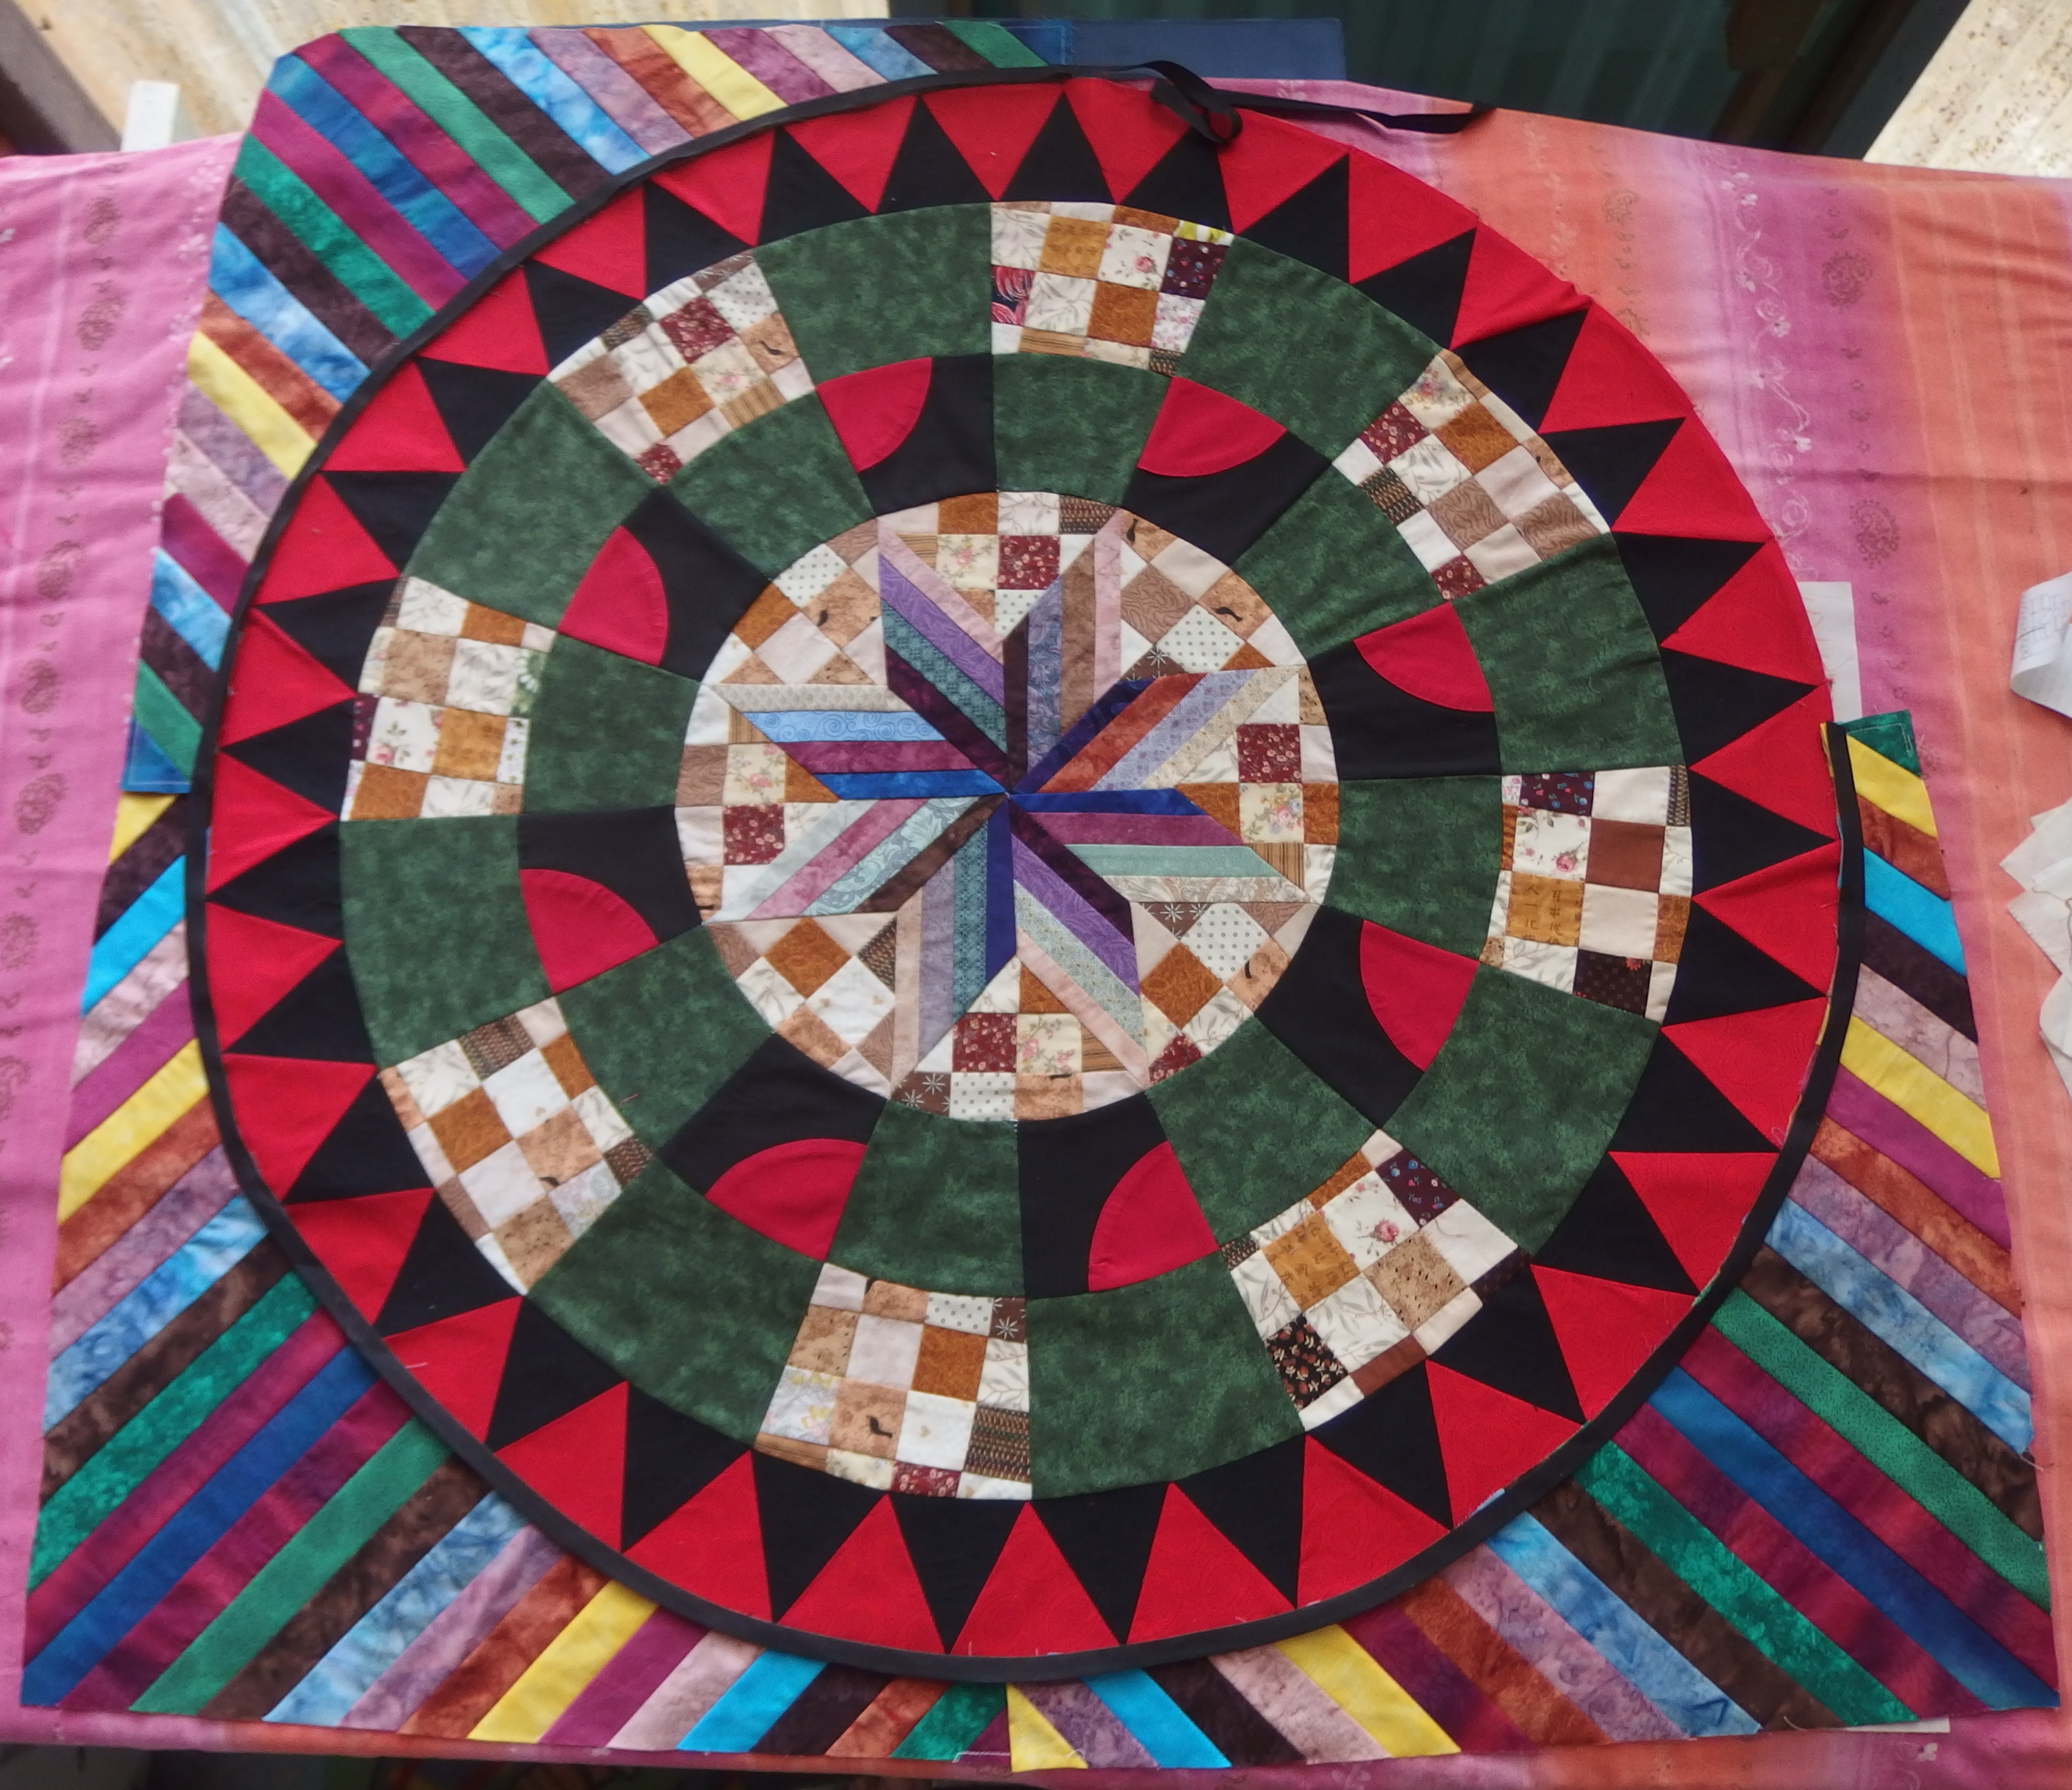
So close to been finished adrenaline is pumping at this stage to get the 4th corner made. I felt the outer circle look a little lost on the outer edge so added some black bias strip here and I feel more happy with it.
Finally it is all most completed I need to hand sew the corners on and then appliqué the black bias strip on. what a wonderful journey it has been. Thank You Esther
Finally 4th corner is added and I have placed a black bias strip around the last outer circle I just enough to complete the circle so so lucky.
Those red triangles do go nicely there. Too bad about the yellow ones. They were very striking but I agree, they were fighting the center. The red just pulls it all together.
Well done!
continuing the red really goes well with the center I think – it is laying very flat and looks so good. Here I continue to work on too many projects and know that I need to get busy and have a finish of one of large quilts so that I will have a quilt top waiting for the quilting frame as I always like to have one ready when a quilt comes off of the frame – thank goodness it will still be at least two months or more before the current quilt comes off of the frame.
Wow, this is looking good! I find it is better to go slowly and not have to tear the block apart and resew. Blessings, Gretchen
Well I’d rather pin and pin and check each step because I hate unpicking my work Gretchen LOL. I have just finished making the corner blocks, so I’m all most finished my centre and happy with it, the person who will receive it likes it too. Hugs Glenda
So true, Glenda. Esther has already created a lasting legacy with the patterns. Each quilt is a family heirloom, which cements her place in history. Healing hearts is just another section of this amazing gift. I love your stripes. Currently I am sewing blocks for my quilt-a-longs, so I can free up time to work on LE.
Very clever how you used old blocks to create Little Hazel. Esther created the canvas, aka the pattern, you used your imagination to colour the painting!