
Papua New Guinea friend ship quilt we made these blocks nearly 20 years ago and Im just getting around to quilting it. Im glad Im doing the quilting by hand as I have found as I stitch around the block Im remembering so many things Id forgotten about living up there over 16 years ago now. I was short on 3 blocks to make it this size so I made them.
Sadly not much to show, I have been doing sashiko quilting on my Friendship quilt most of the last two weeks, I did start machine quilting and disliked it so much I have been unpicking it and doing sashiko quilting on it and Im much happier with it.
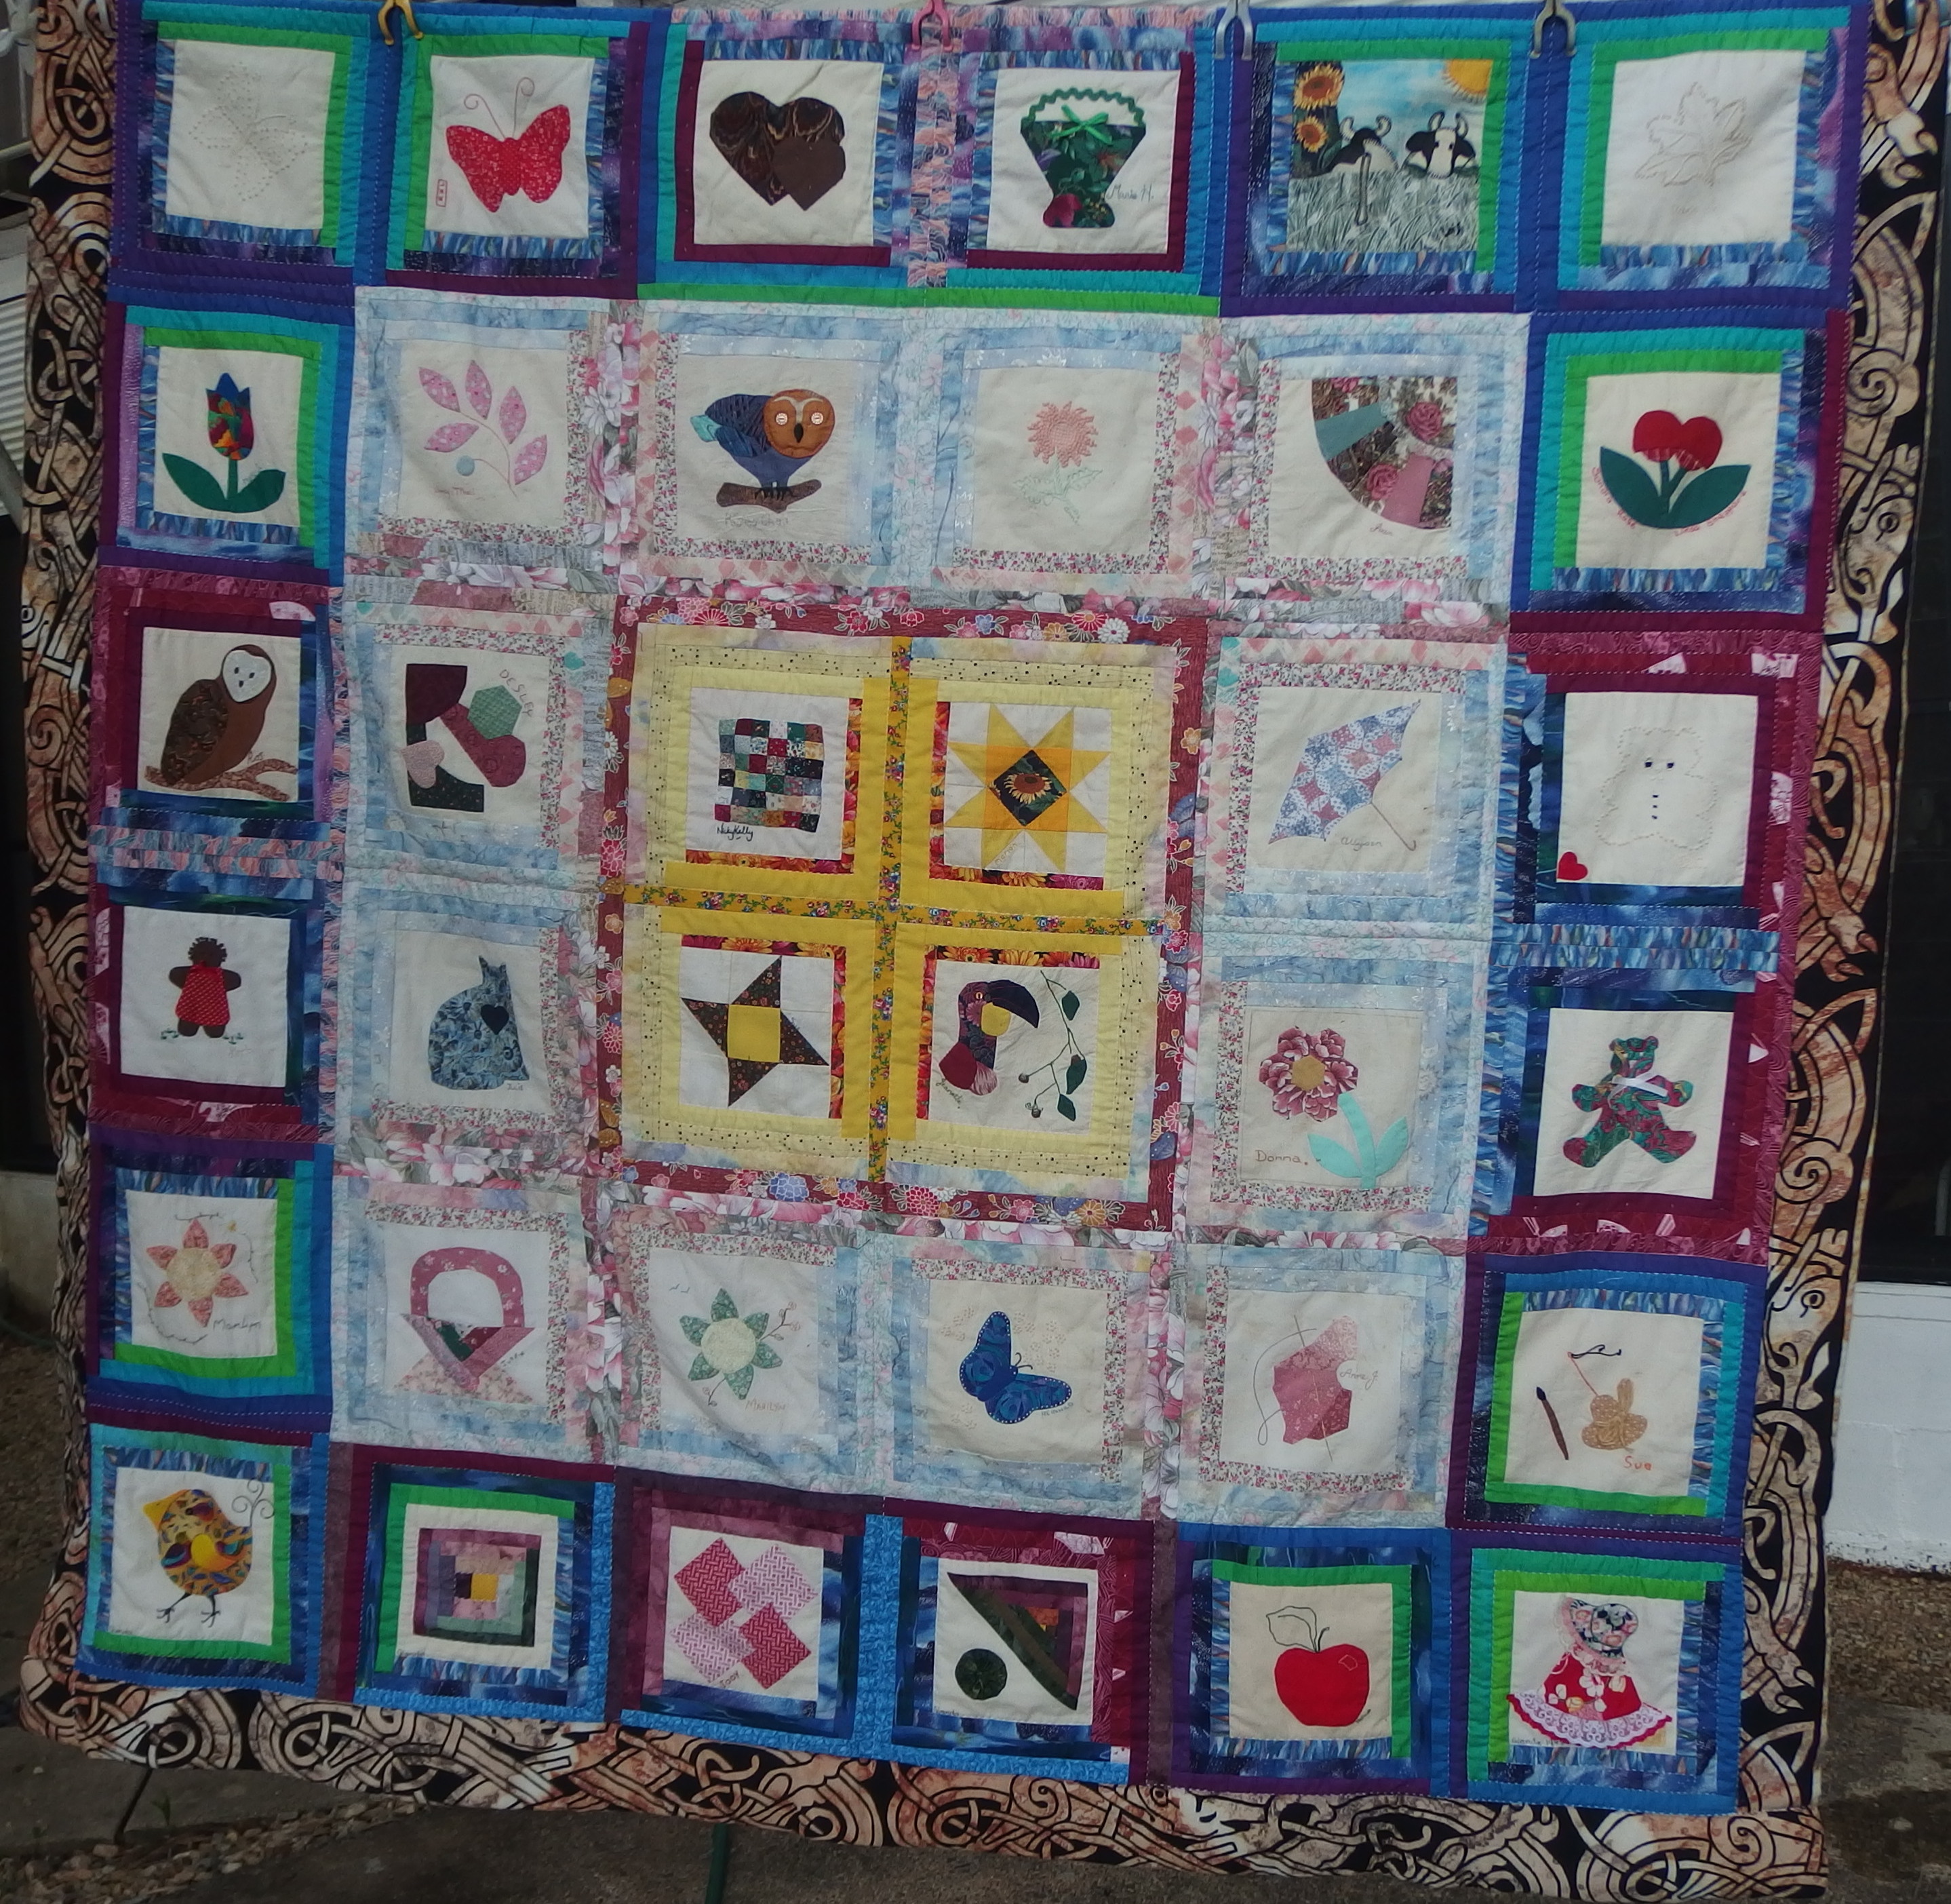
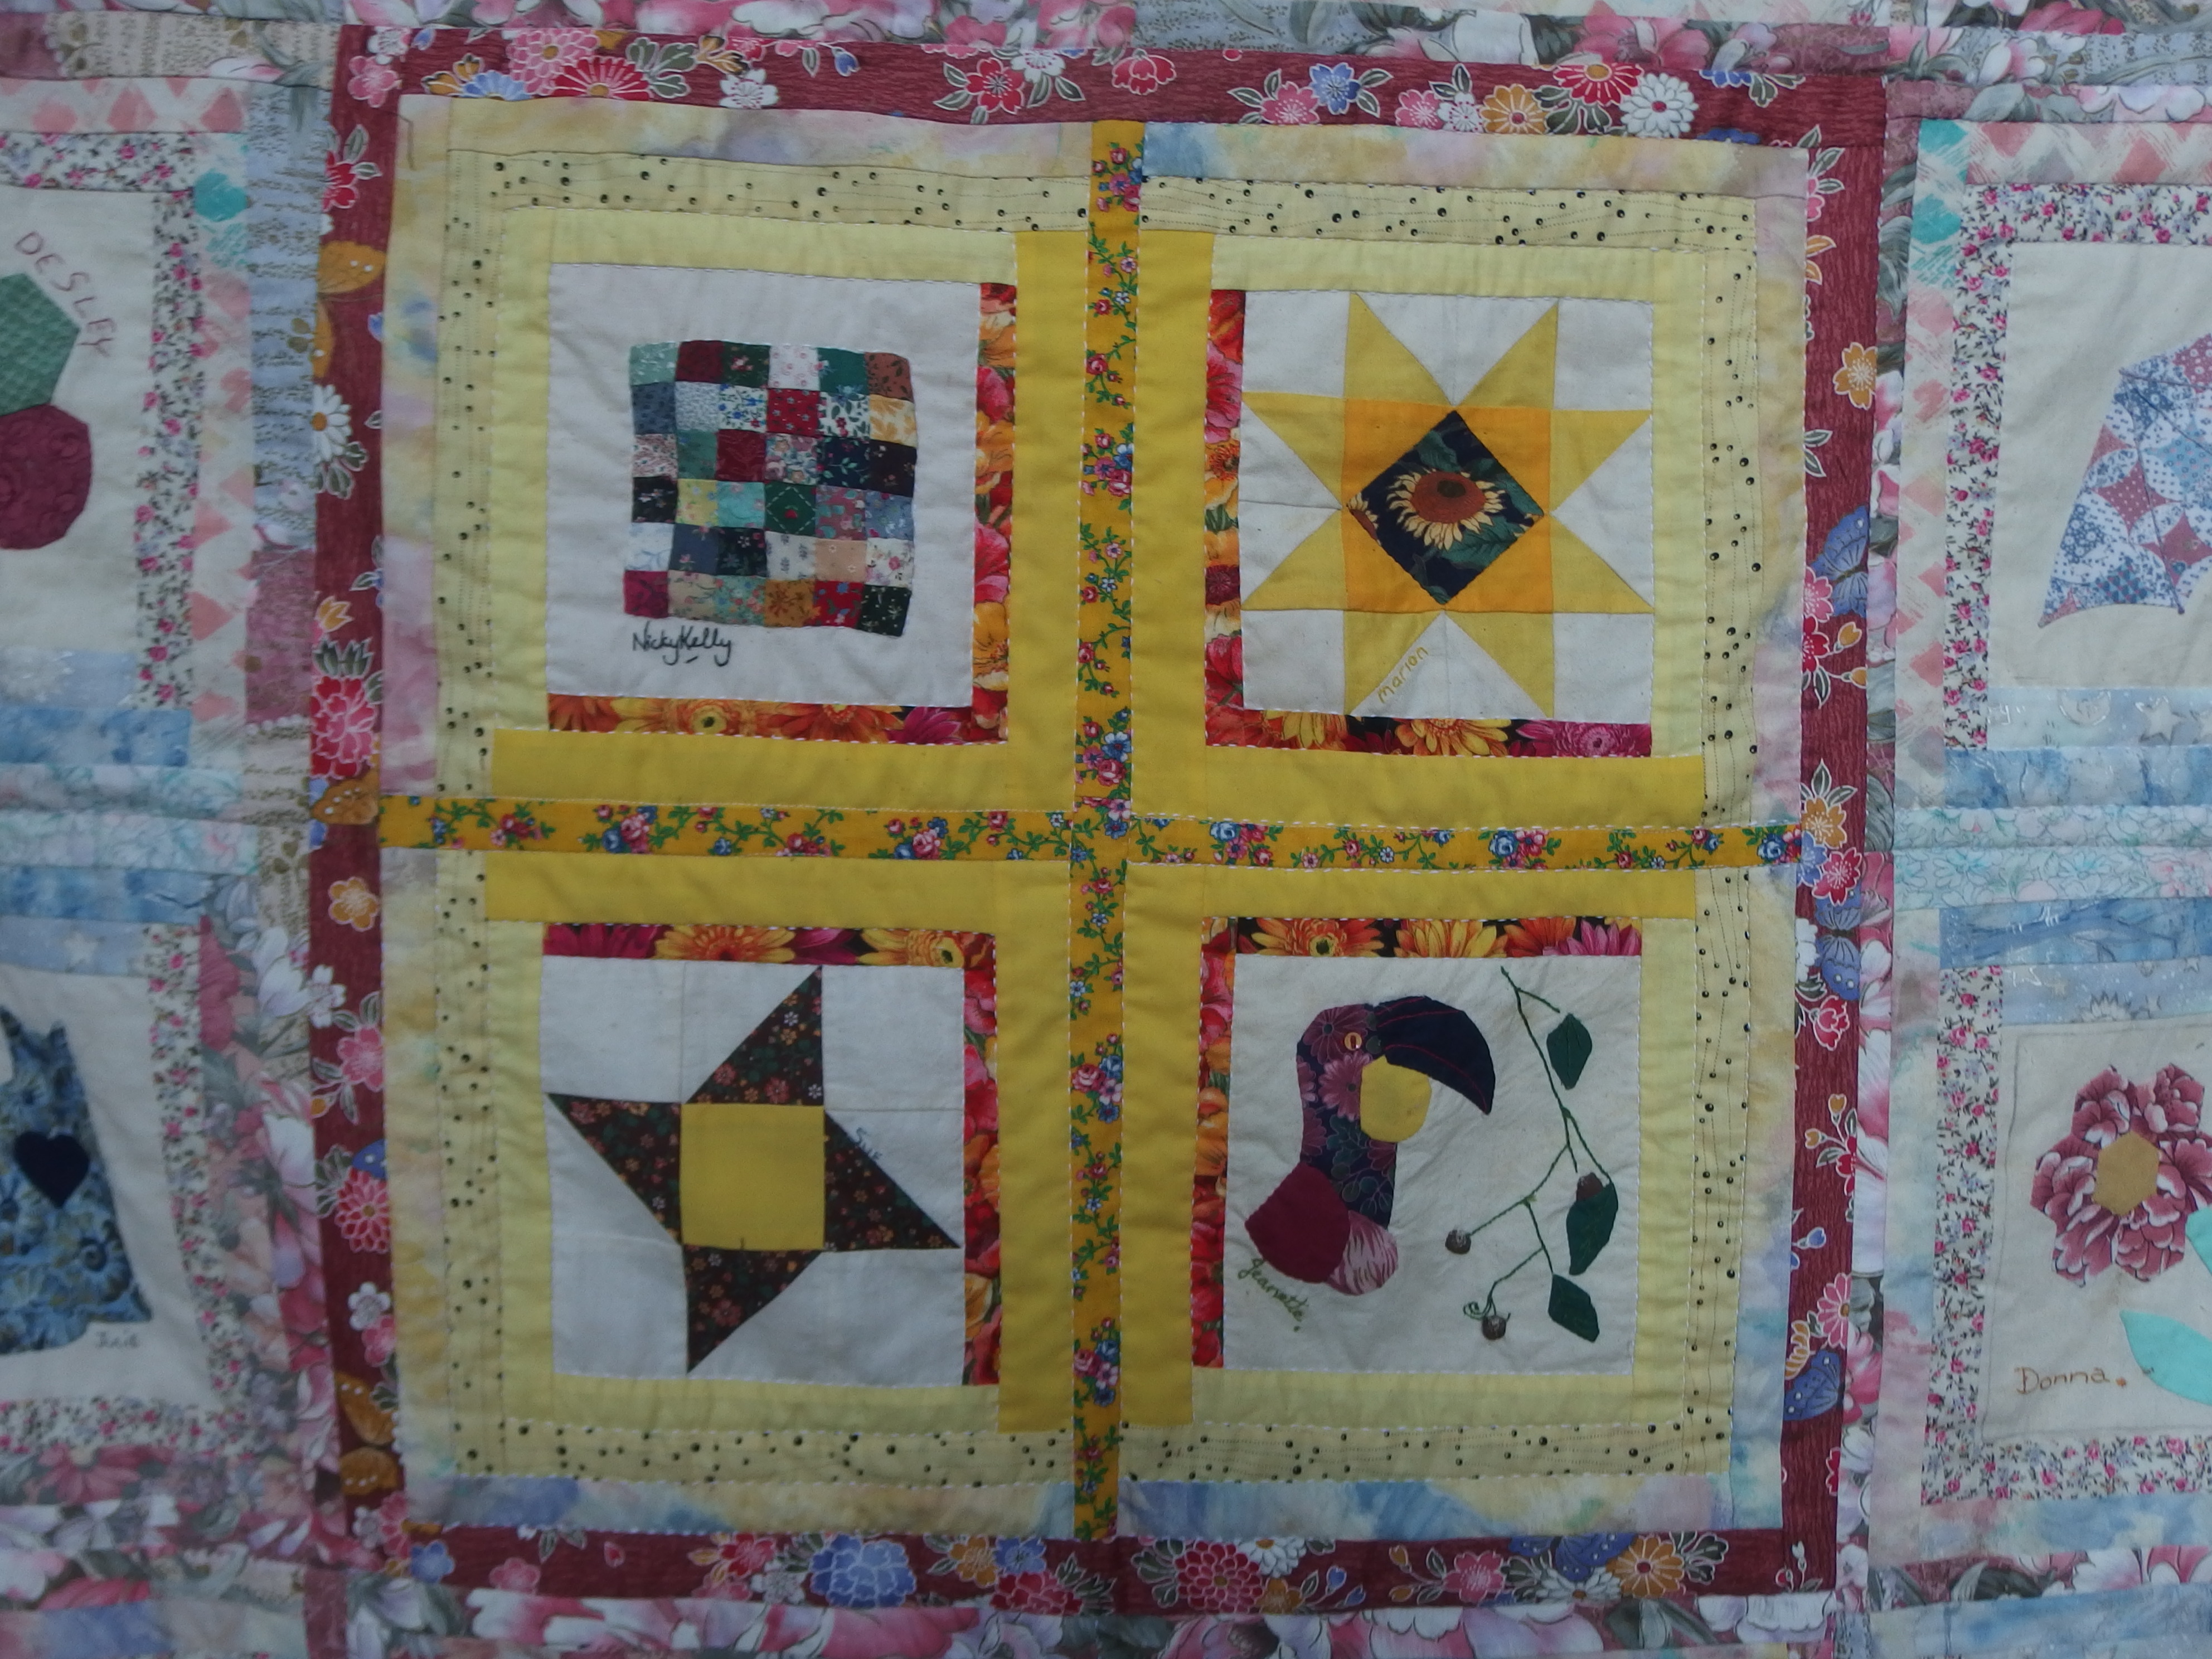
Friendship quilt hanging out for some fresh air, Im about 1/2 way with the quilting.
Centre almost finished quilting. I used tags to sandwich this quilt and it stood up to the pulling out and putting away over several years but I did notice a few wee pull tension holes in the fabric. I still like basting my quilts with thread there is NO tension on them with thread.
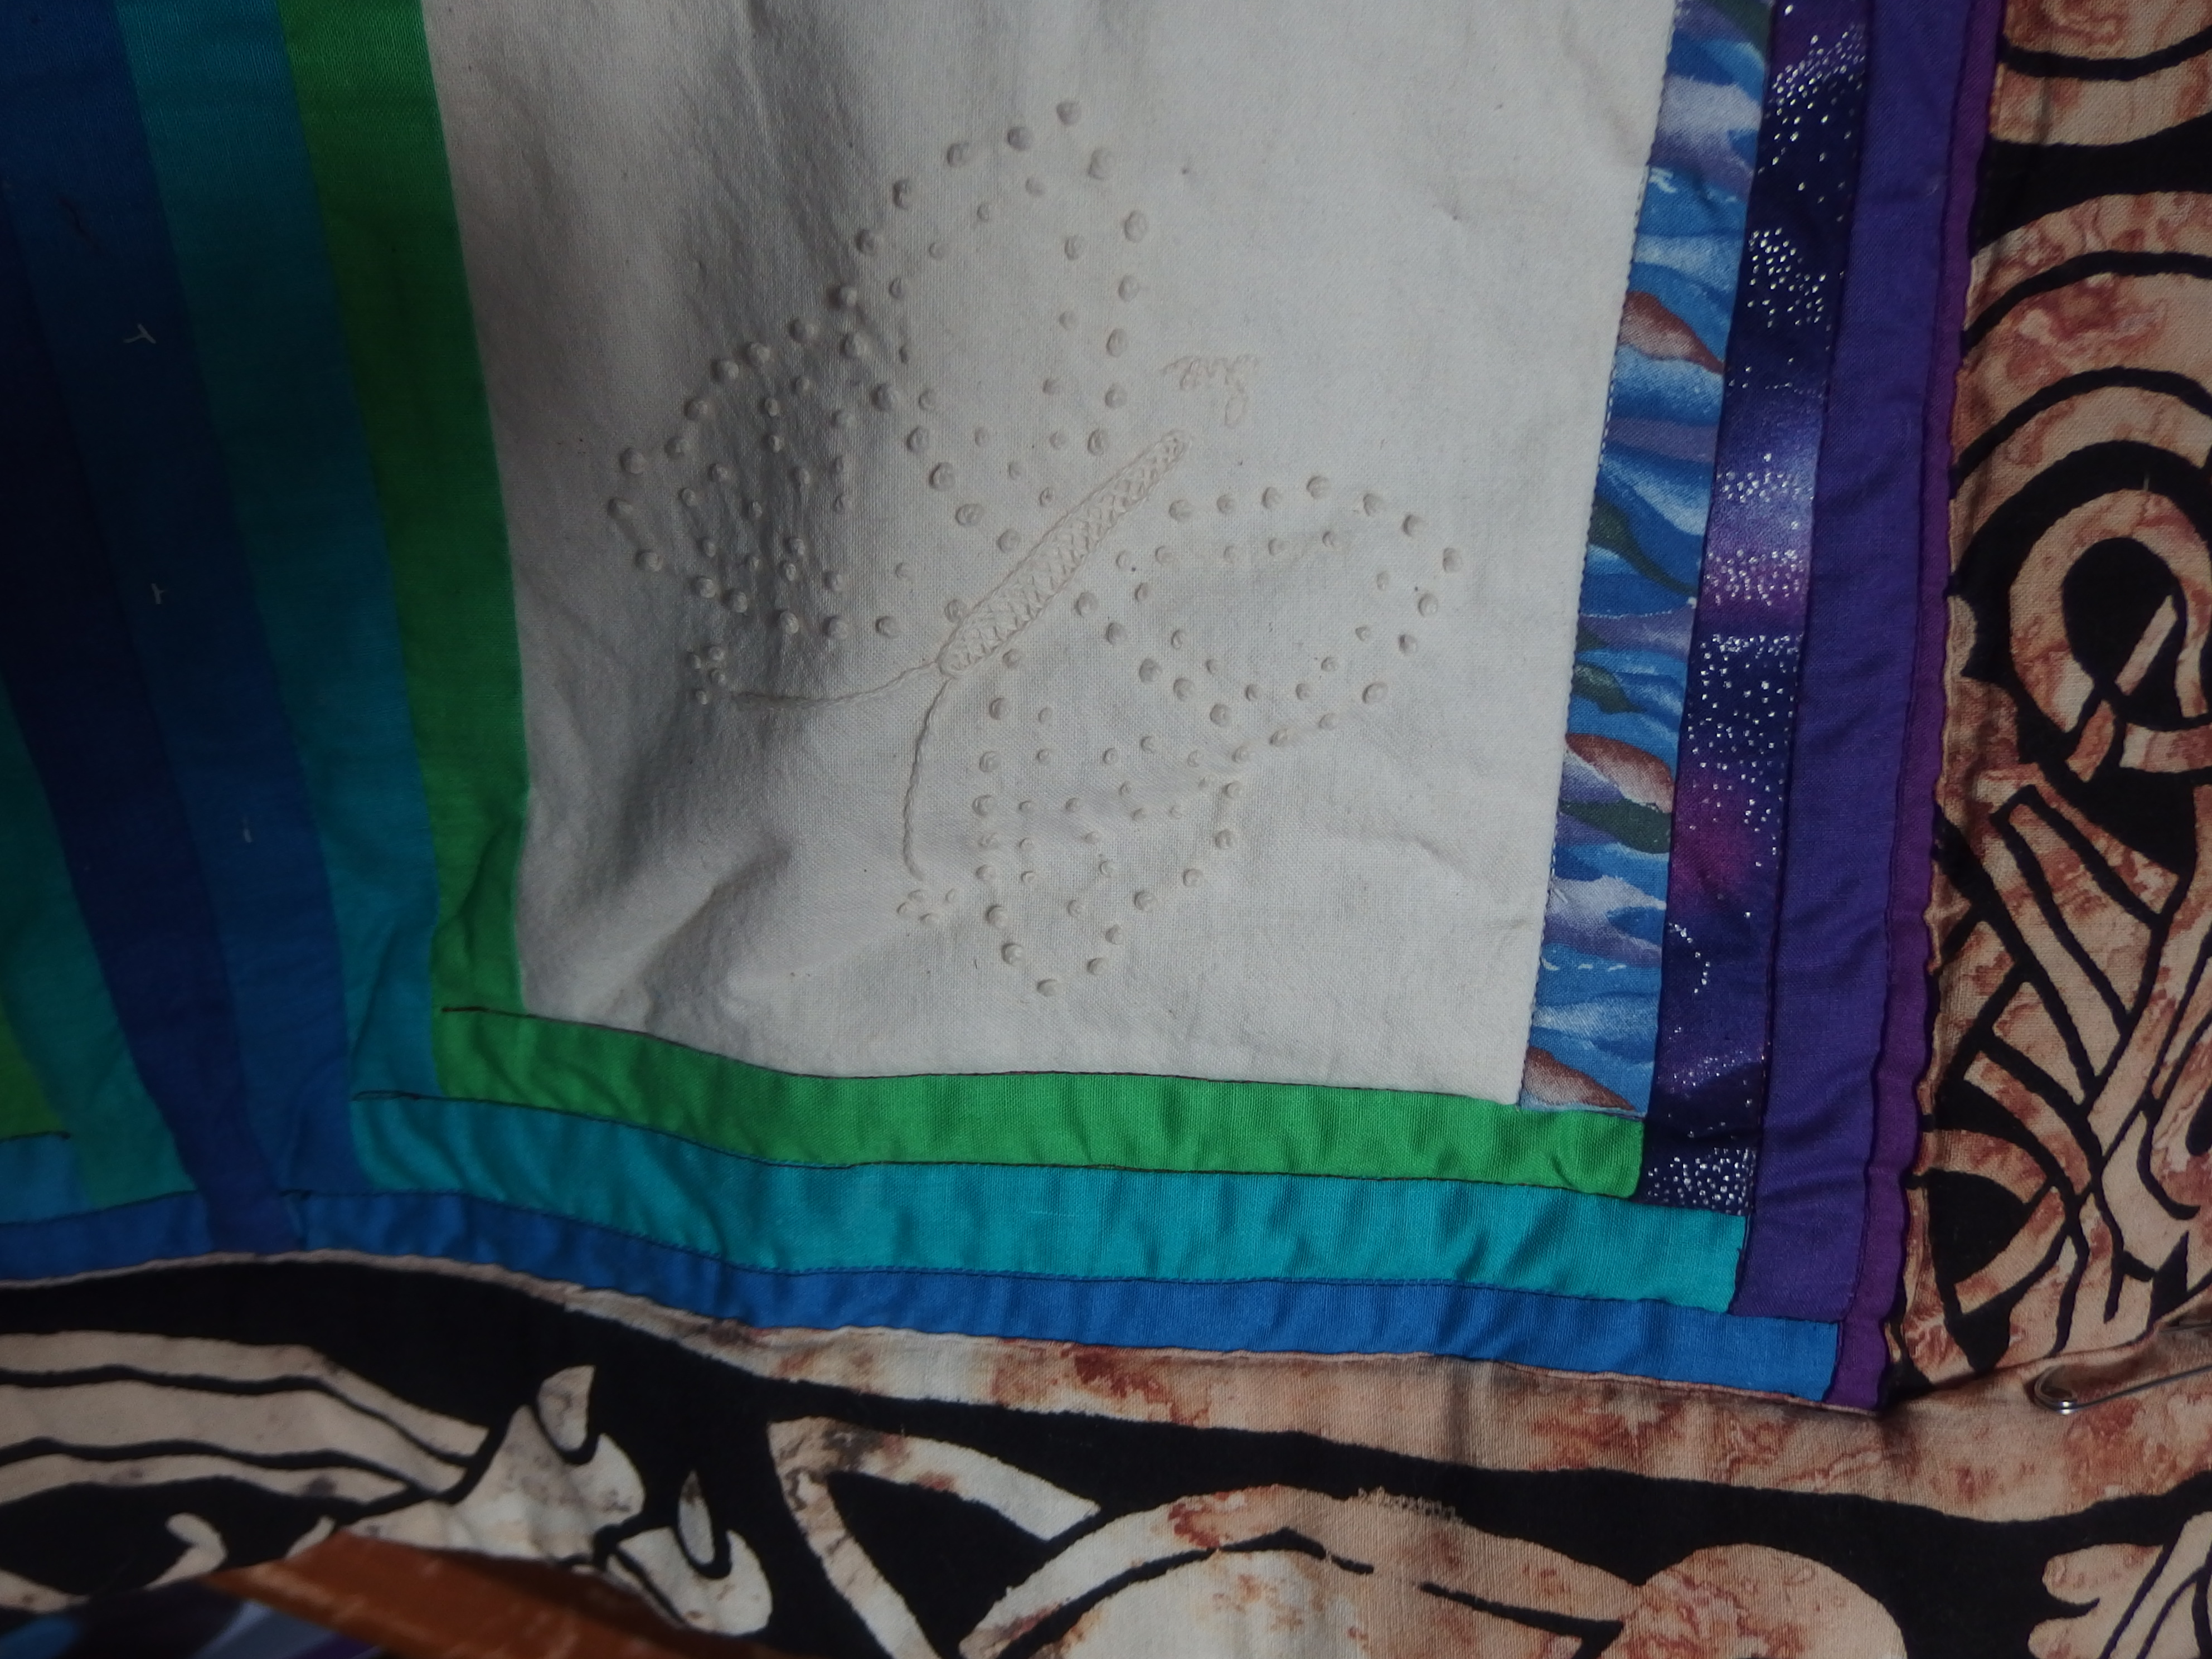
A corner I had machine quilted, it was so flat not puffy and soft like I like my quilts.
In this corner I have unpicked the machine quilting and worked sashiko hand quilting and now it is light puffy and very soft. Funny thing is I have been using a sashiko thimble which was given to me by a Japanese friend when she saw I was doing sashiko quilting, I worked out how to use it when she told me it was used on the middle finger resting on the bottom of the finger????? well I praticed and praticed and finally was able to pick up 3 stitches at a time. Last night I decided to see if there were any videos on using it, there was and the first thing I noticed I had my thimble upside down LOL So I turned it around watched how she held the needle nothing like what I was doing and by the time I went to bed last night I was picking up 10 stitches at a time no problem WOWWWWWW when you know how it is so easy LOL
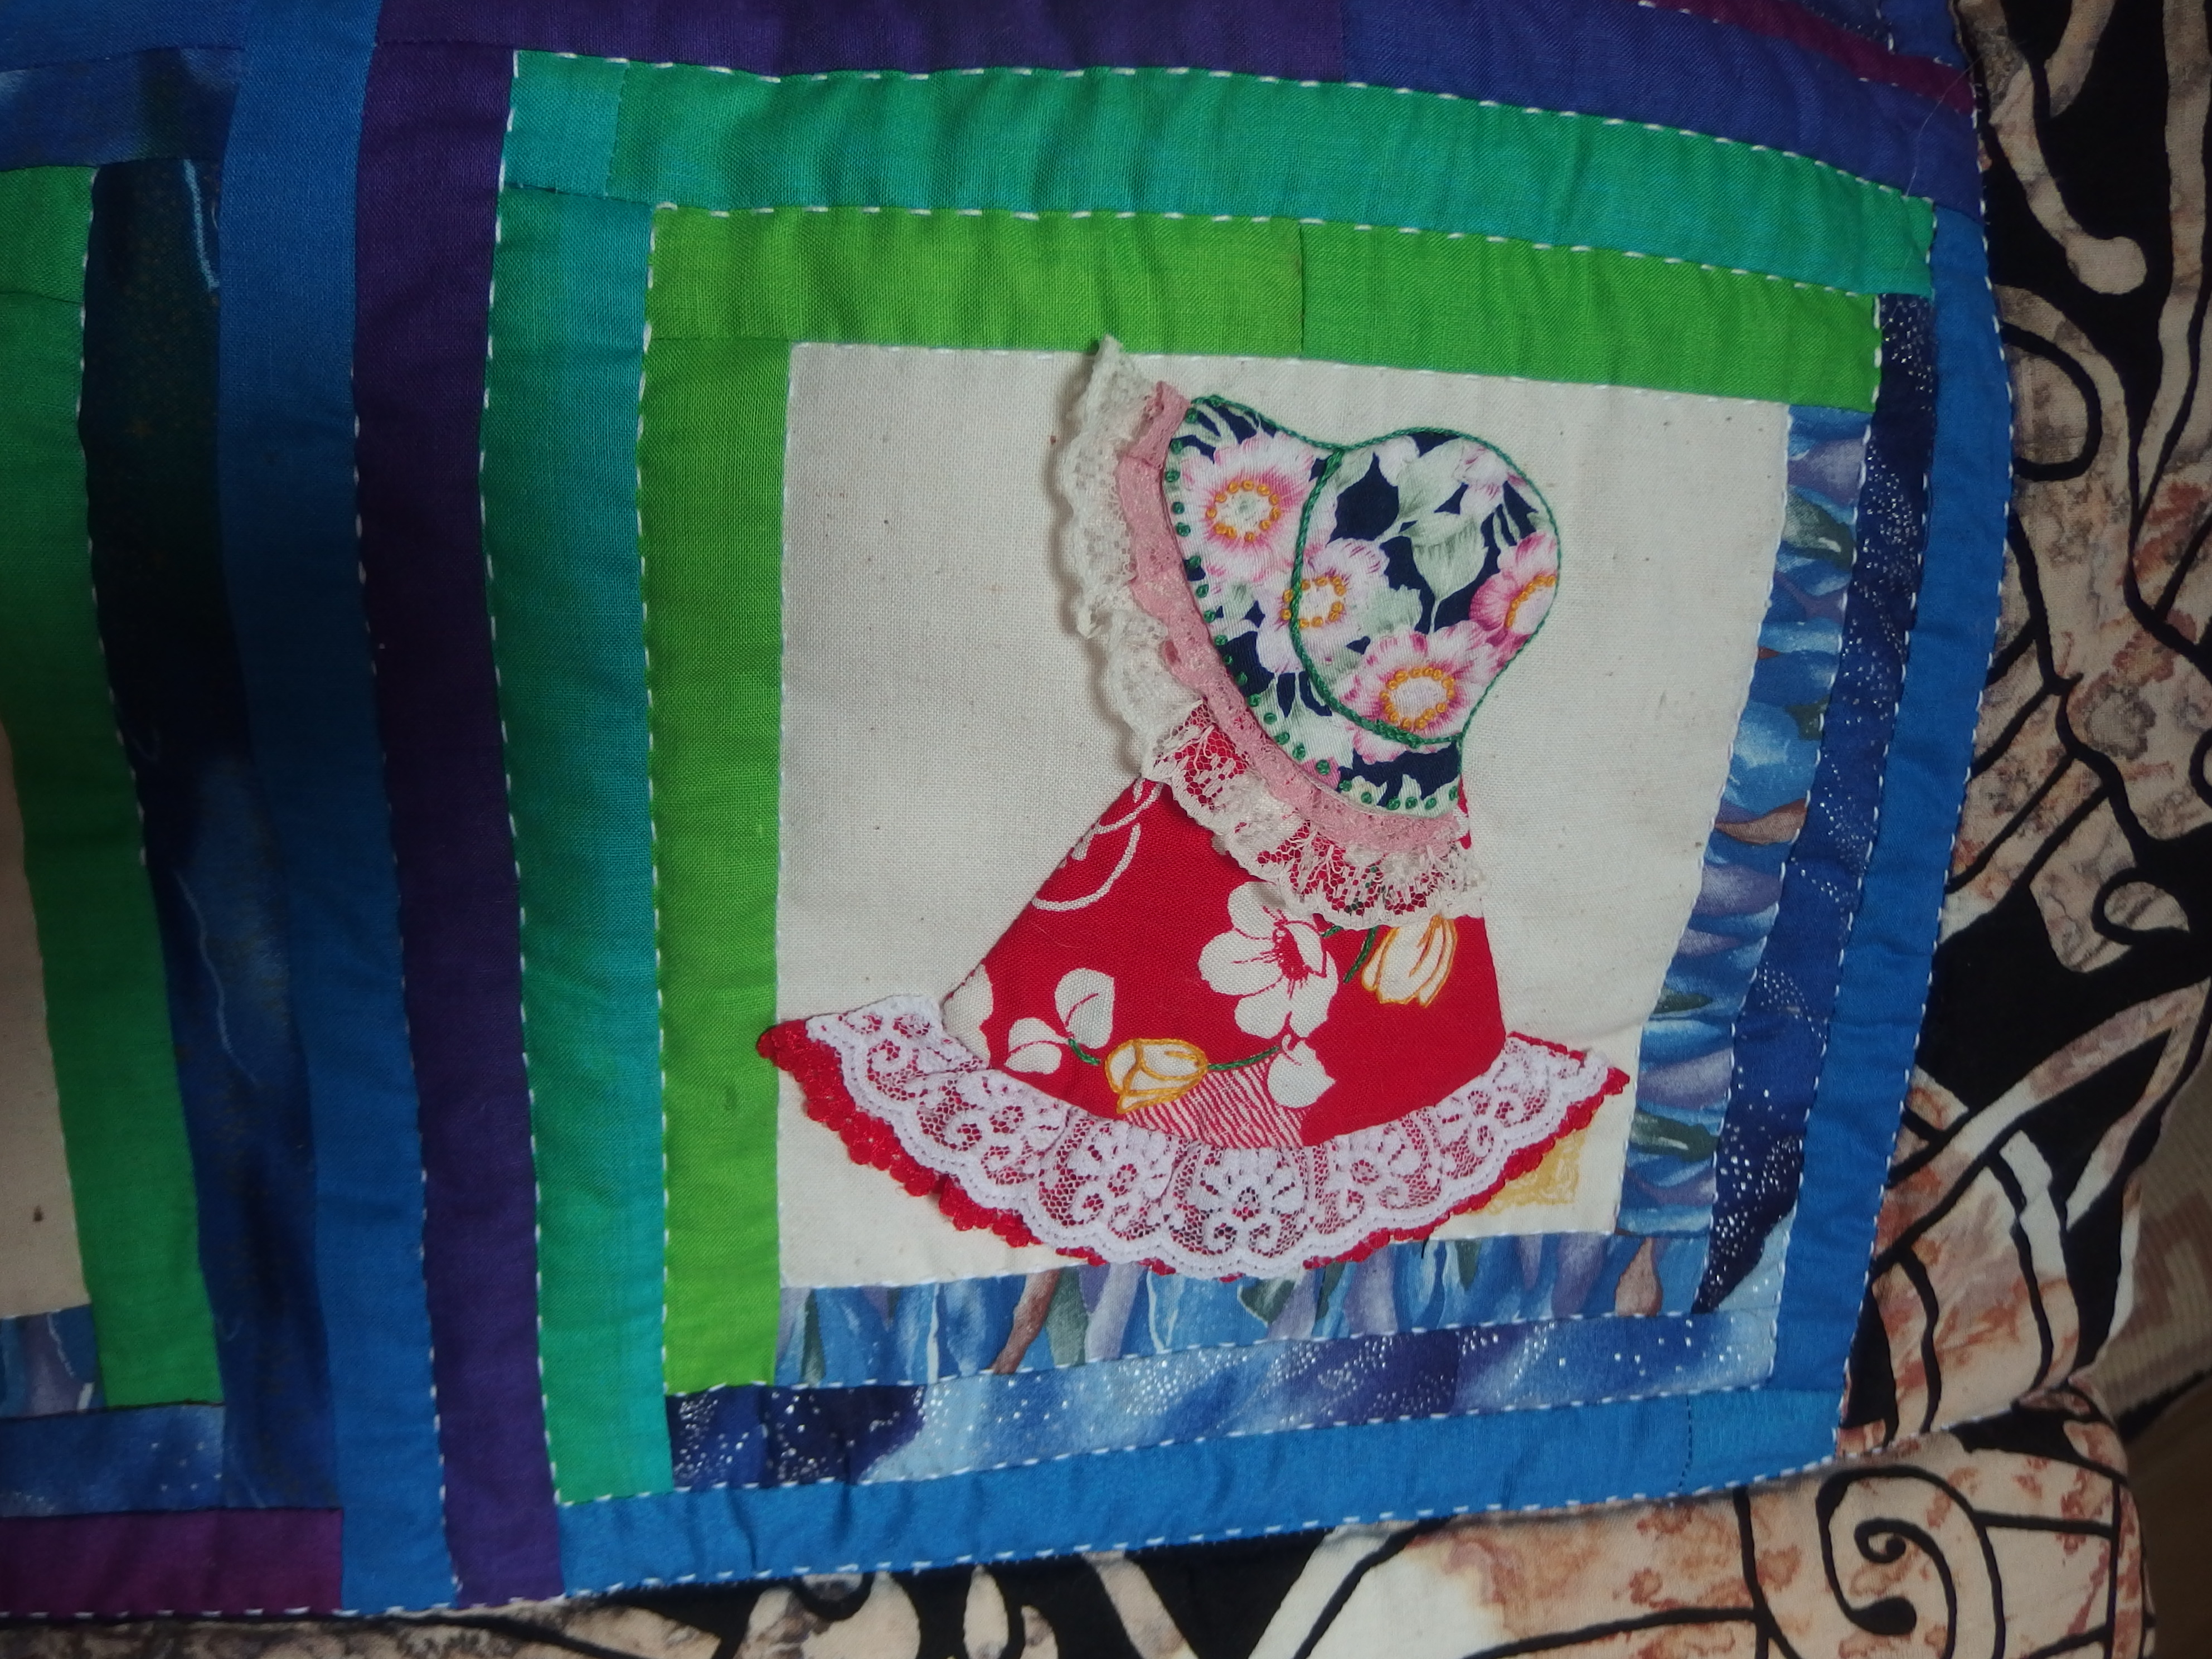
I made 32 Sunbonnet Sues for the friendship swap, each one was dress completely different from the colour of her bonnets to the dresses and shoes. It was such fun. Afterwards I thought about making them all over again and making a Sunbonnet Sue quilt but I did not have any grand-girls then LOL SO I never did.
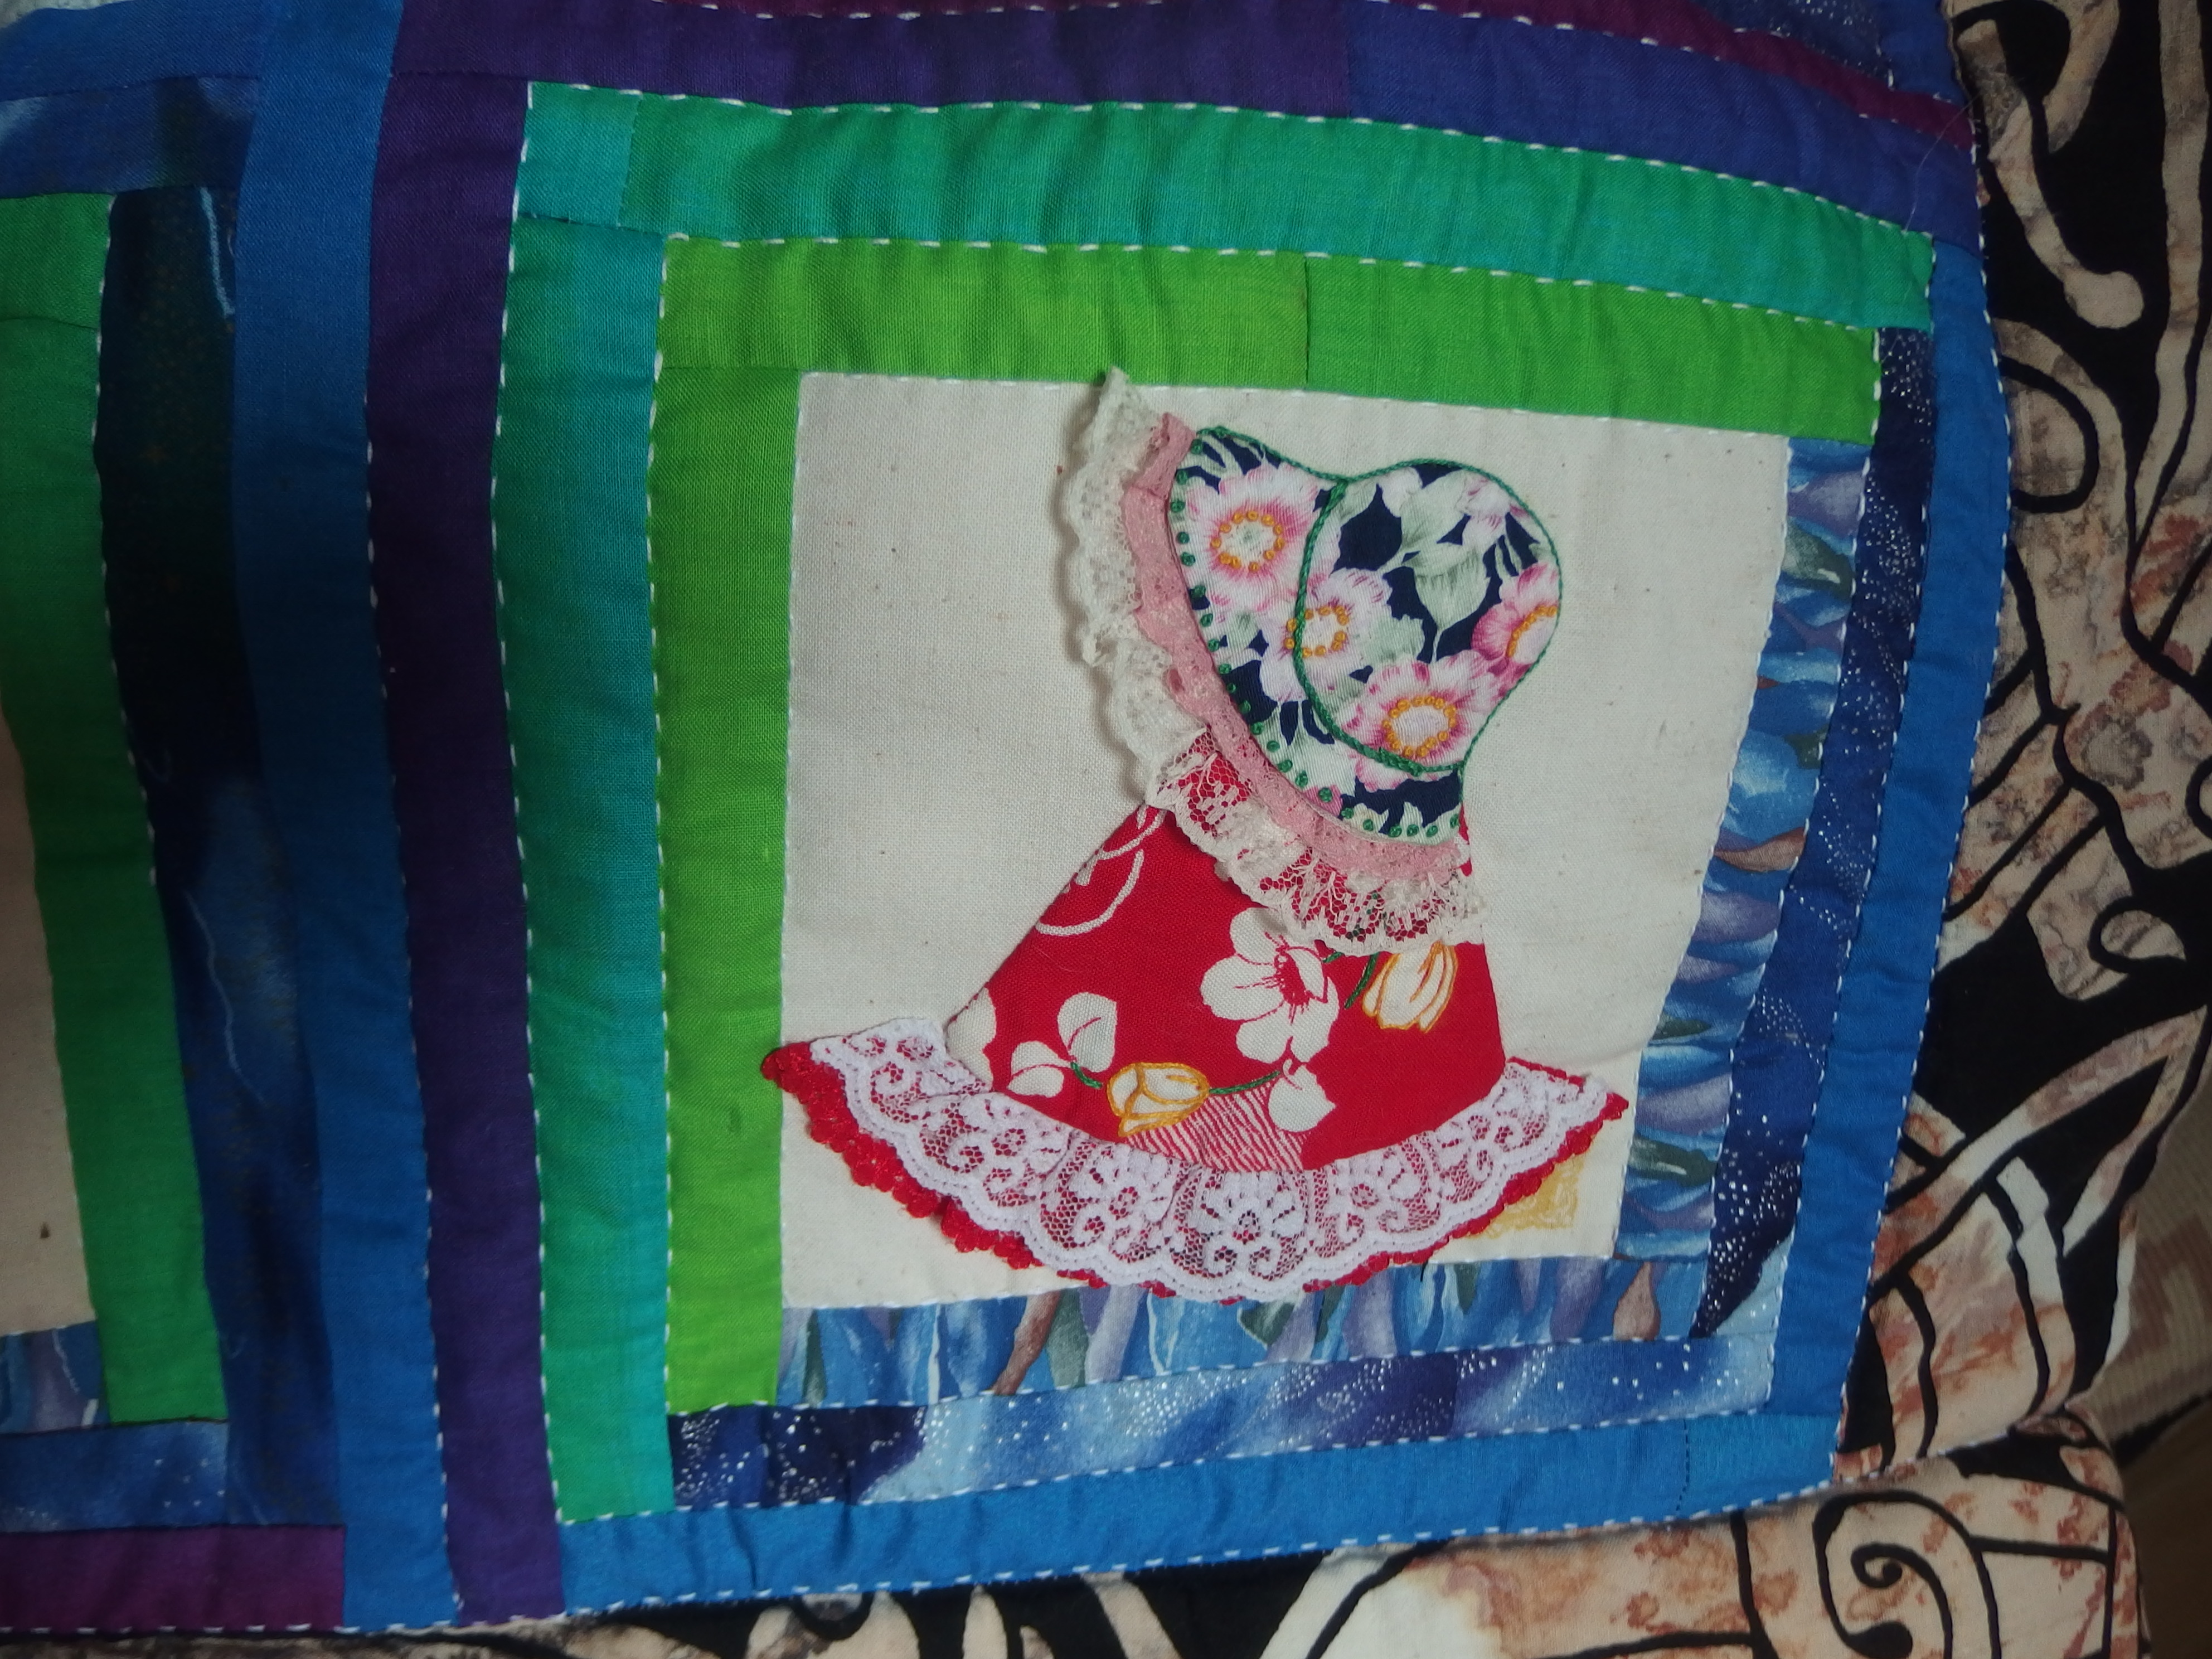
I made 32 of these Sunbonnet Sues for the friendship quilts none the same they were all different dresses and hats.
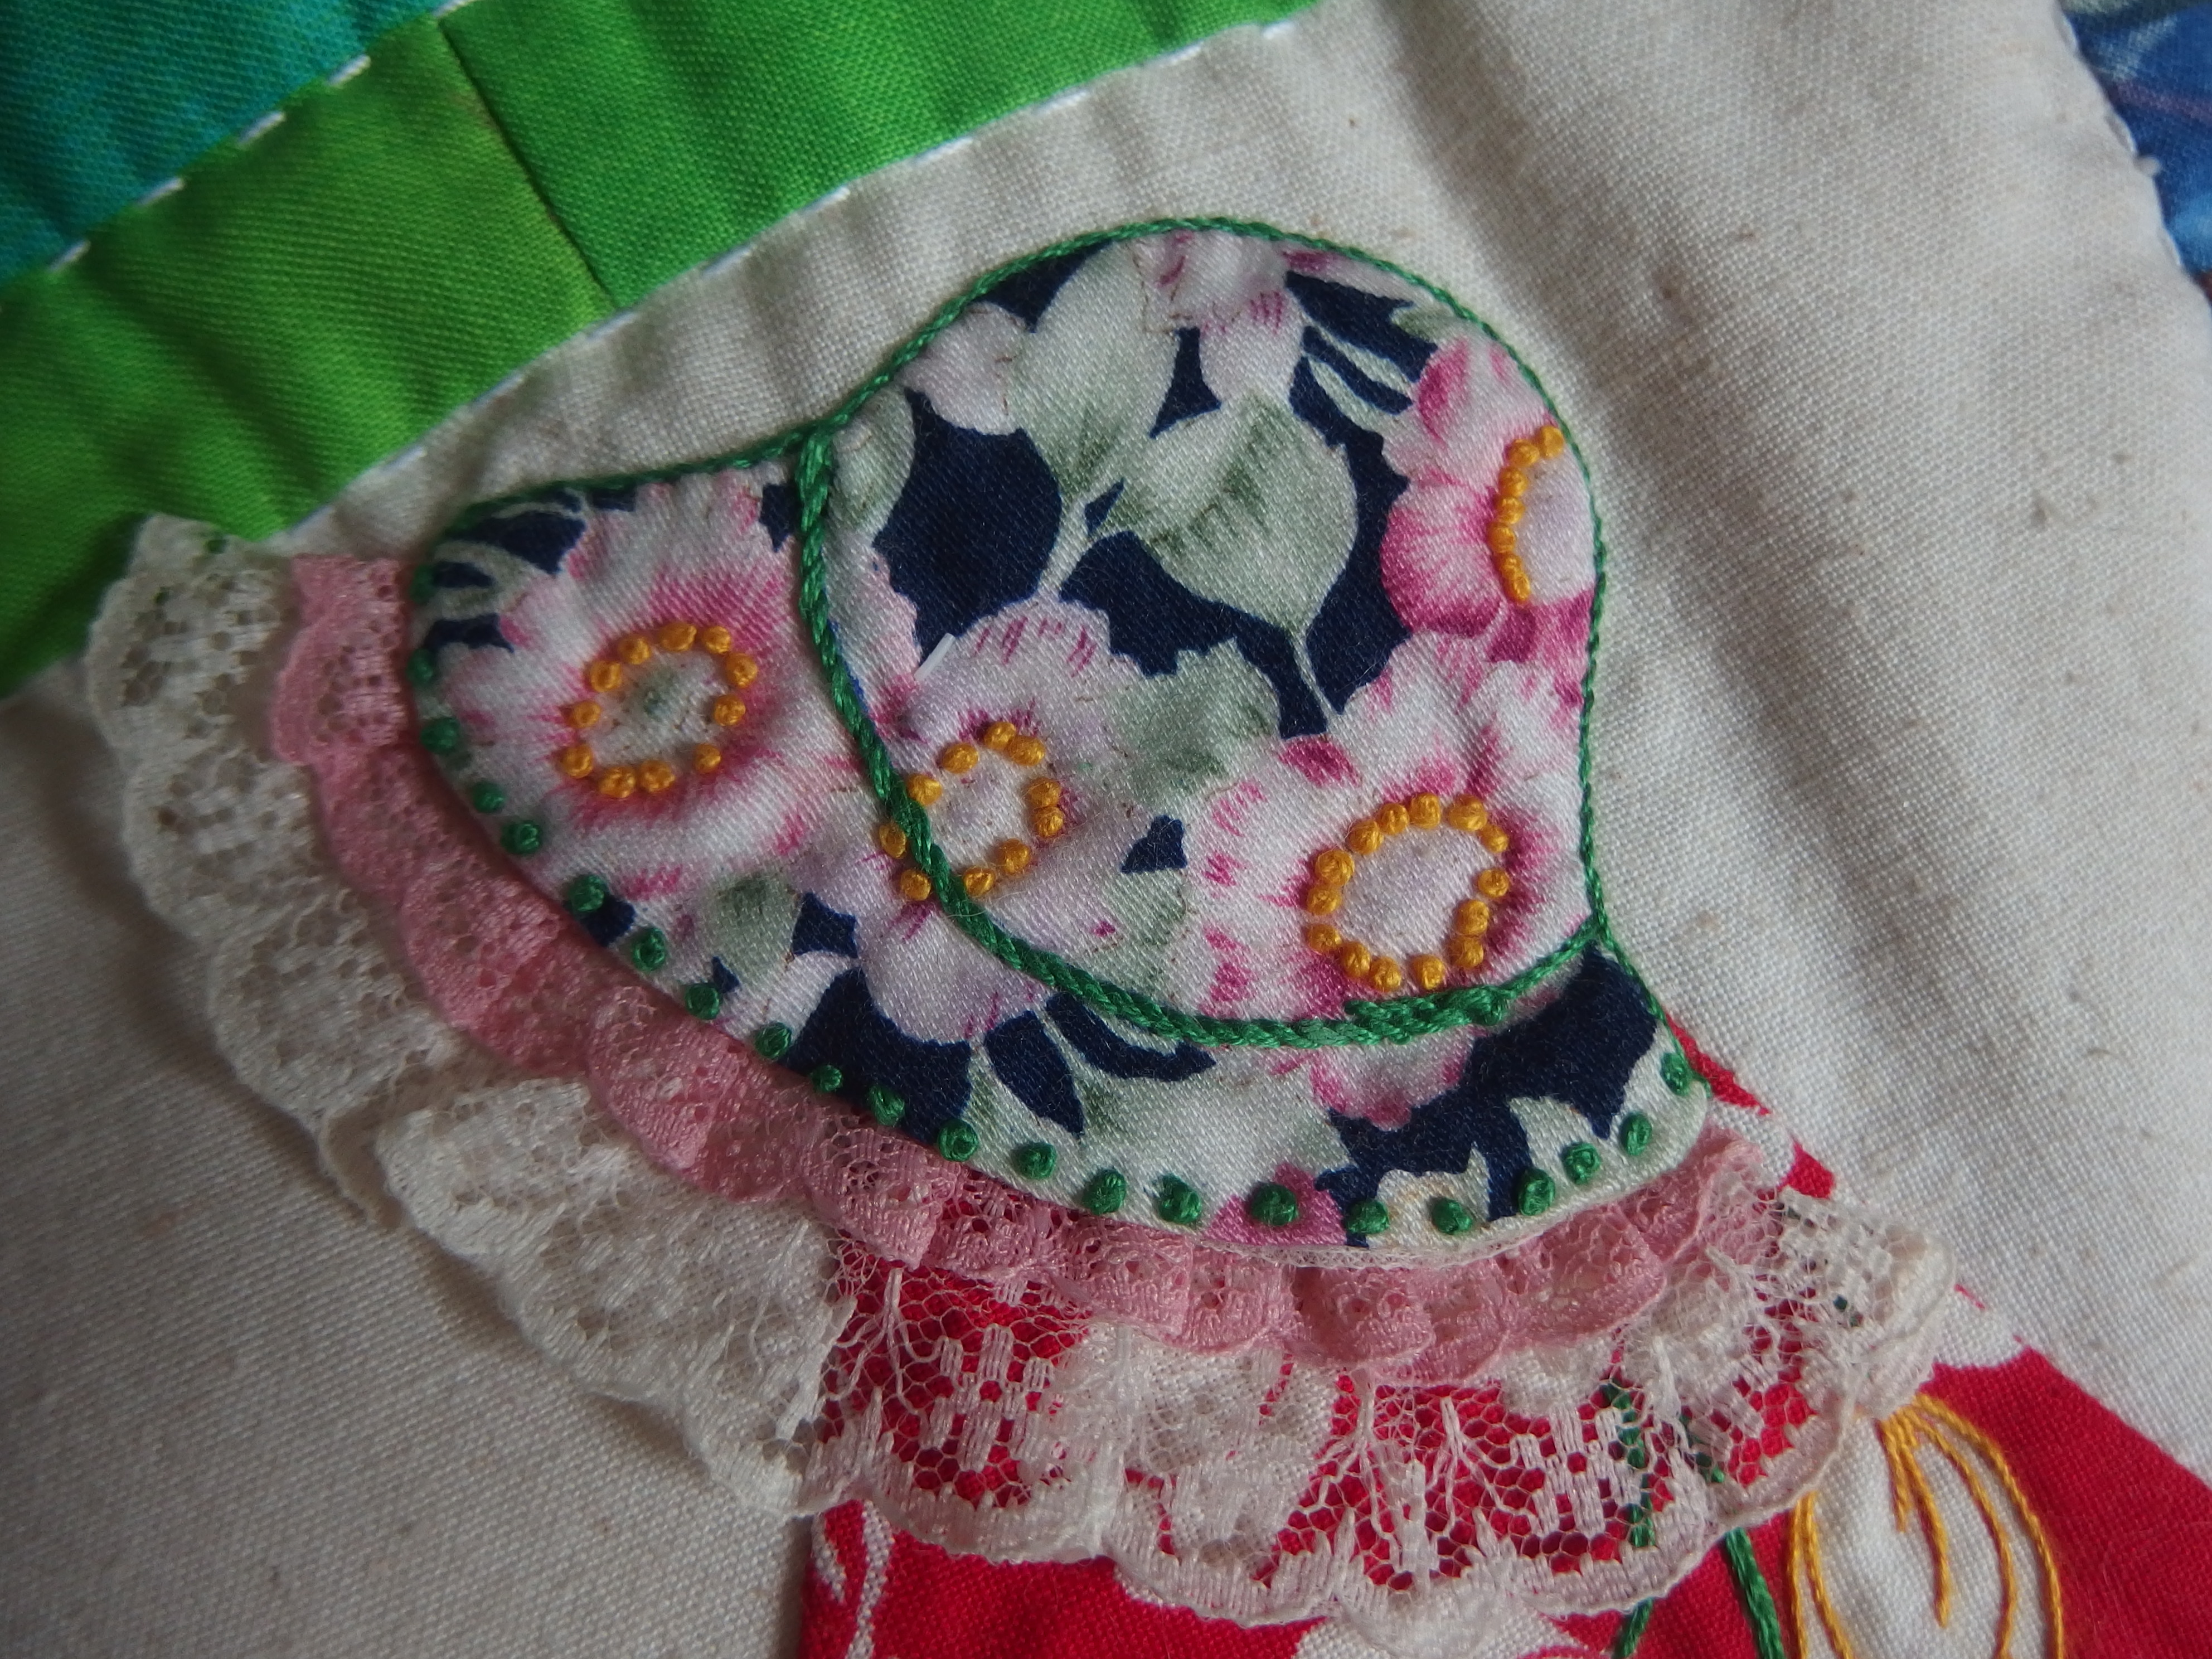
This little bonnet I did french knots in the flowers to add some yellow and green french knots around the edge of the bonnet.
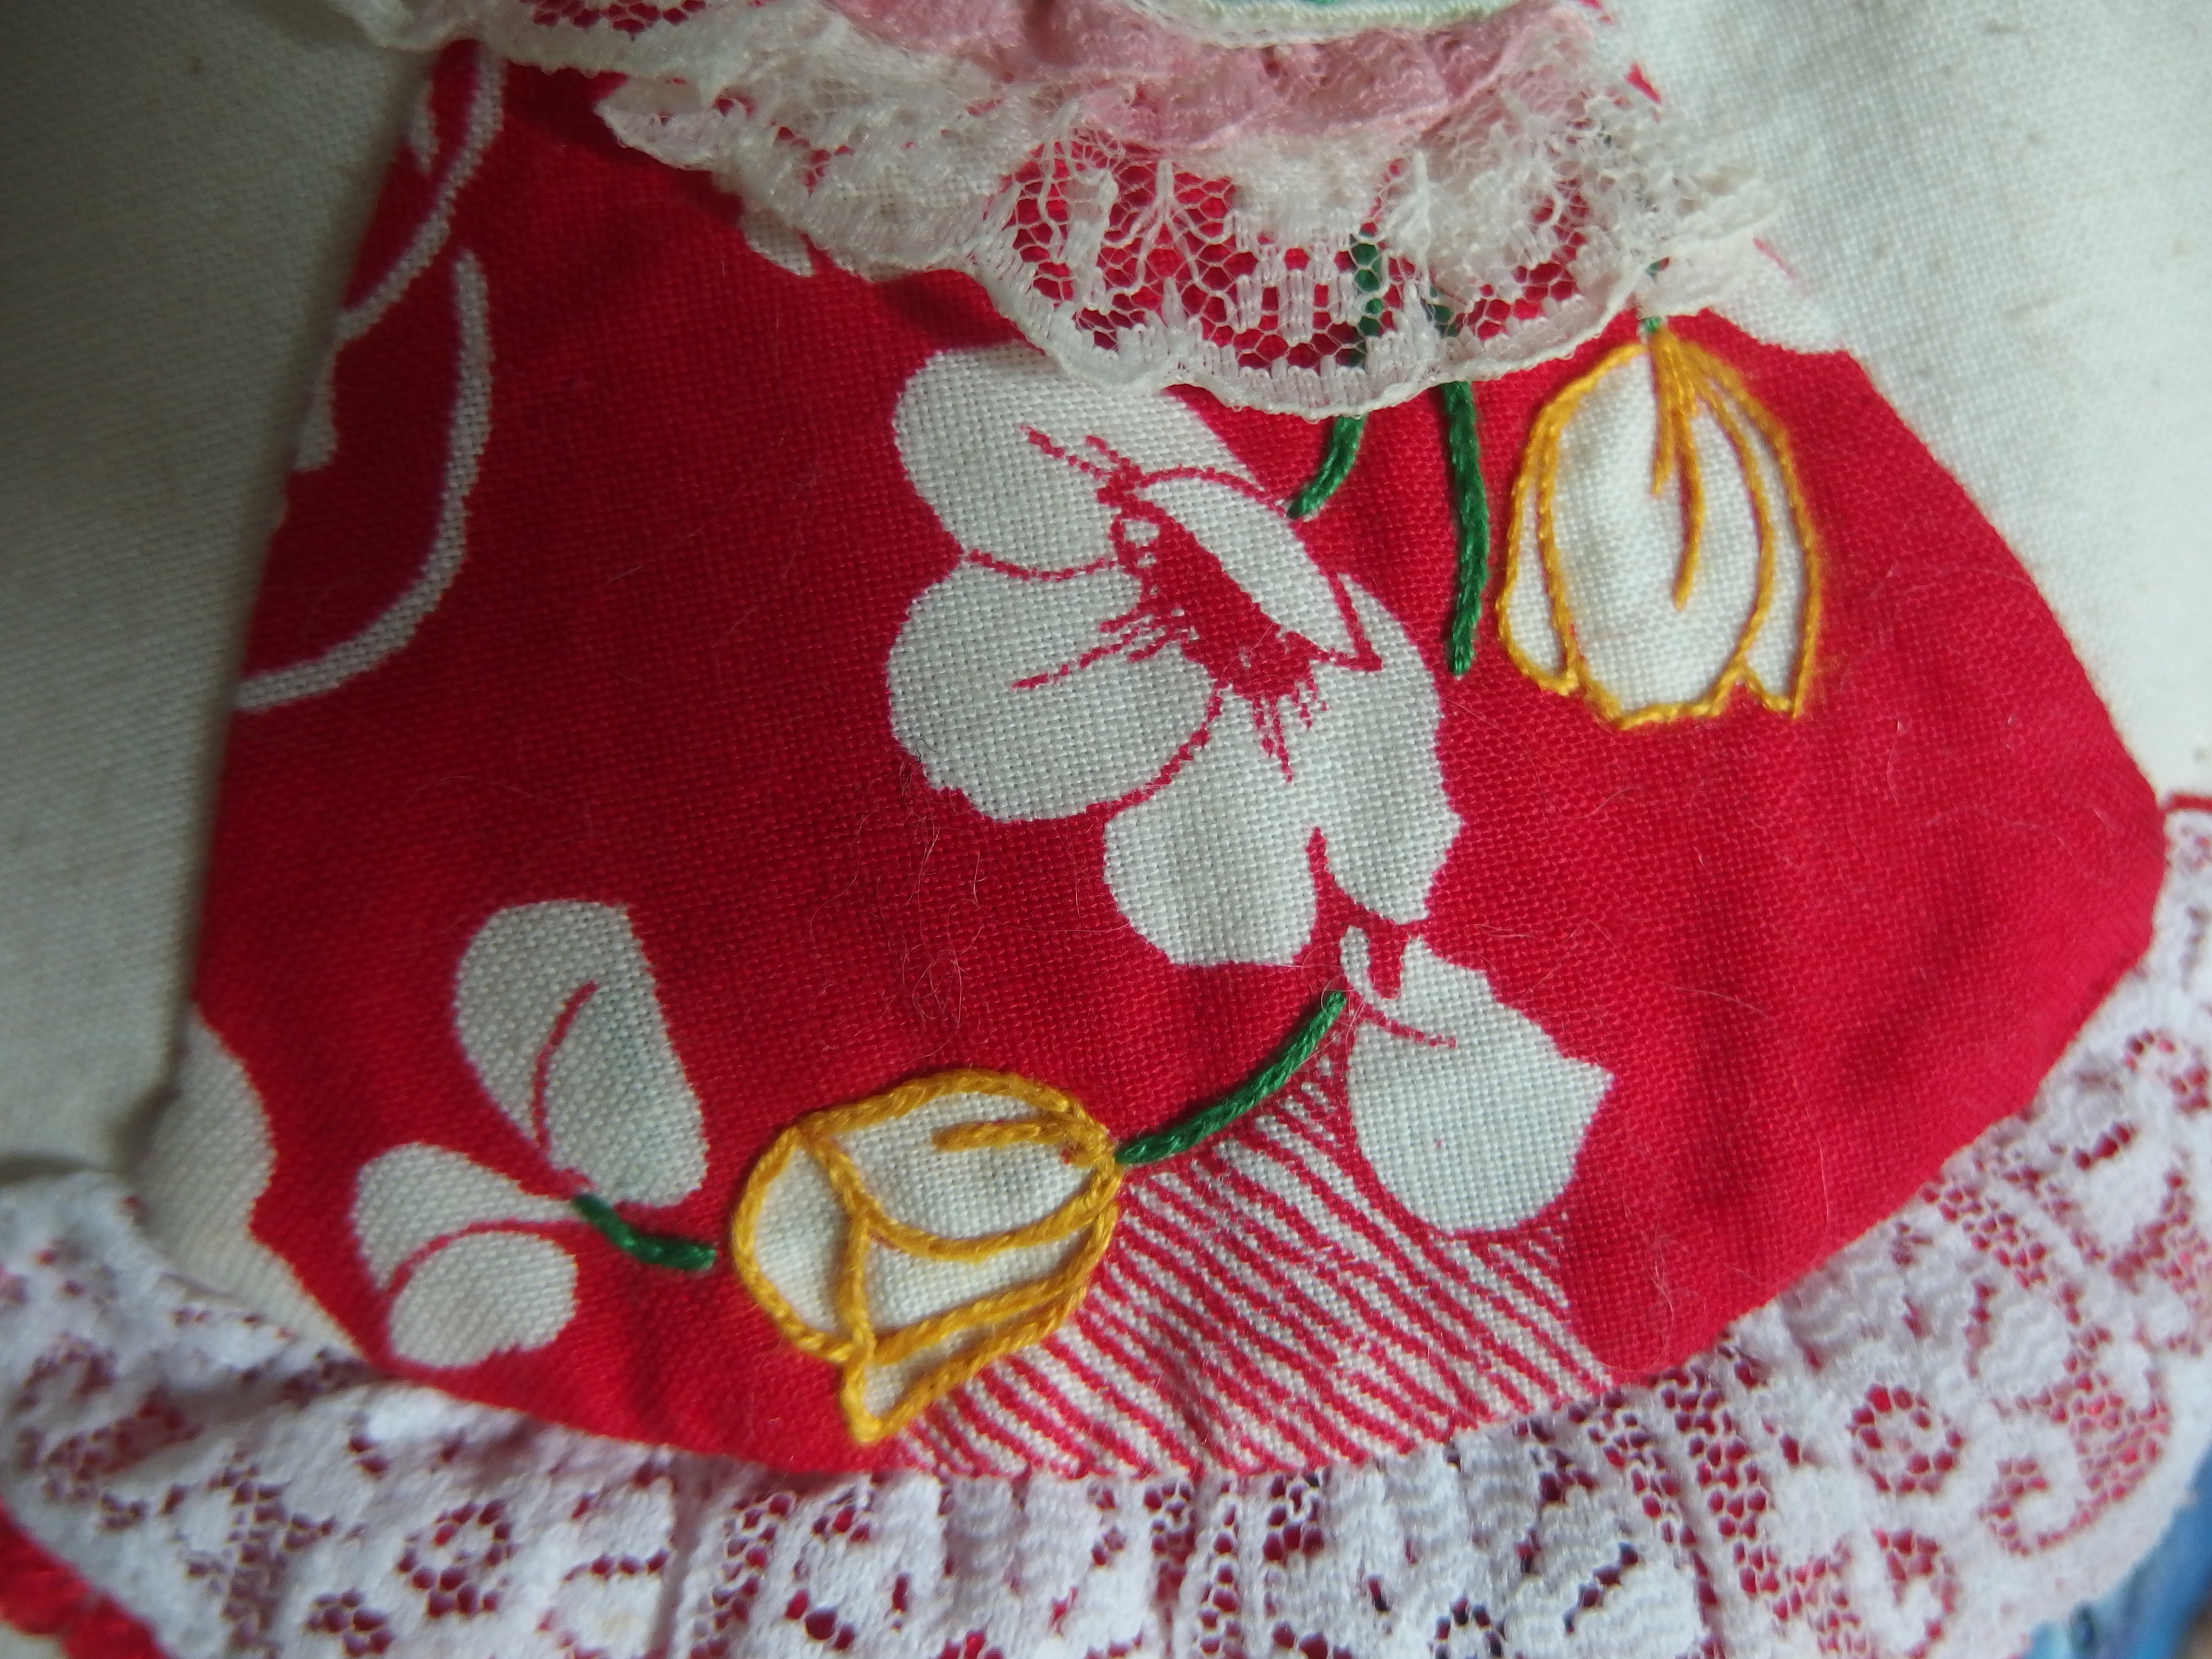
Here I have added green stem stitch embroidery to the stems and yellow to the flowers.

I made her wee boots for this Sue, eyelets are tiny french knots and the thread is very fine cotton. It was lots of fun.
I did do some work on my LE mostly prep work though.
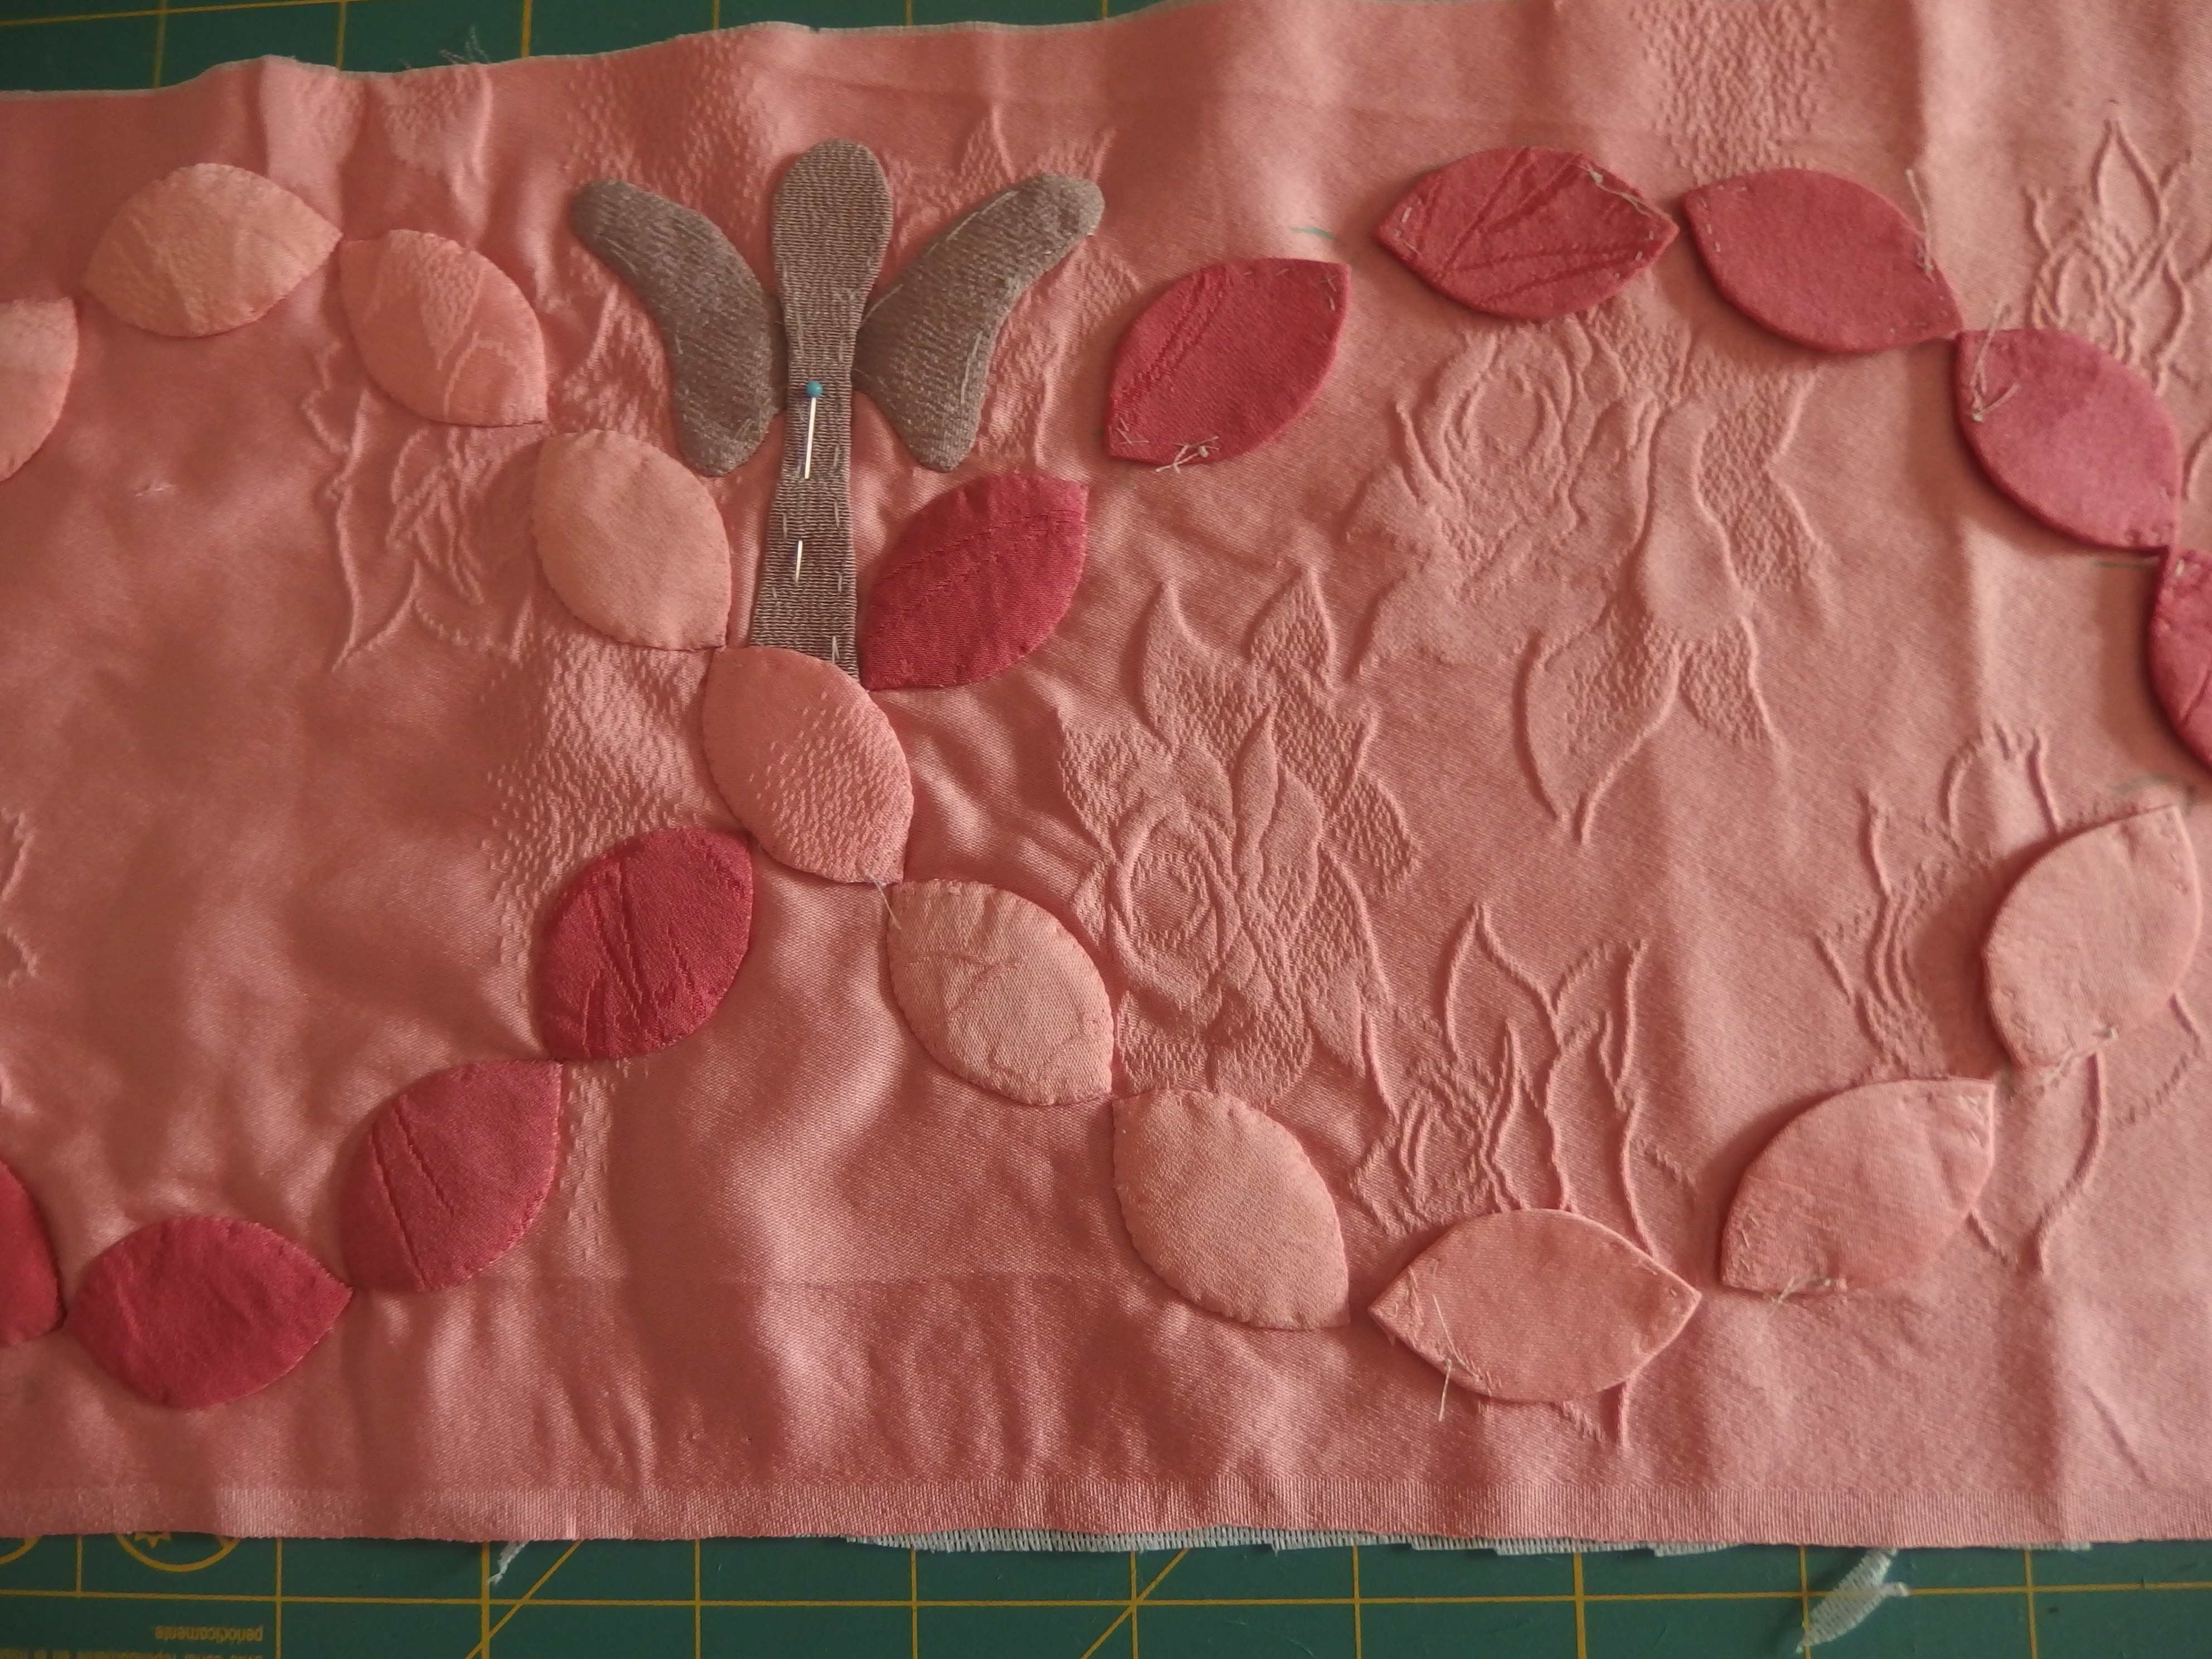
I was having a problem with getting my ovals or leaves in the right place and keeping them in the right place as the silks were fighting each other. I tried a dab of glue this worked at holding them in place but OHHHH dear I ended up with a hard blob as it seemed to burn the silk a nasty reaction it did not do that to my cottons??????? I can not leave then pinned for long as they then leave holes and a tiny rust marks with all the high humidity
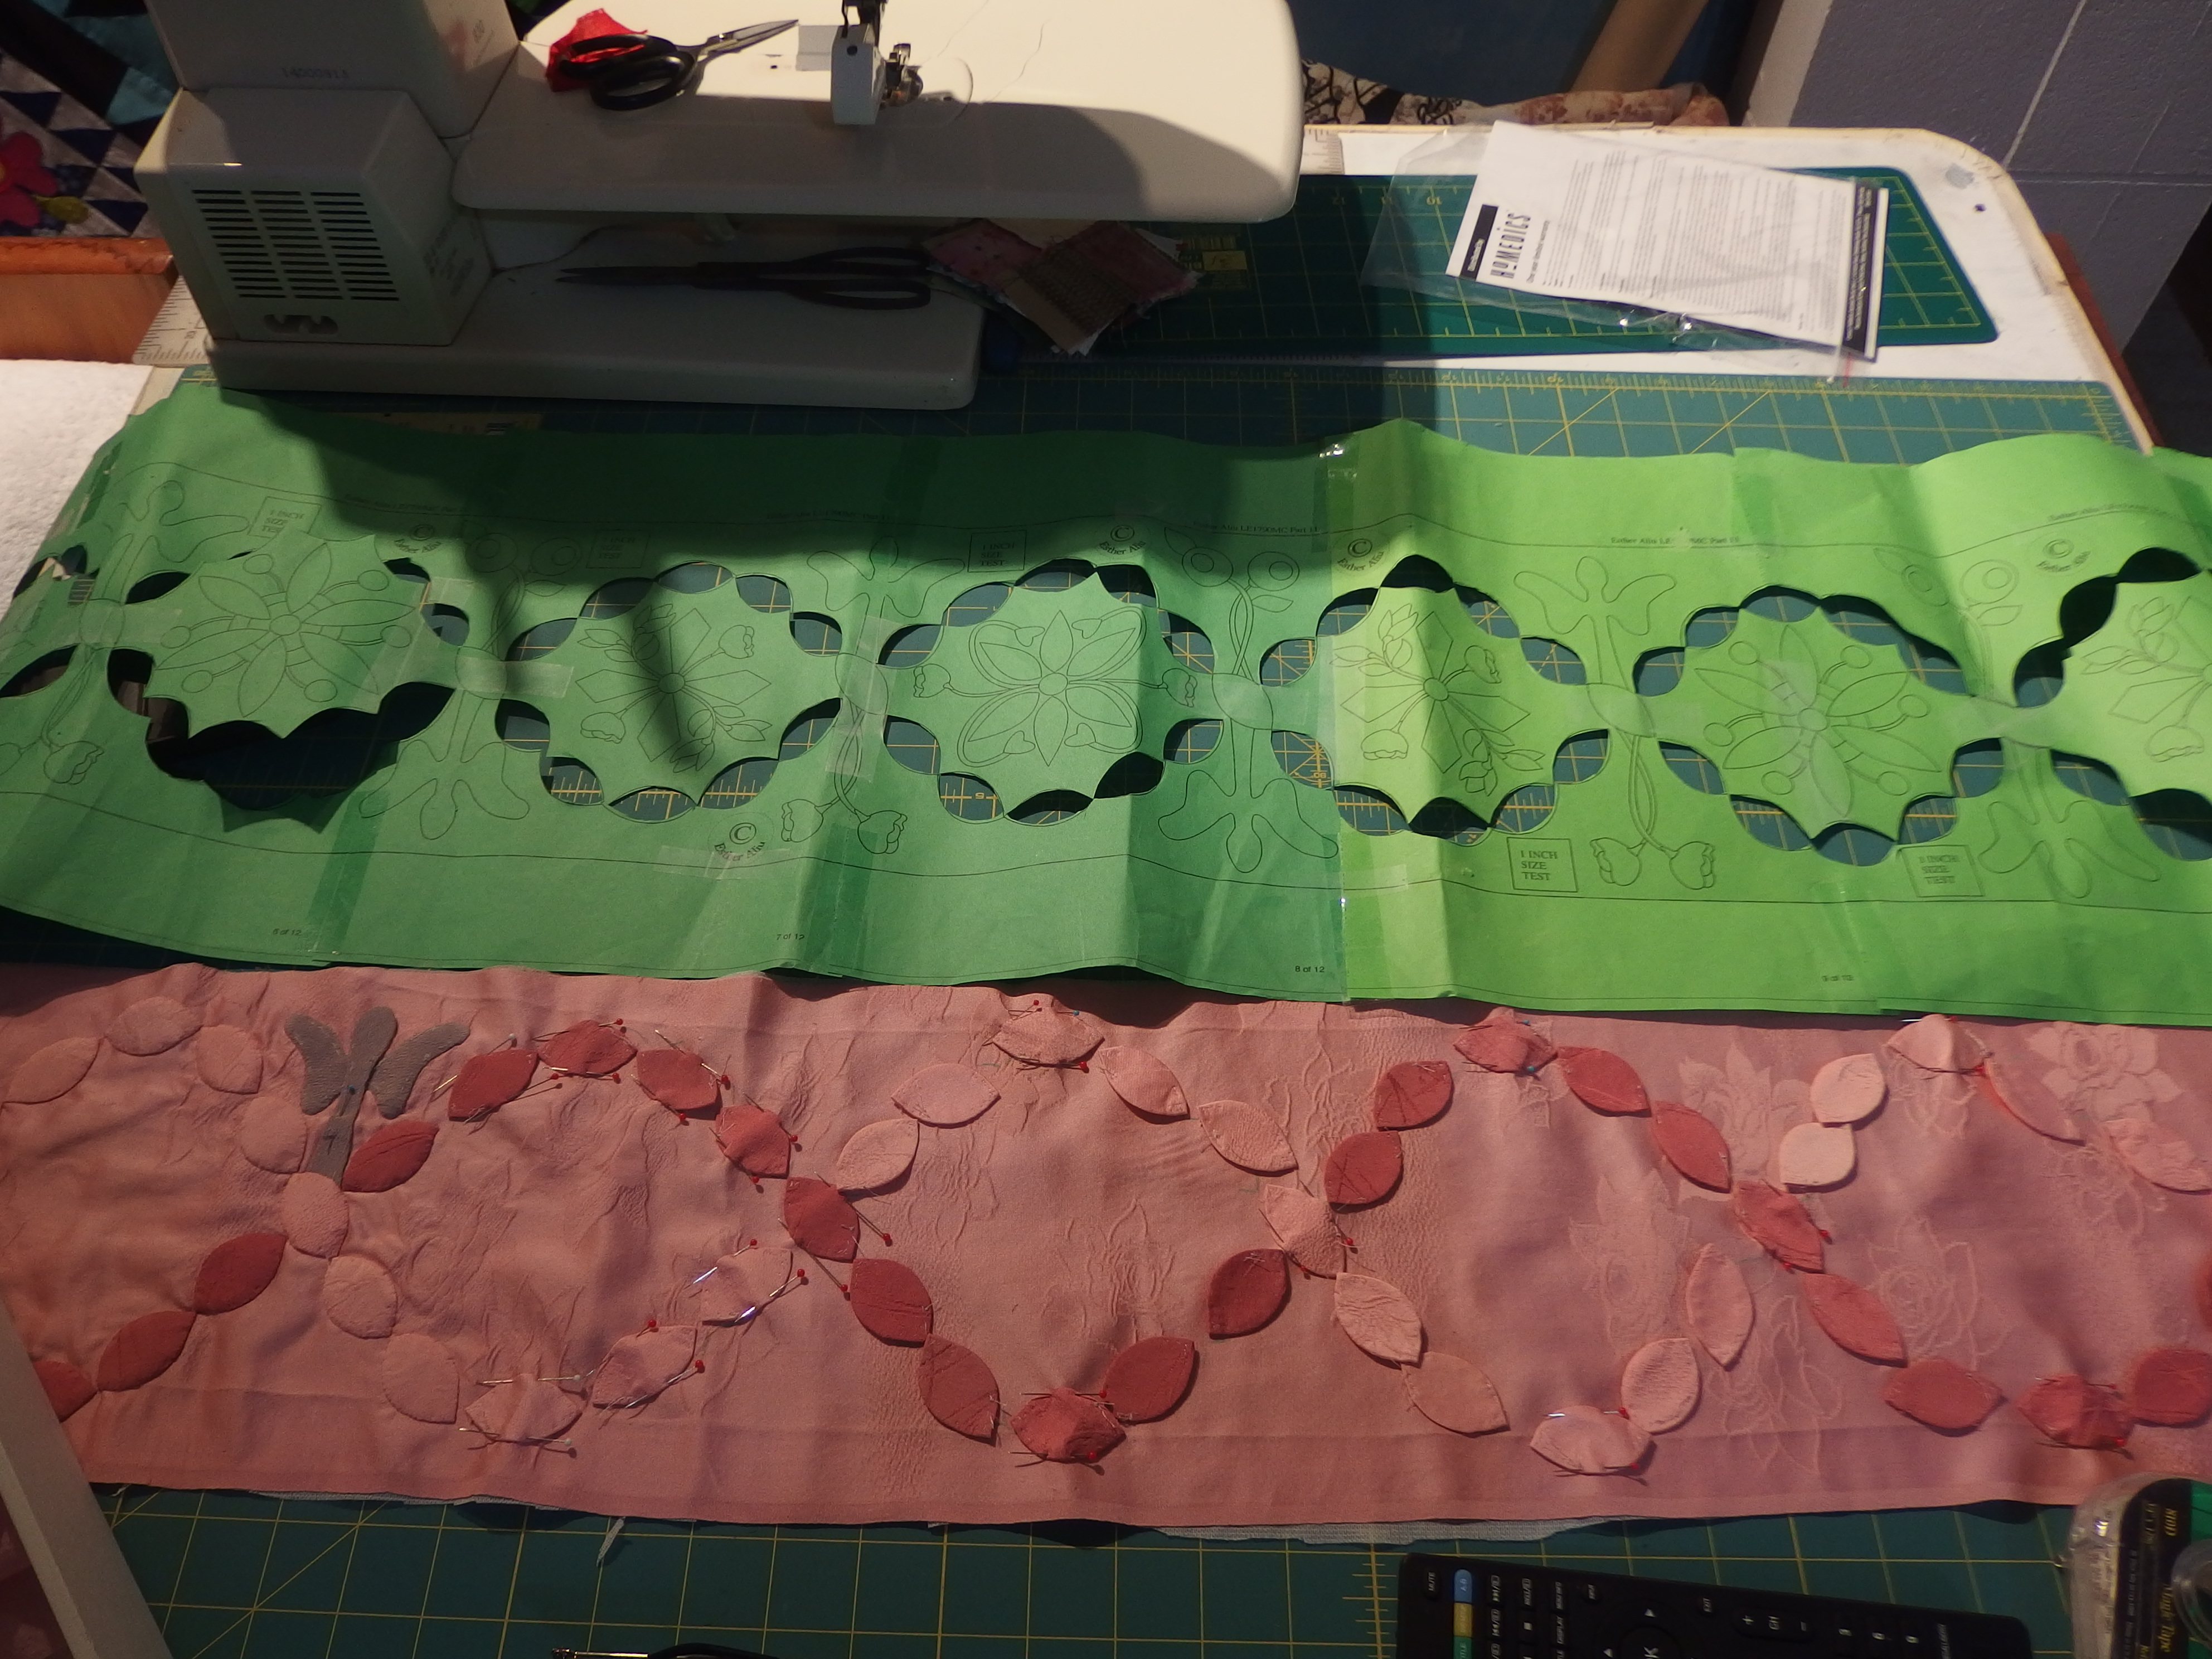
So I made up a template in dark green paper so i could see the holes of the ovals clearly when I cut them all out, they were cut slightly small than the full size so my making lines will be covered by the ovals when appliquéd on. I can not wash this quilt when it is finished so I have to be carful all the time to keep in clean and not show any marking. Its a nightmare I can tell you.
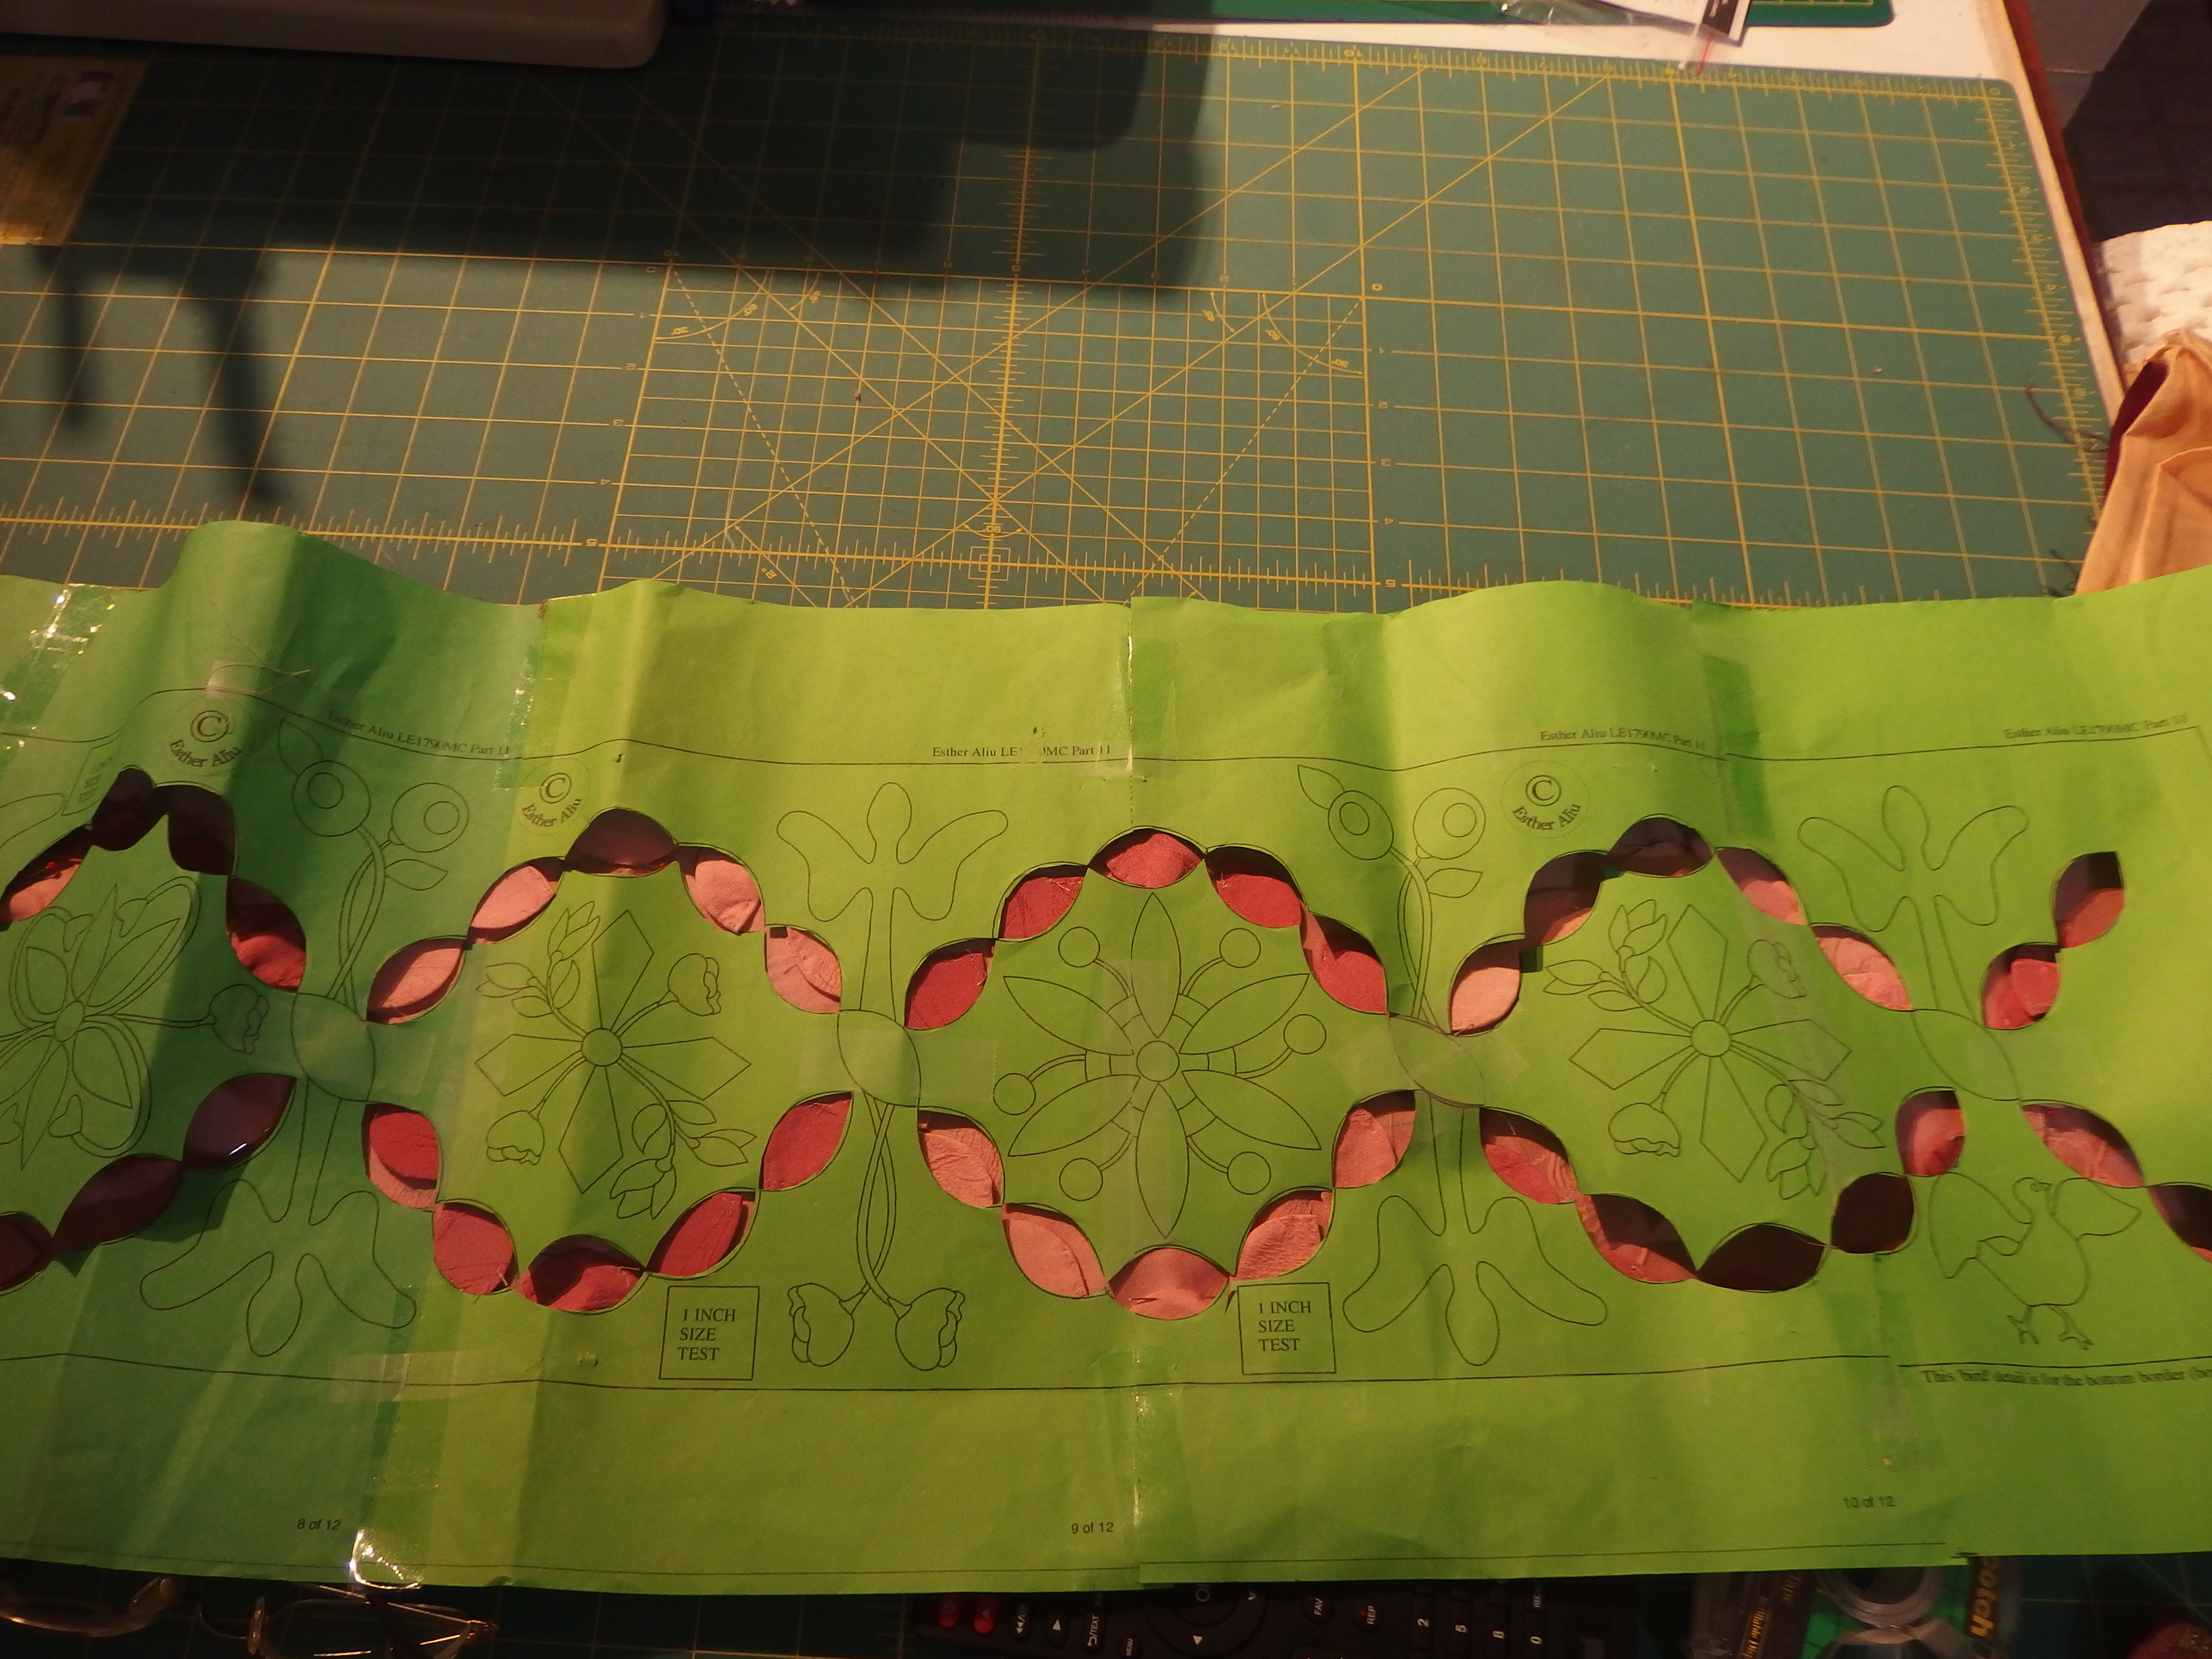
Here you can see the strong contrast where I have placed the template over my pink silk panel. then I took a fine chalk marker and carefully marked only the ends of the ovals
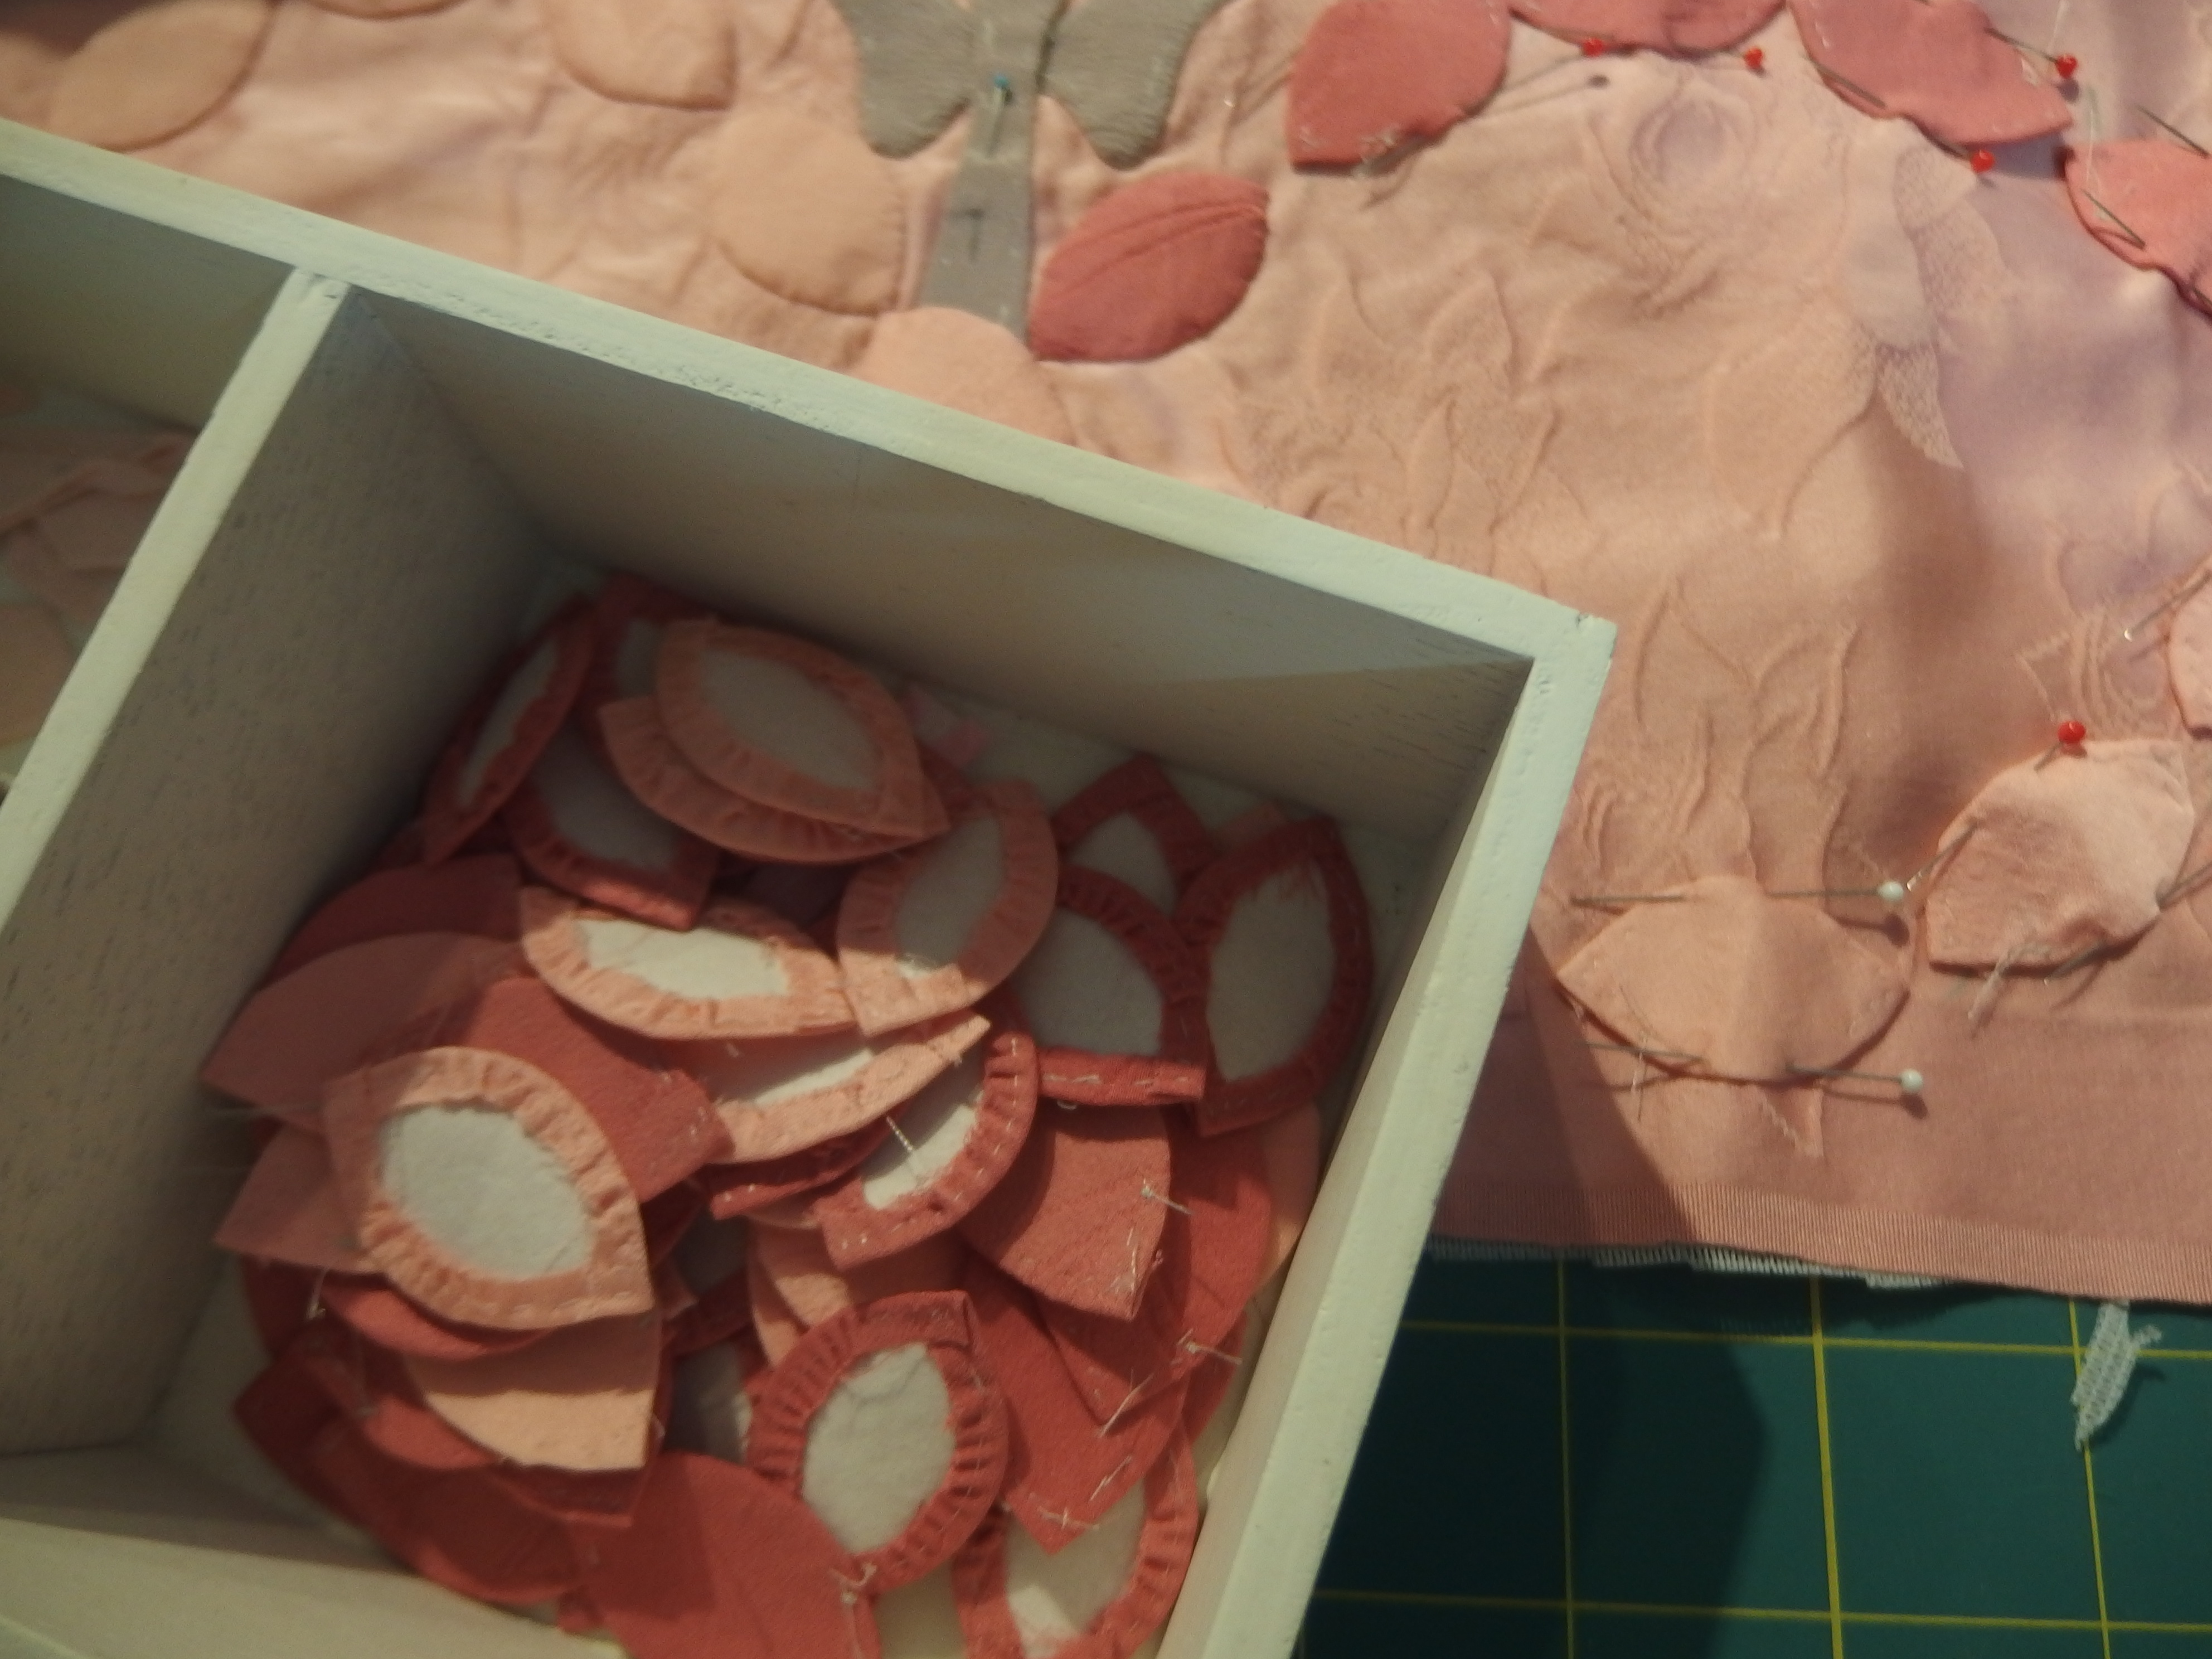
I have enough Ovals basted over washawayironon freezer-papaer to complete one and a half borders, I thought I had made all of them a year ago !!!!! Boo Hoo.
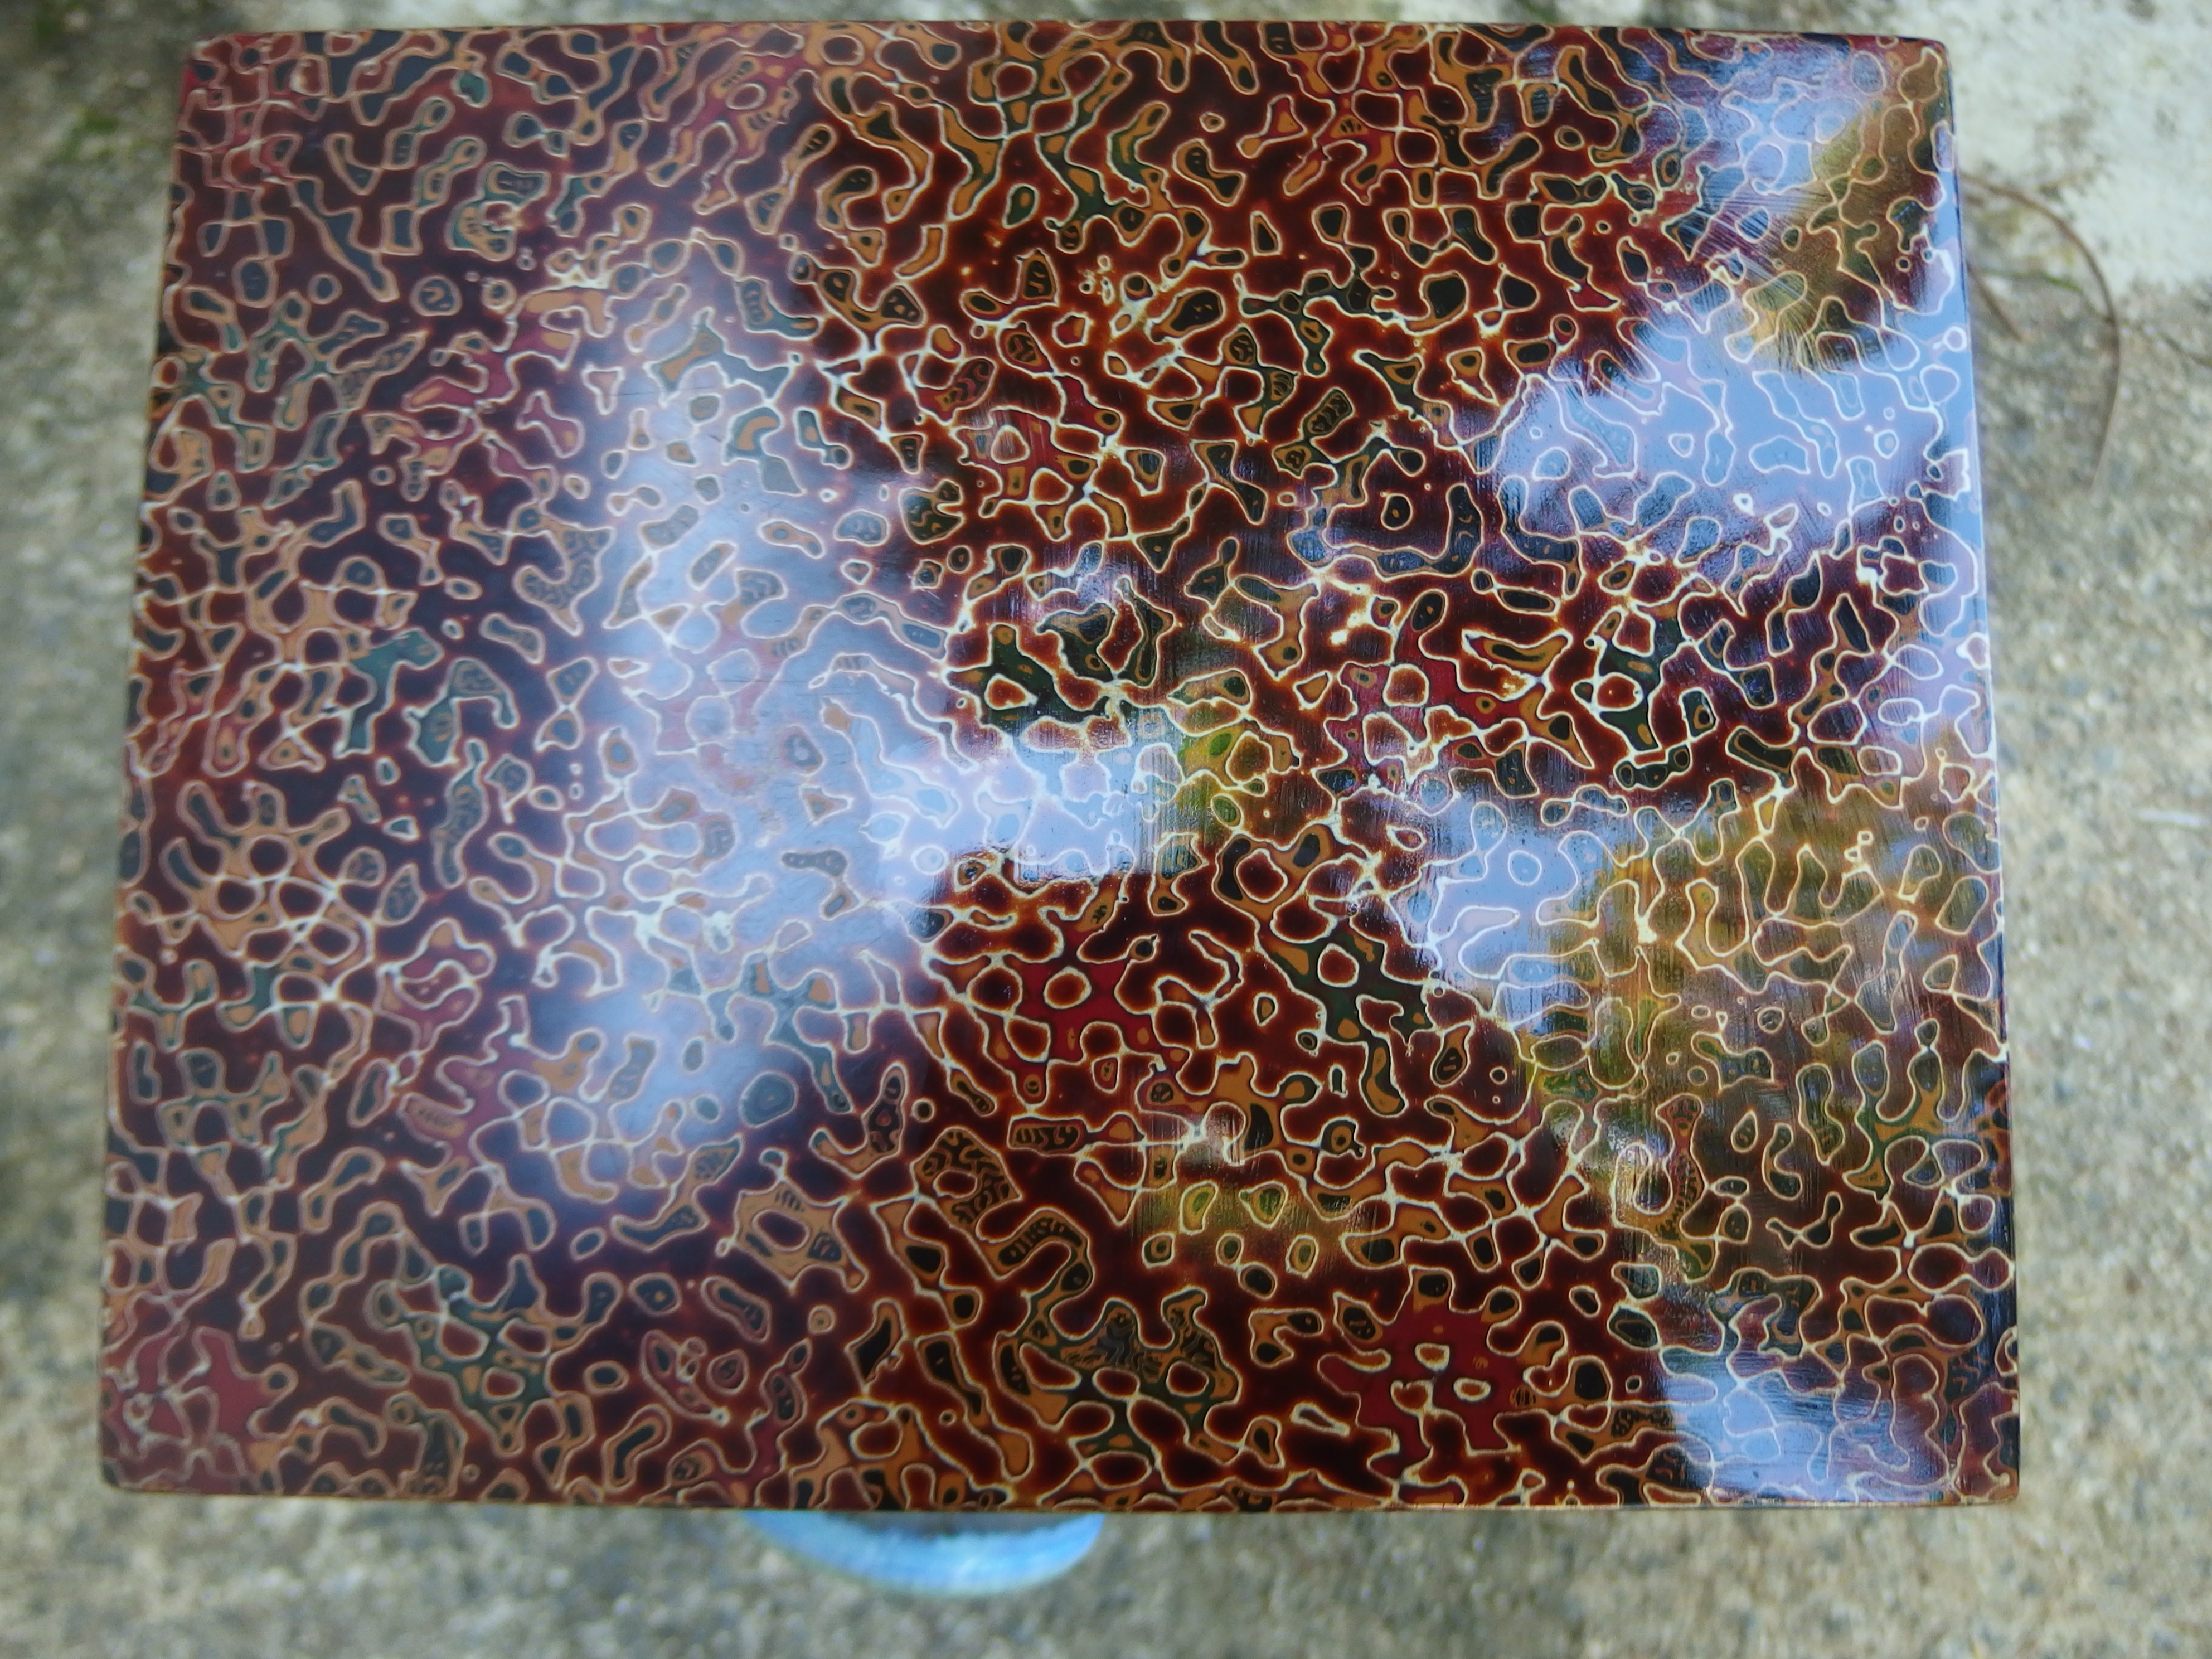
Wakasa Kaigara lacquer box. A few weeks ago I was given a box as soon as I saw it I fell in love with it. I looked up on the internet to see if I could find out any thing about it Id never seen any thing like it before. It is Wakasa lacquer wear. The lid is well worn and has lost its top glow but is still very beautiful to me. I could see on the side of the inner box were there is no wear how beautiful it must have been. I have spent the last few weeks trying to find out how to help bring it back to life, finally today I found out that the last buffing was done with rapeseed oil and the fingers well I don’t have any of that but I do have linseed oil and my fingers so I will use them!!!!. If you look closely on the left side of the lid I have not added the oil yet and it looks a little dull or cloudy. 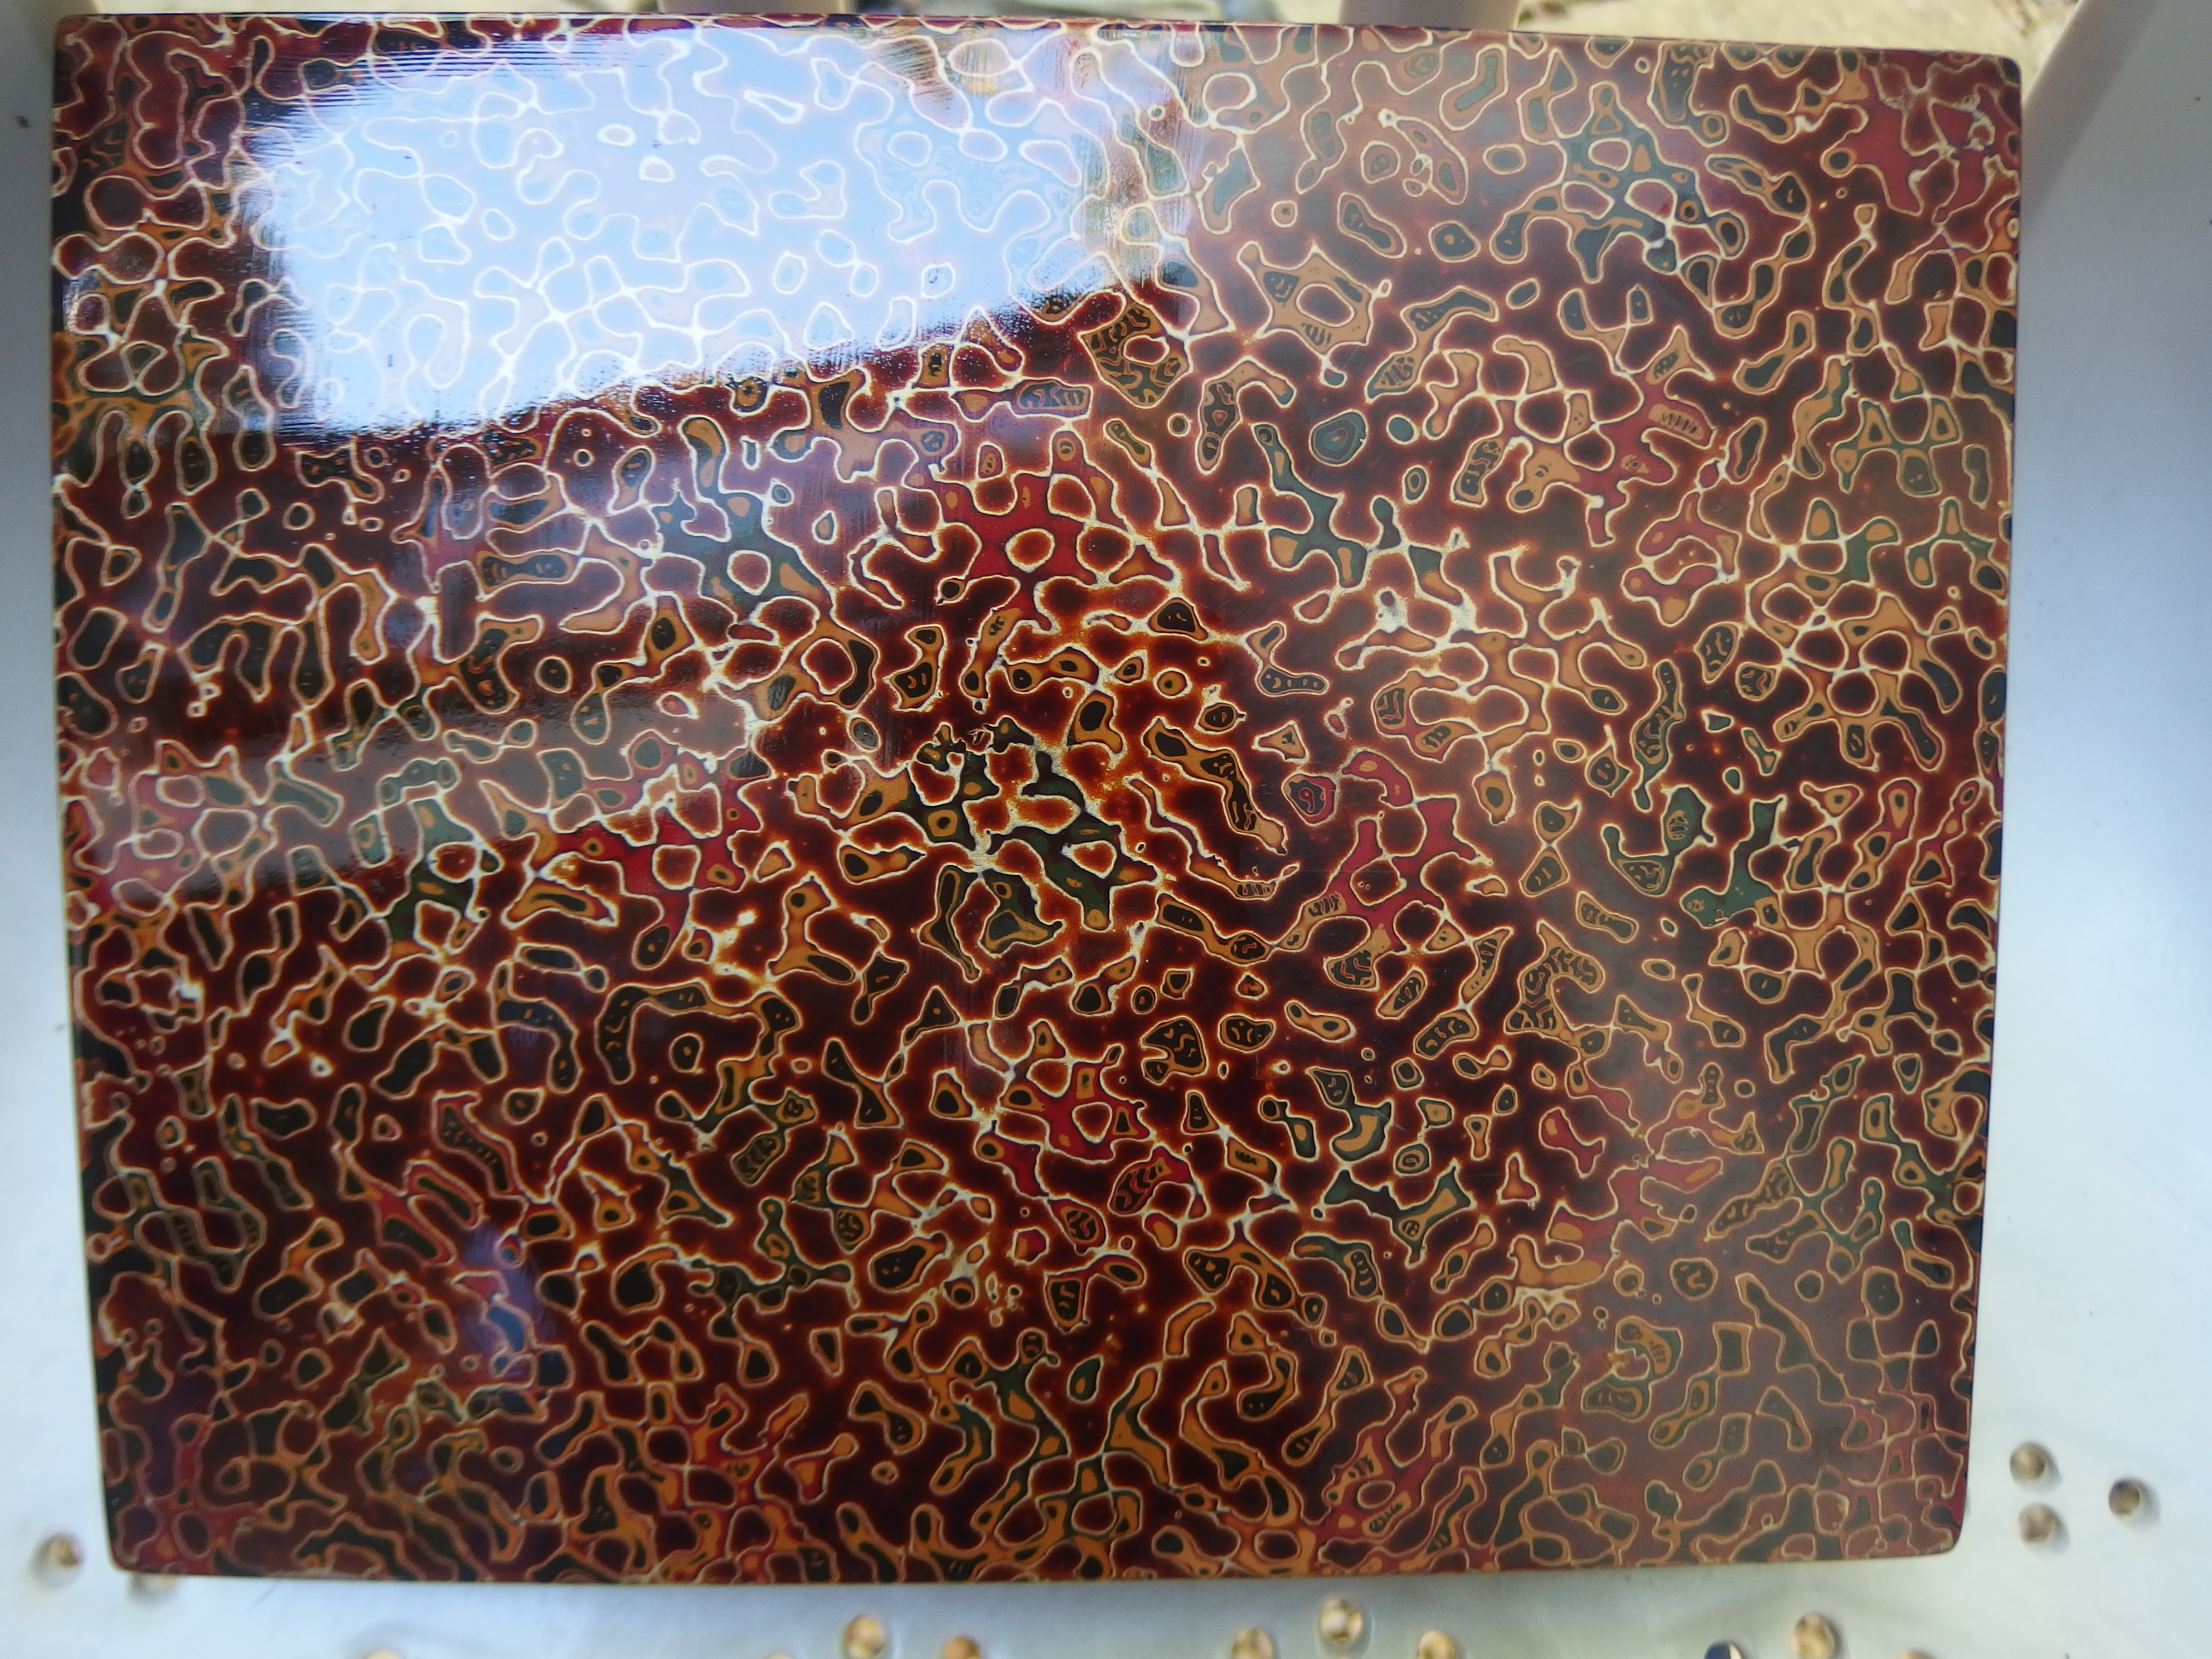
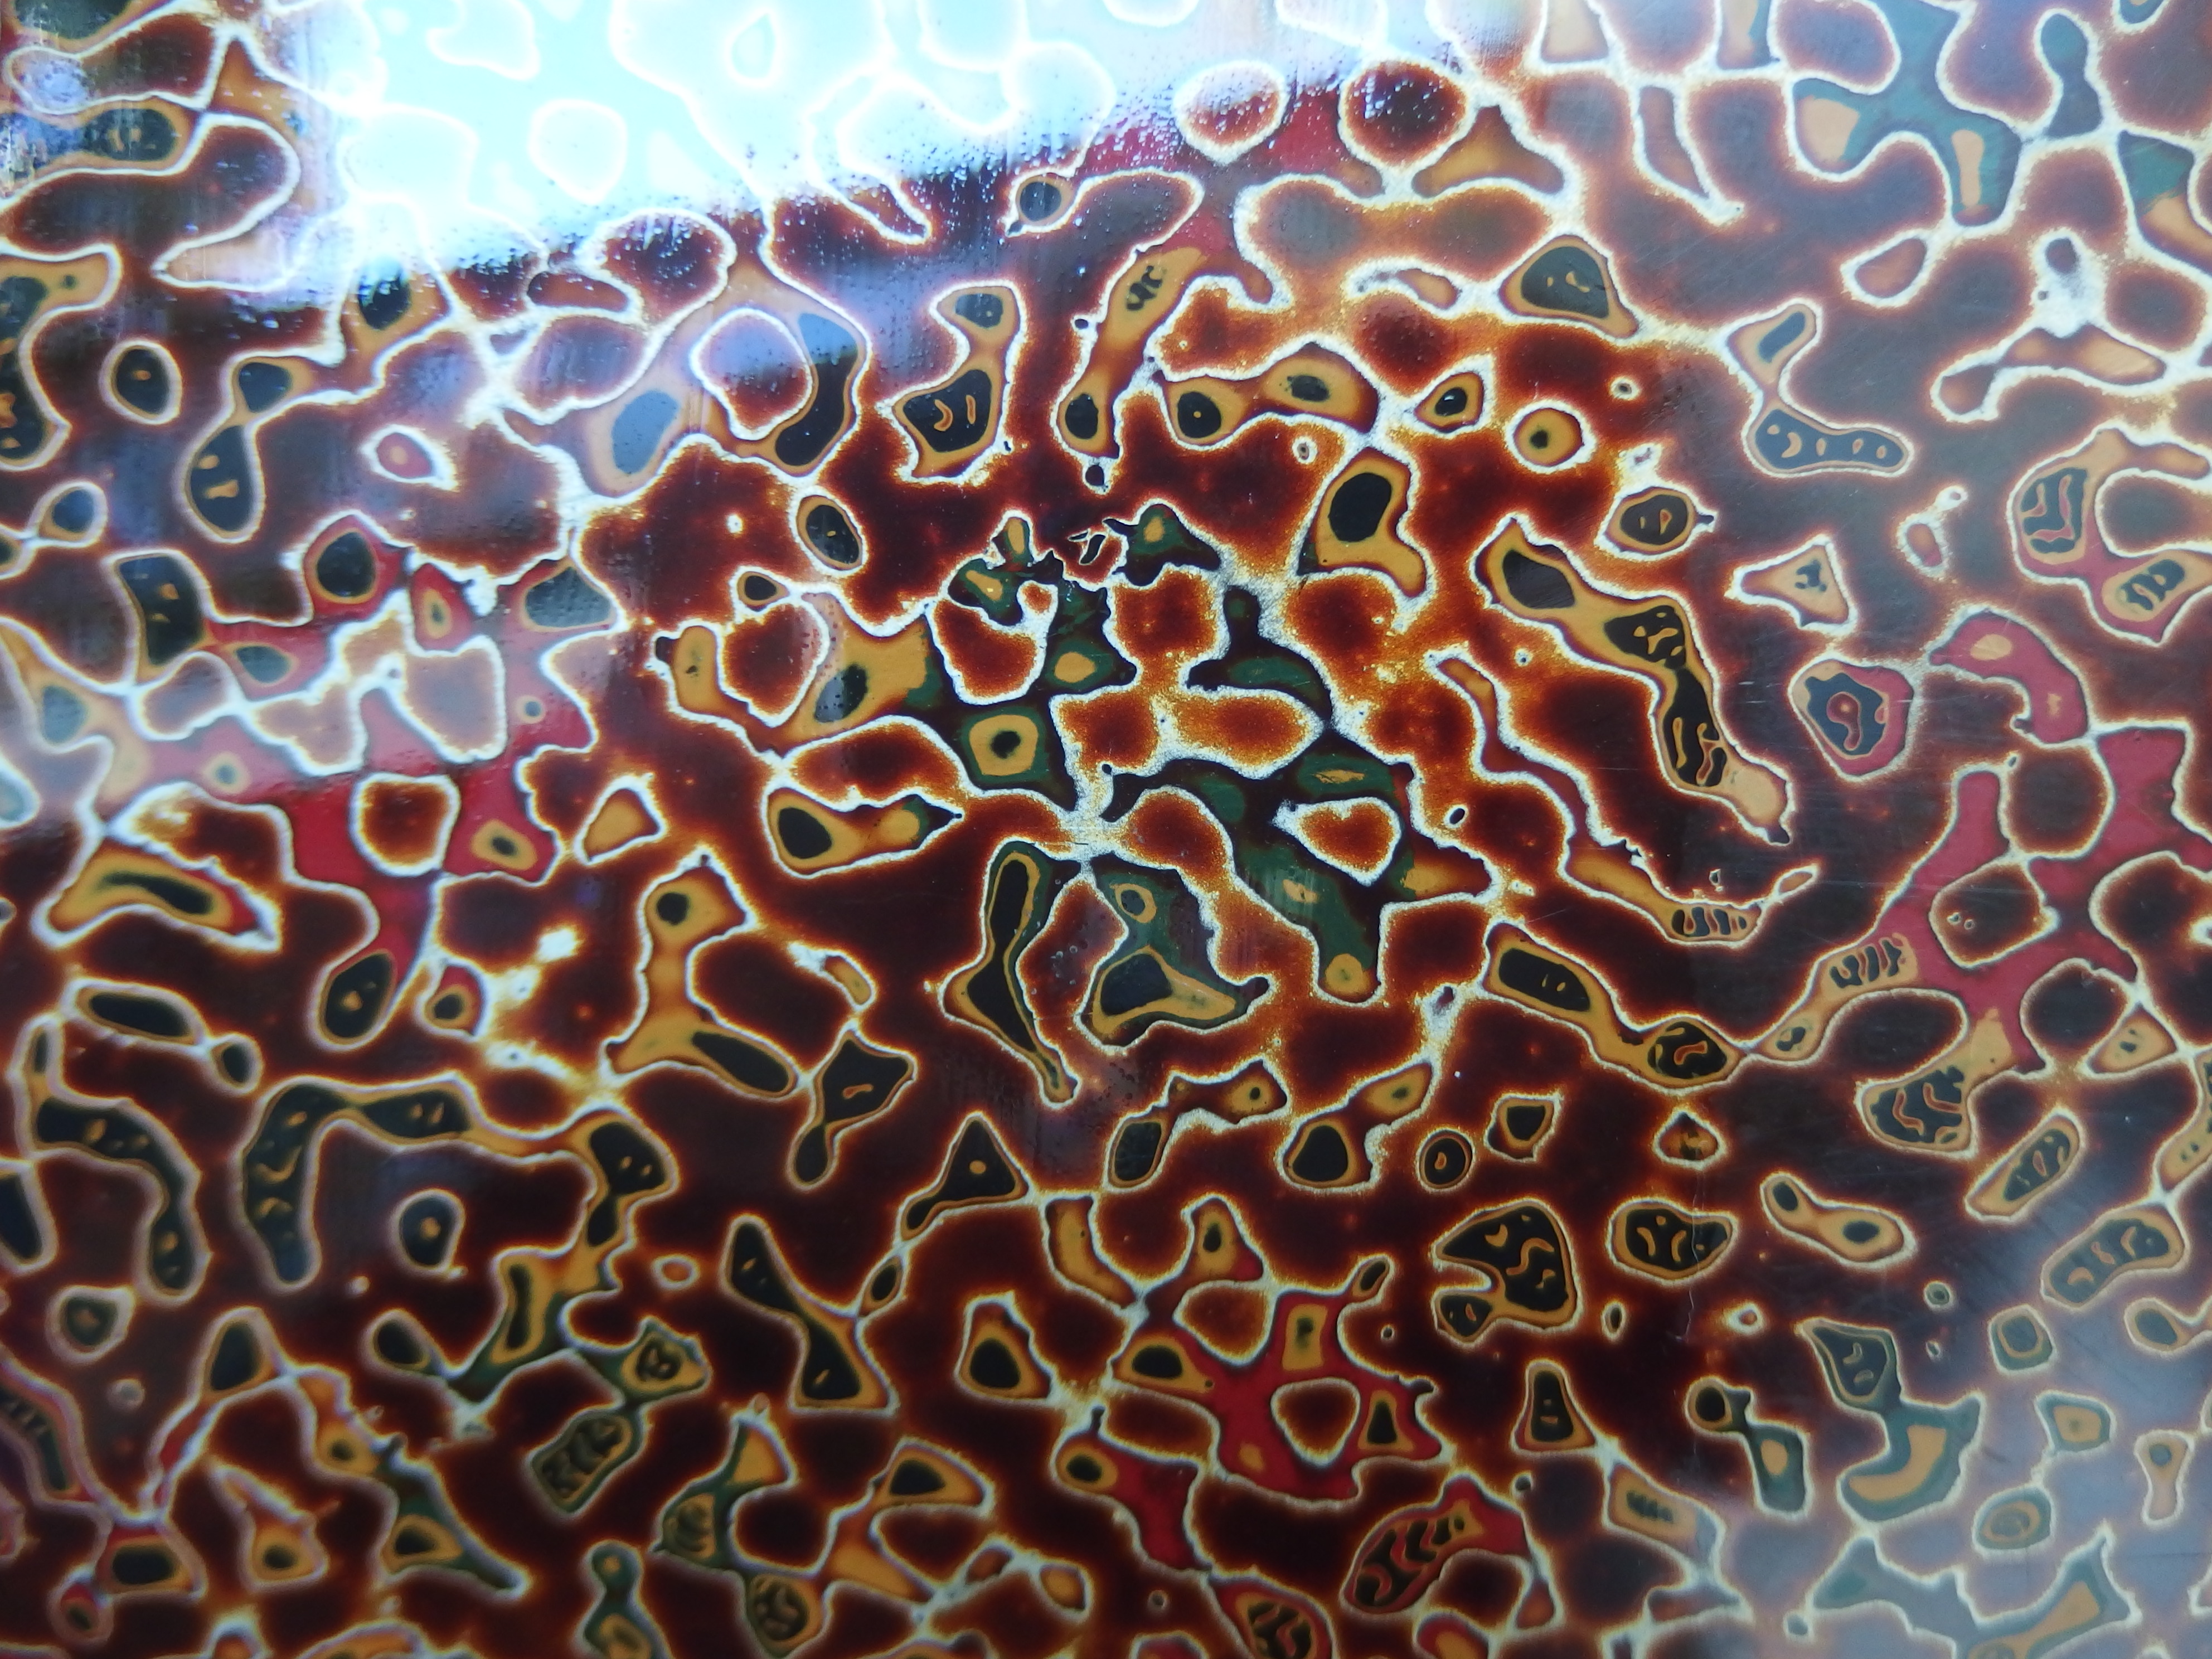
Close up Antique Wakasa Kaigara lacquer box Made from inlay shell. It is difficult to photograph as the depth is like glass and reflects every thing.

Antique Wakasa Kaigara lacquer box. As soon as I arrived home I put my most treasured and most used sewing items in it. How beautiful it looks it is such a joy to see it on my worktable every morning. It takes an artist a year to make an item like this with many many layers of polishing and lacquer. When I wipe off the oil with an eyeglass cleaning cloth the soft cloth I have it is dull again but i think if it took the artist a year to make it I can spend a little time each day for a year rubbing it to see if I can restore that gloss. !!!!!!!
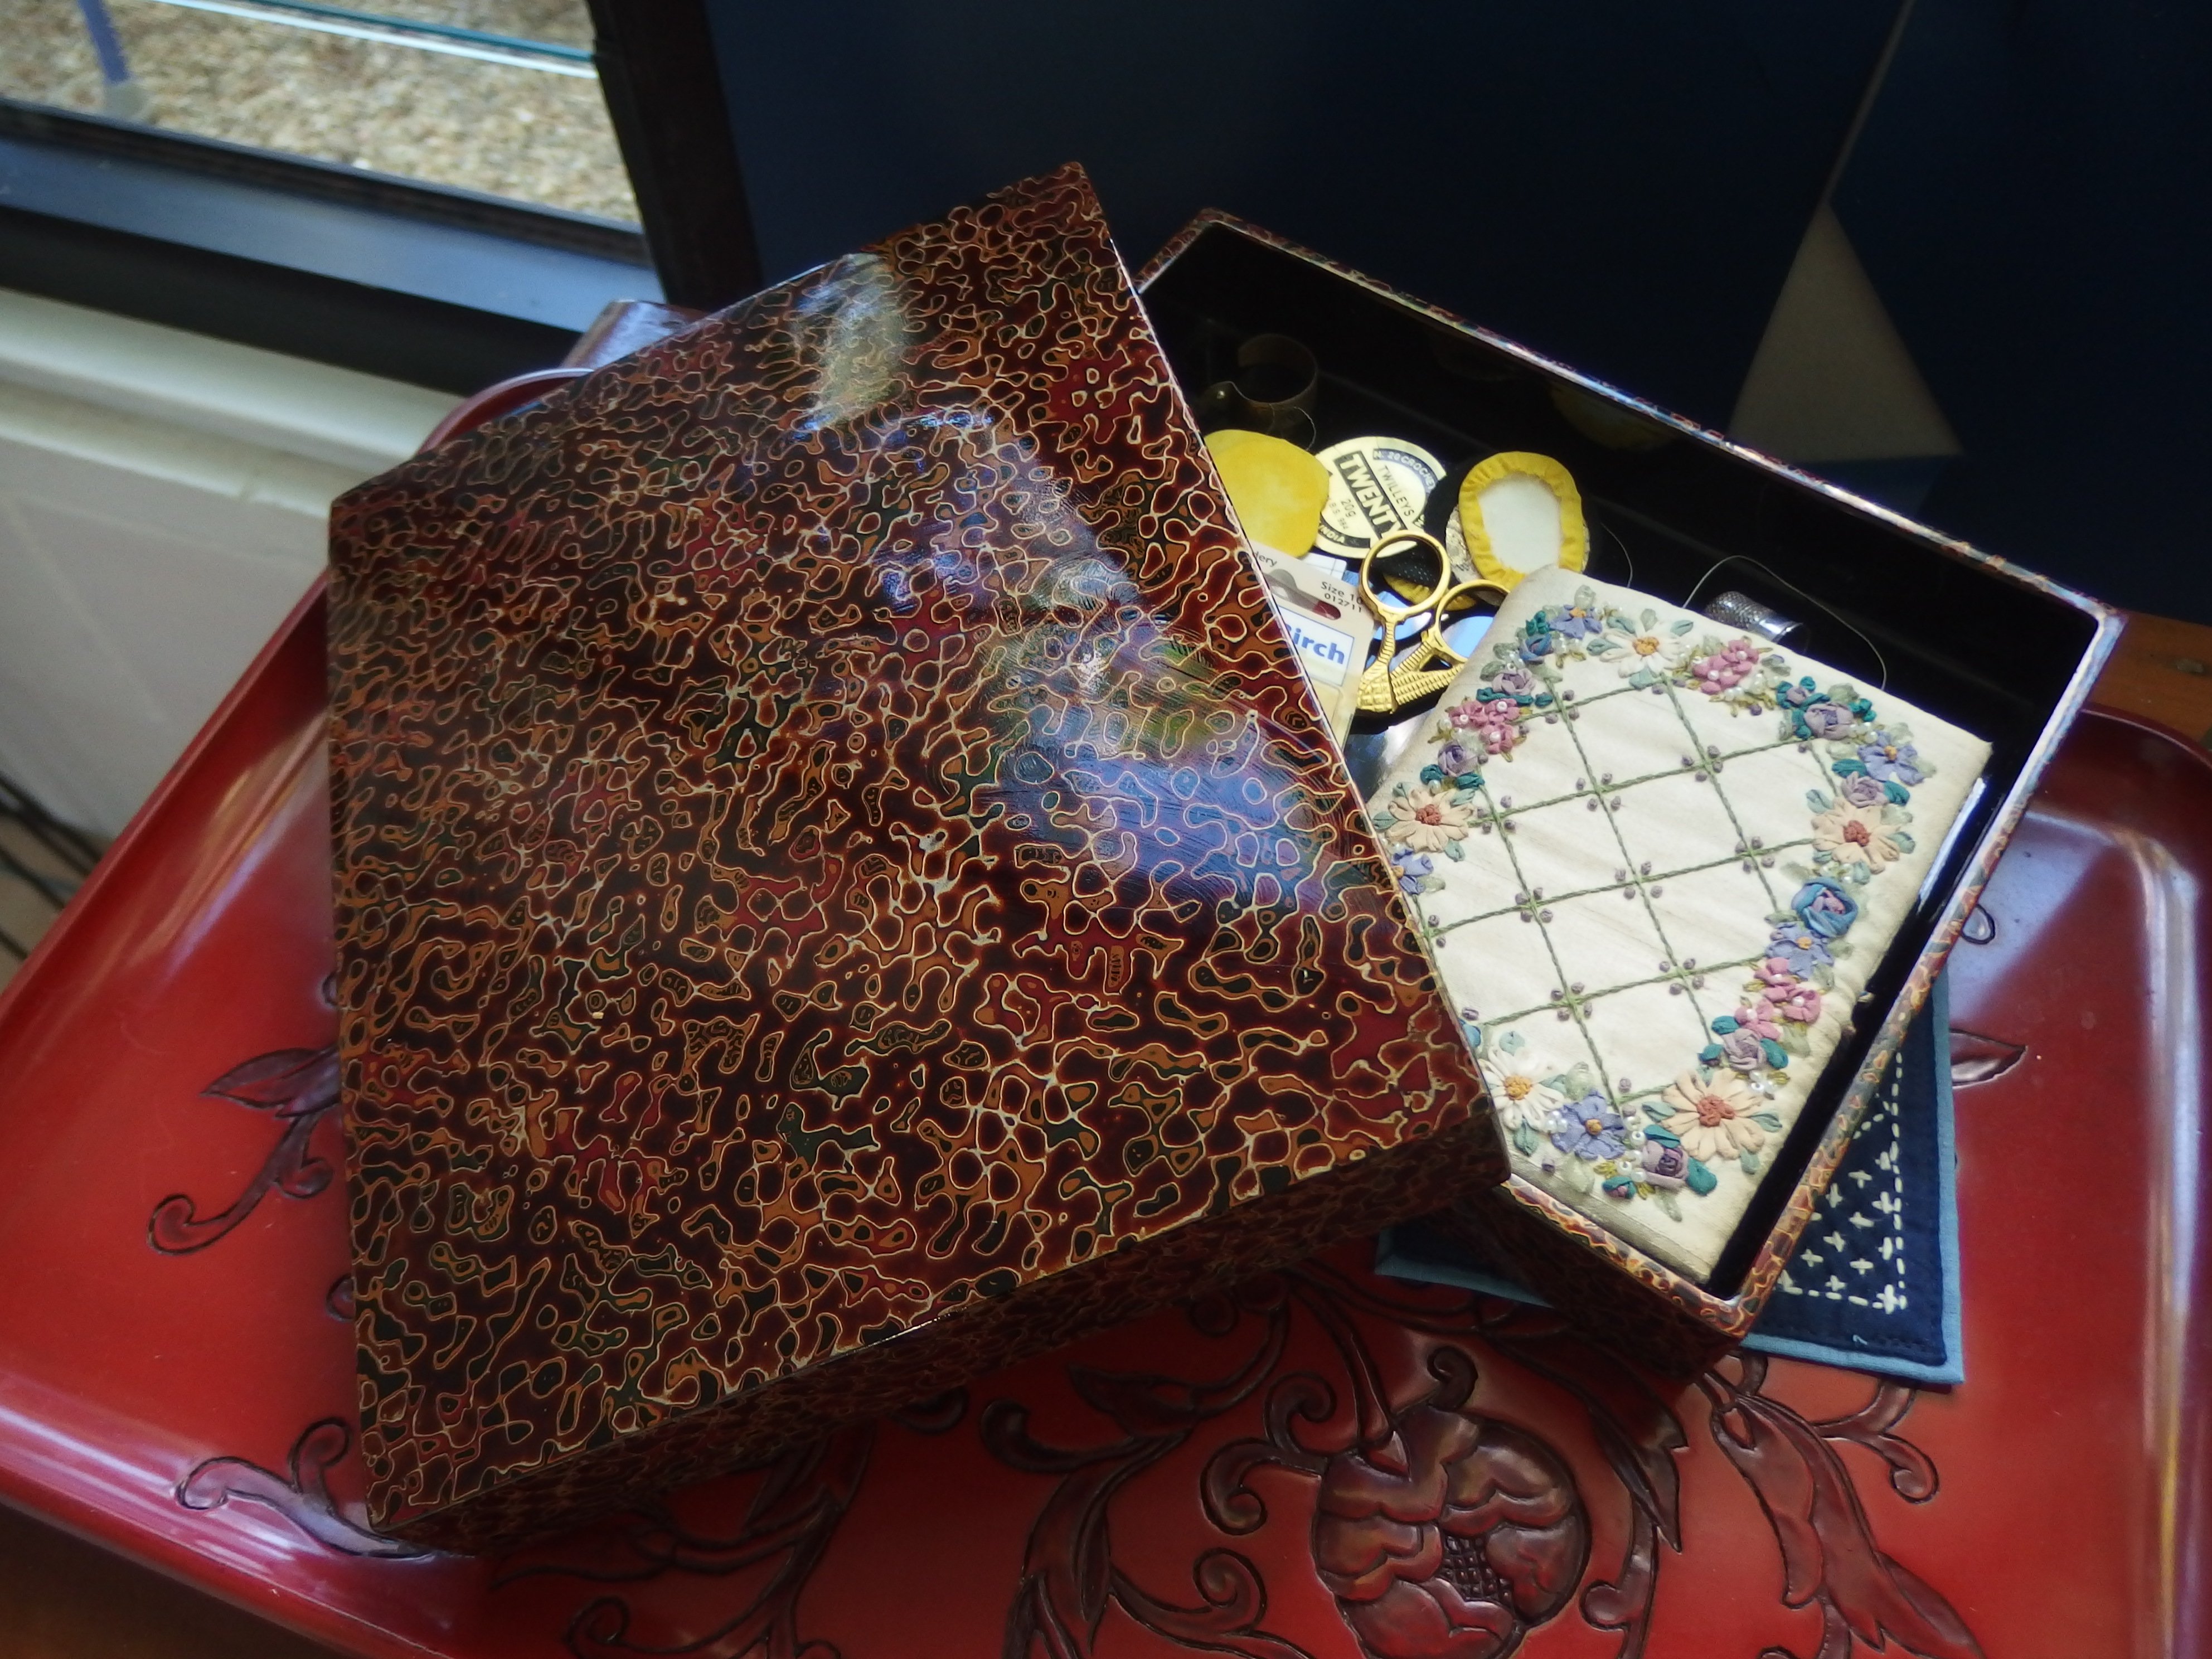
Antique Wakasa Kaigara lacquer box. If you like this box as much as I do look up how it is made http://shokunindou.com/articles/wakasa-nuri-lacquerware It is hard to believe that some one would spend a year to make a box! but when you see it in person and how it glows and the depth to it you can believe it. I just hope I can restore that glow for future generations to love and admirer. I will give it to a museum if I do get it to glow again.

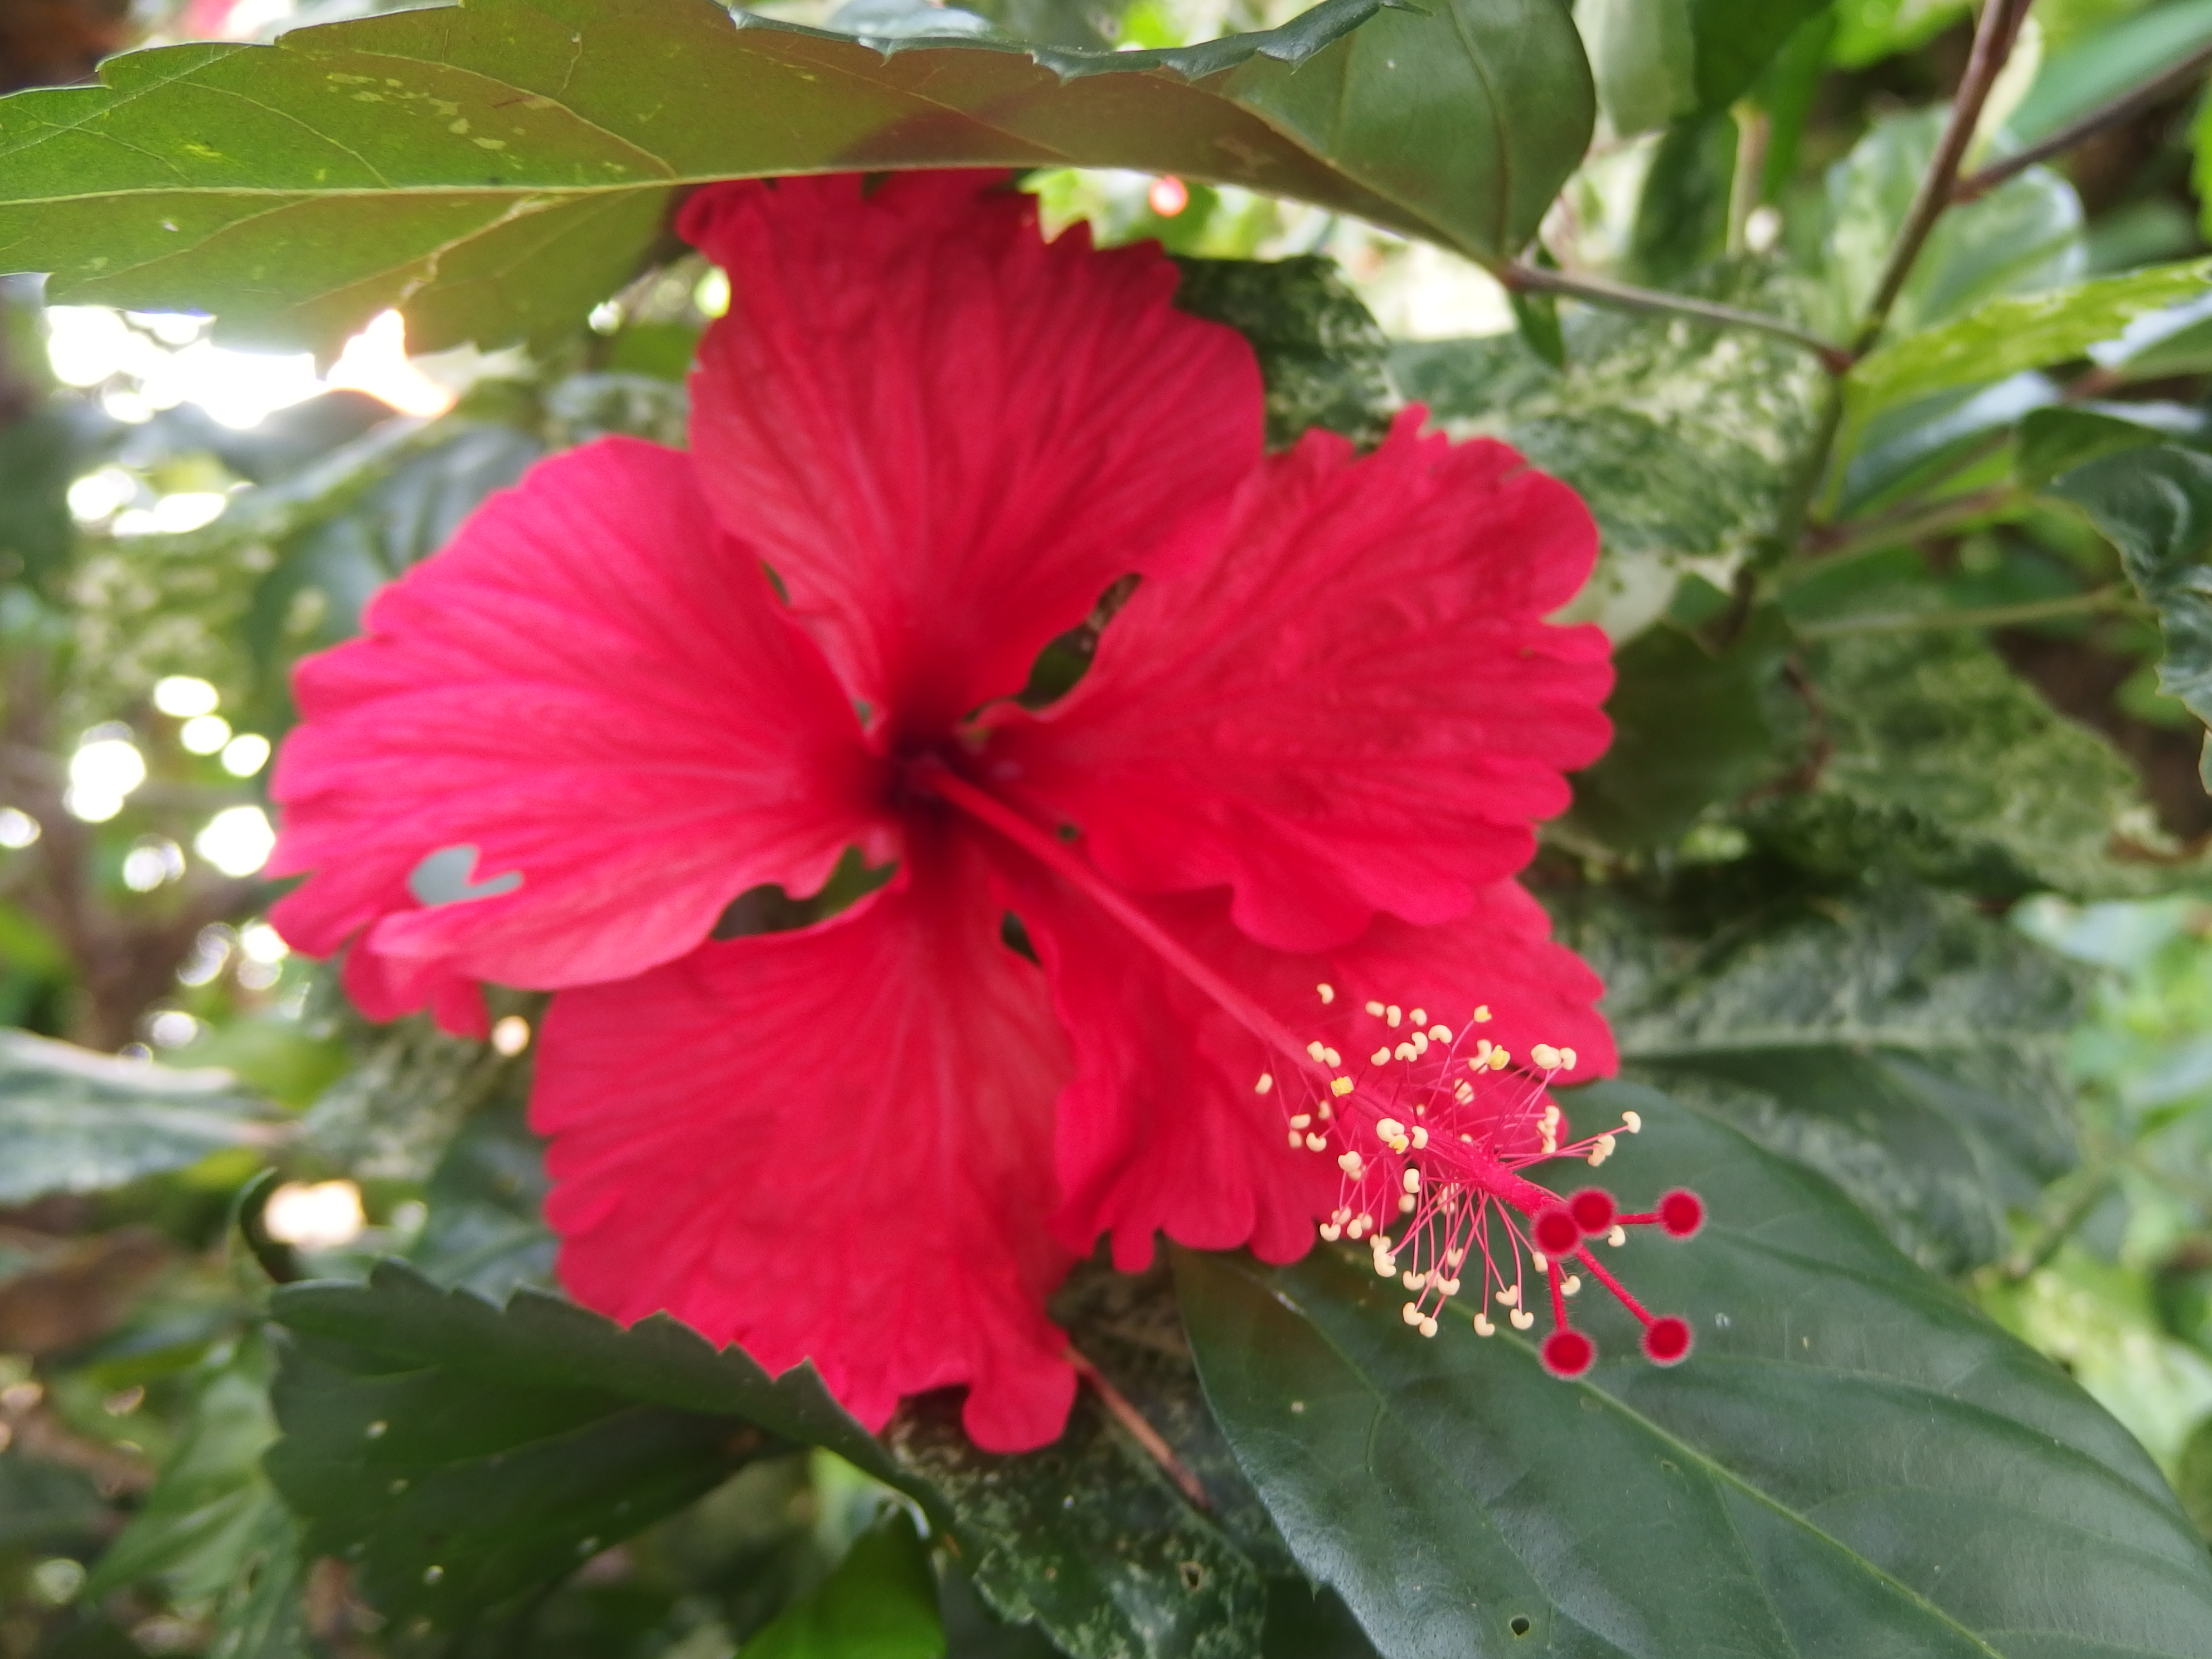
This native creeper is flowering on the trees at the bottom of the gully by the river it will finally kill the trees it is covering. From my kitchen window it looks like a waterfall of flowers,
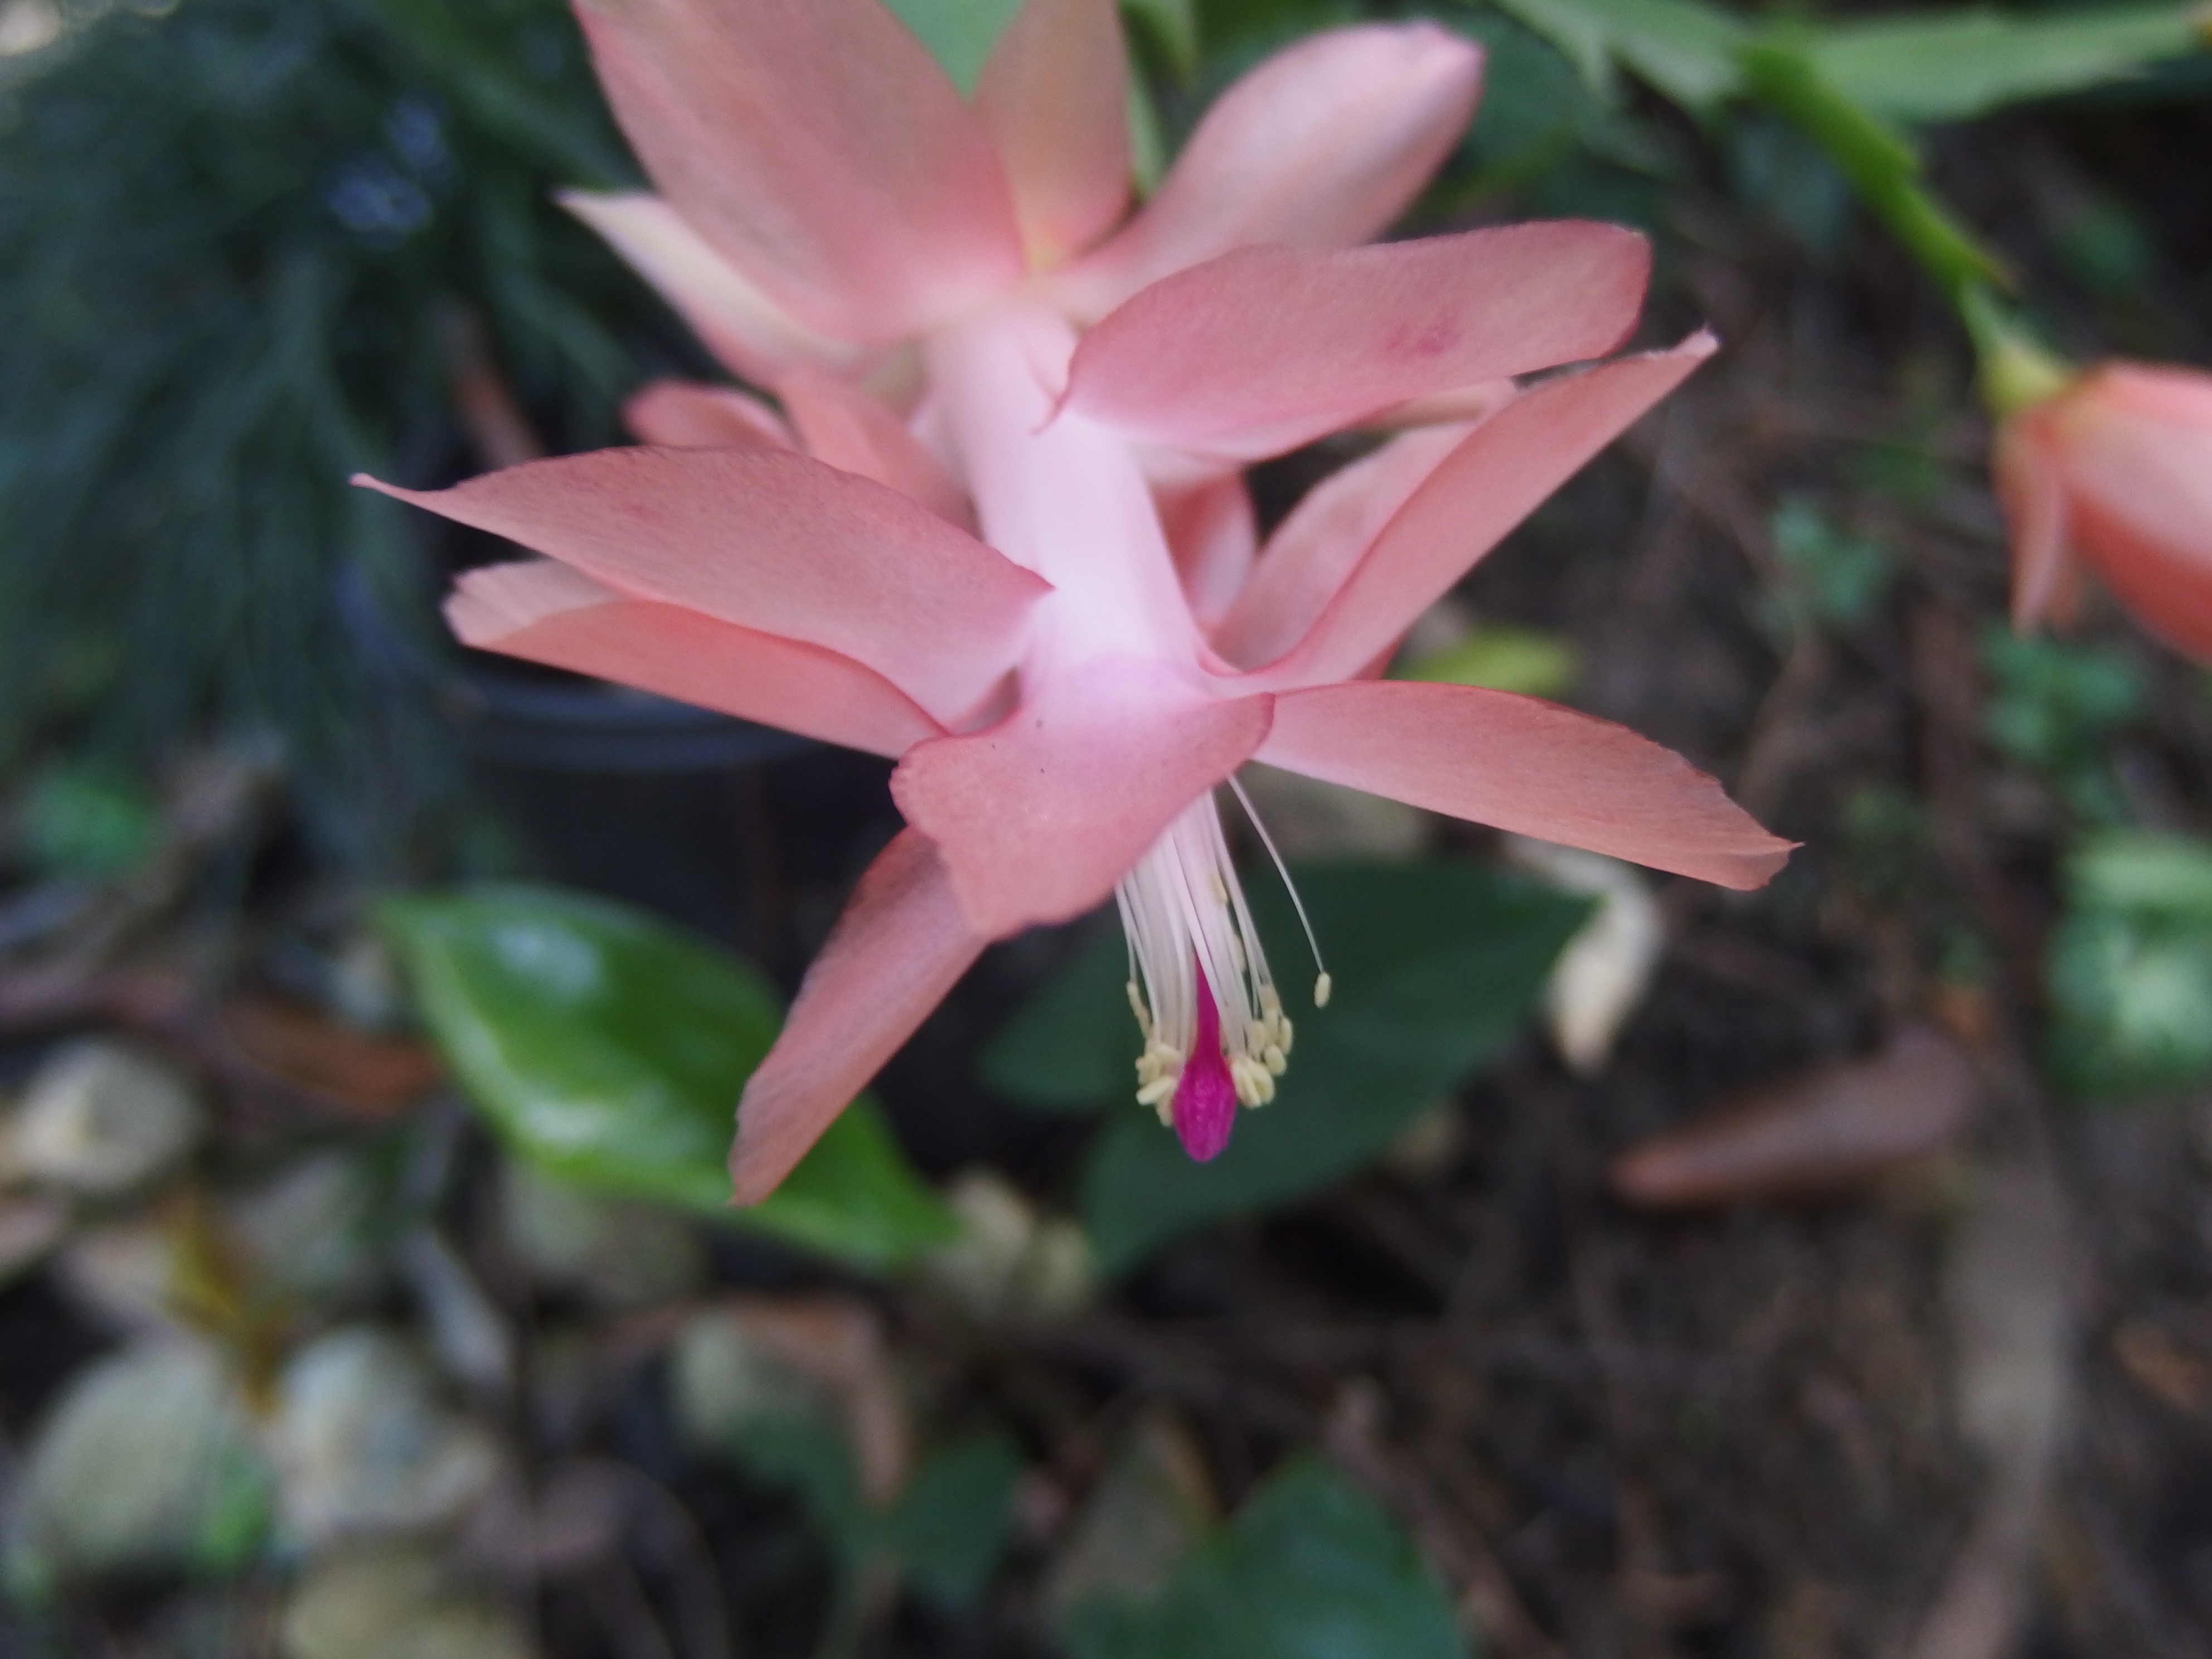
Just starting to flower, these grow out doors here.
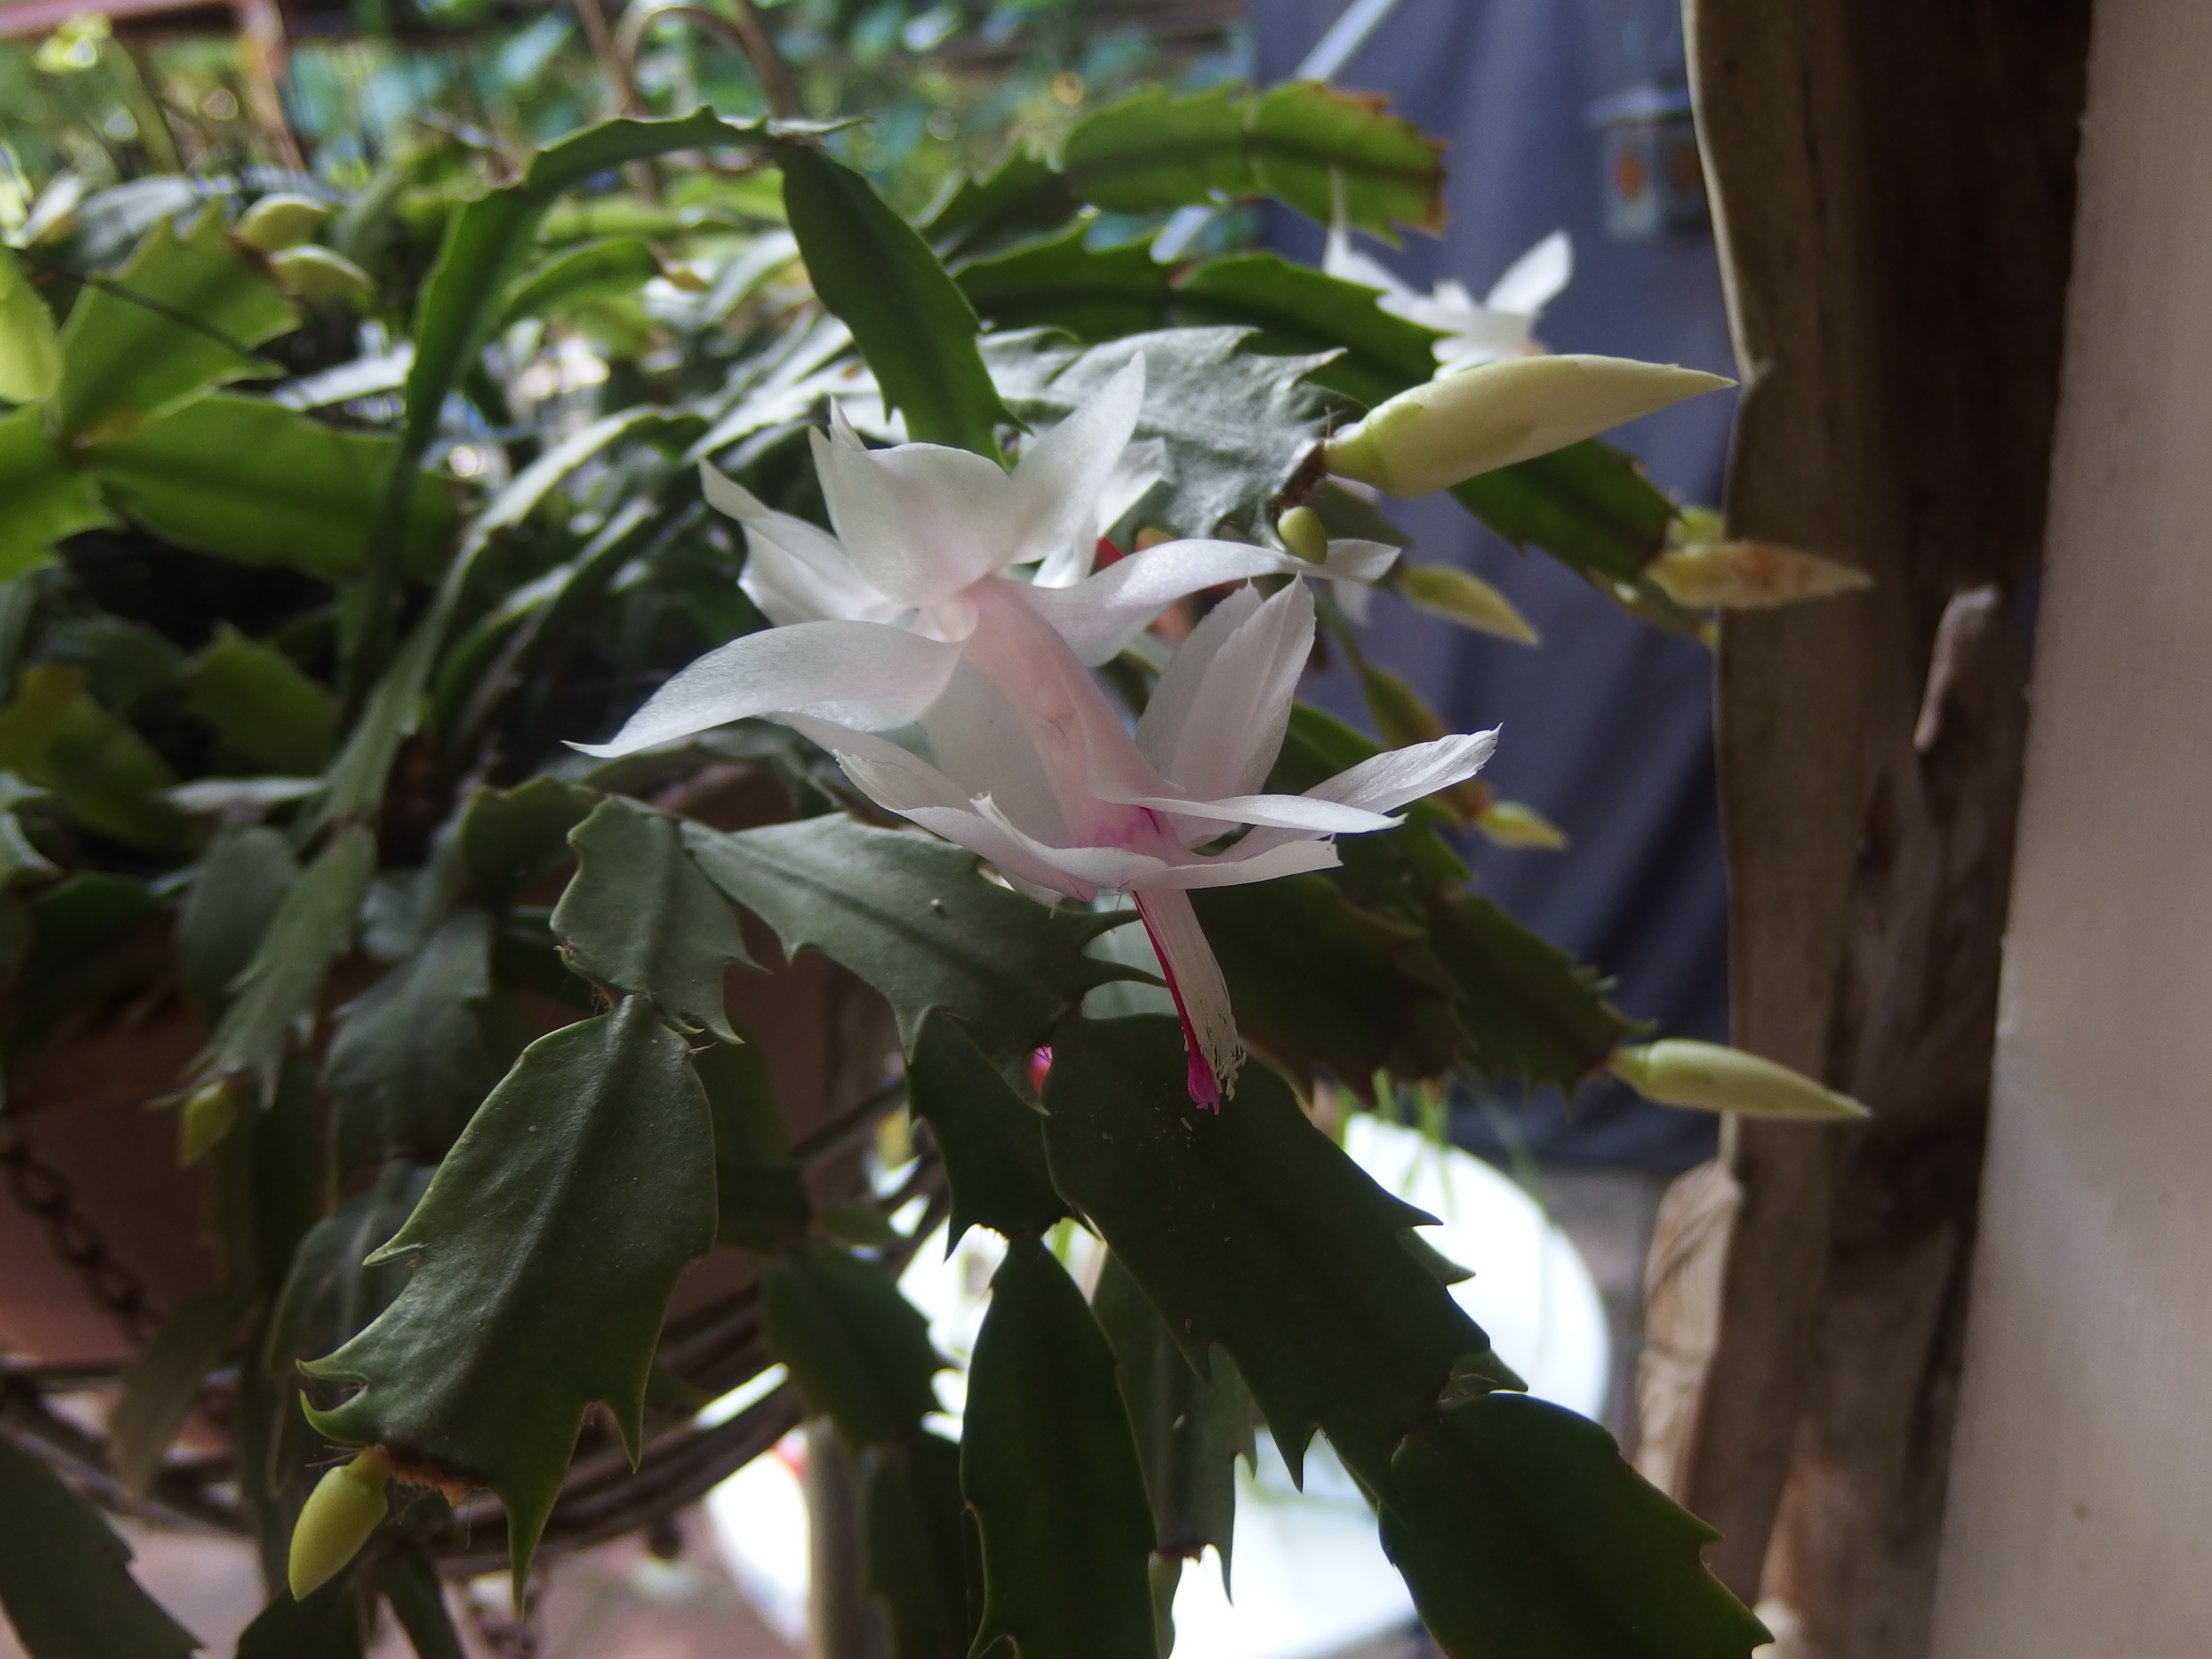
White one just coming in to flower too.
Stunning red.
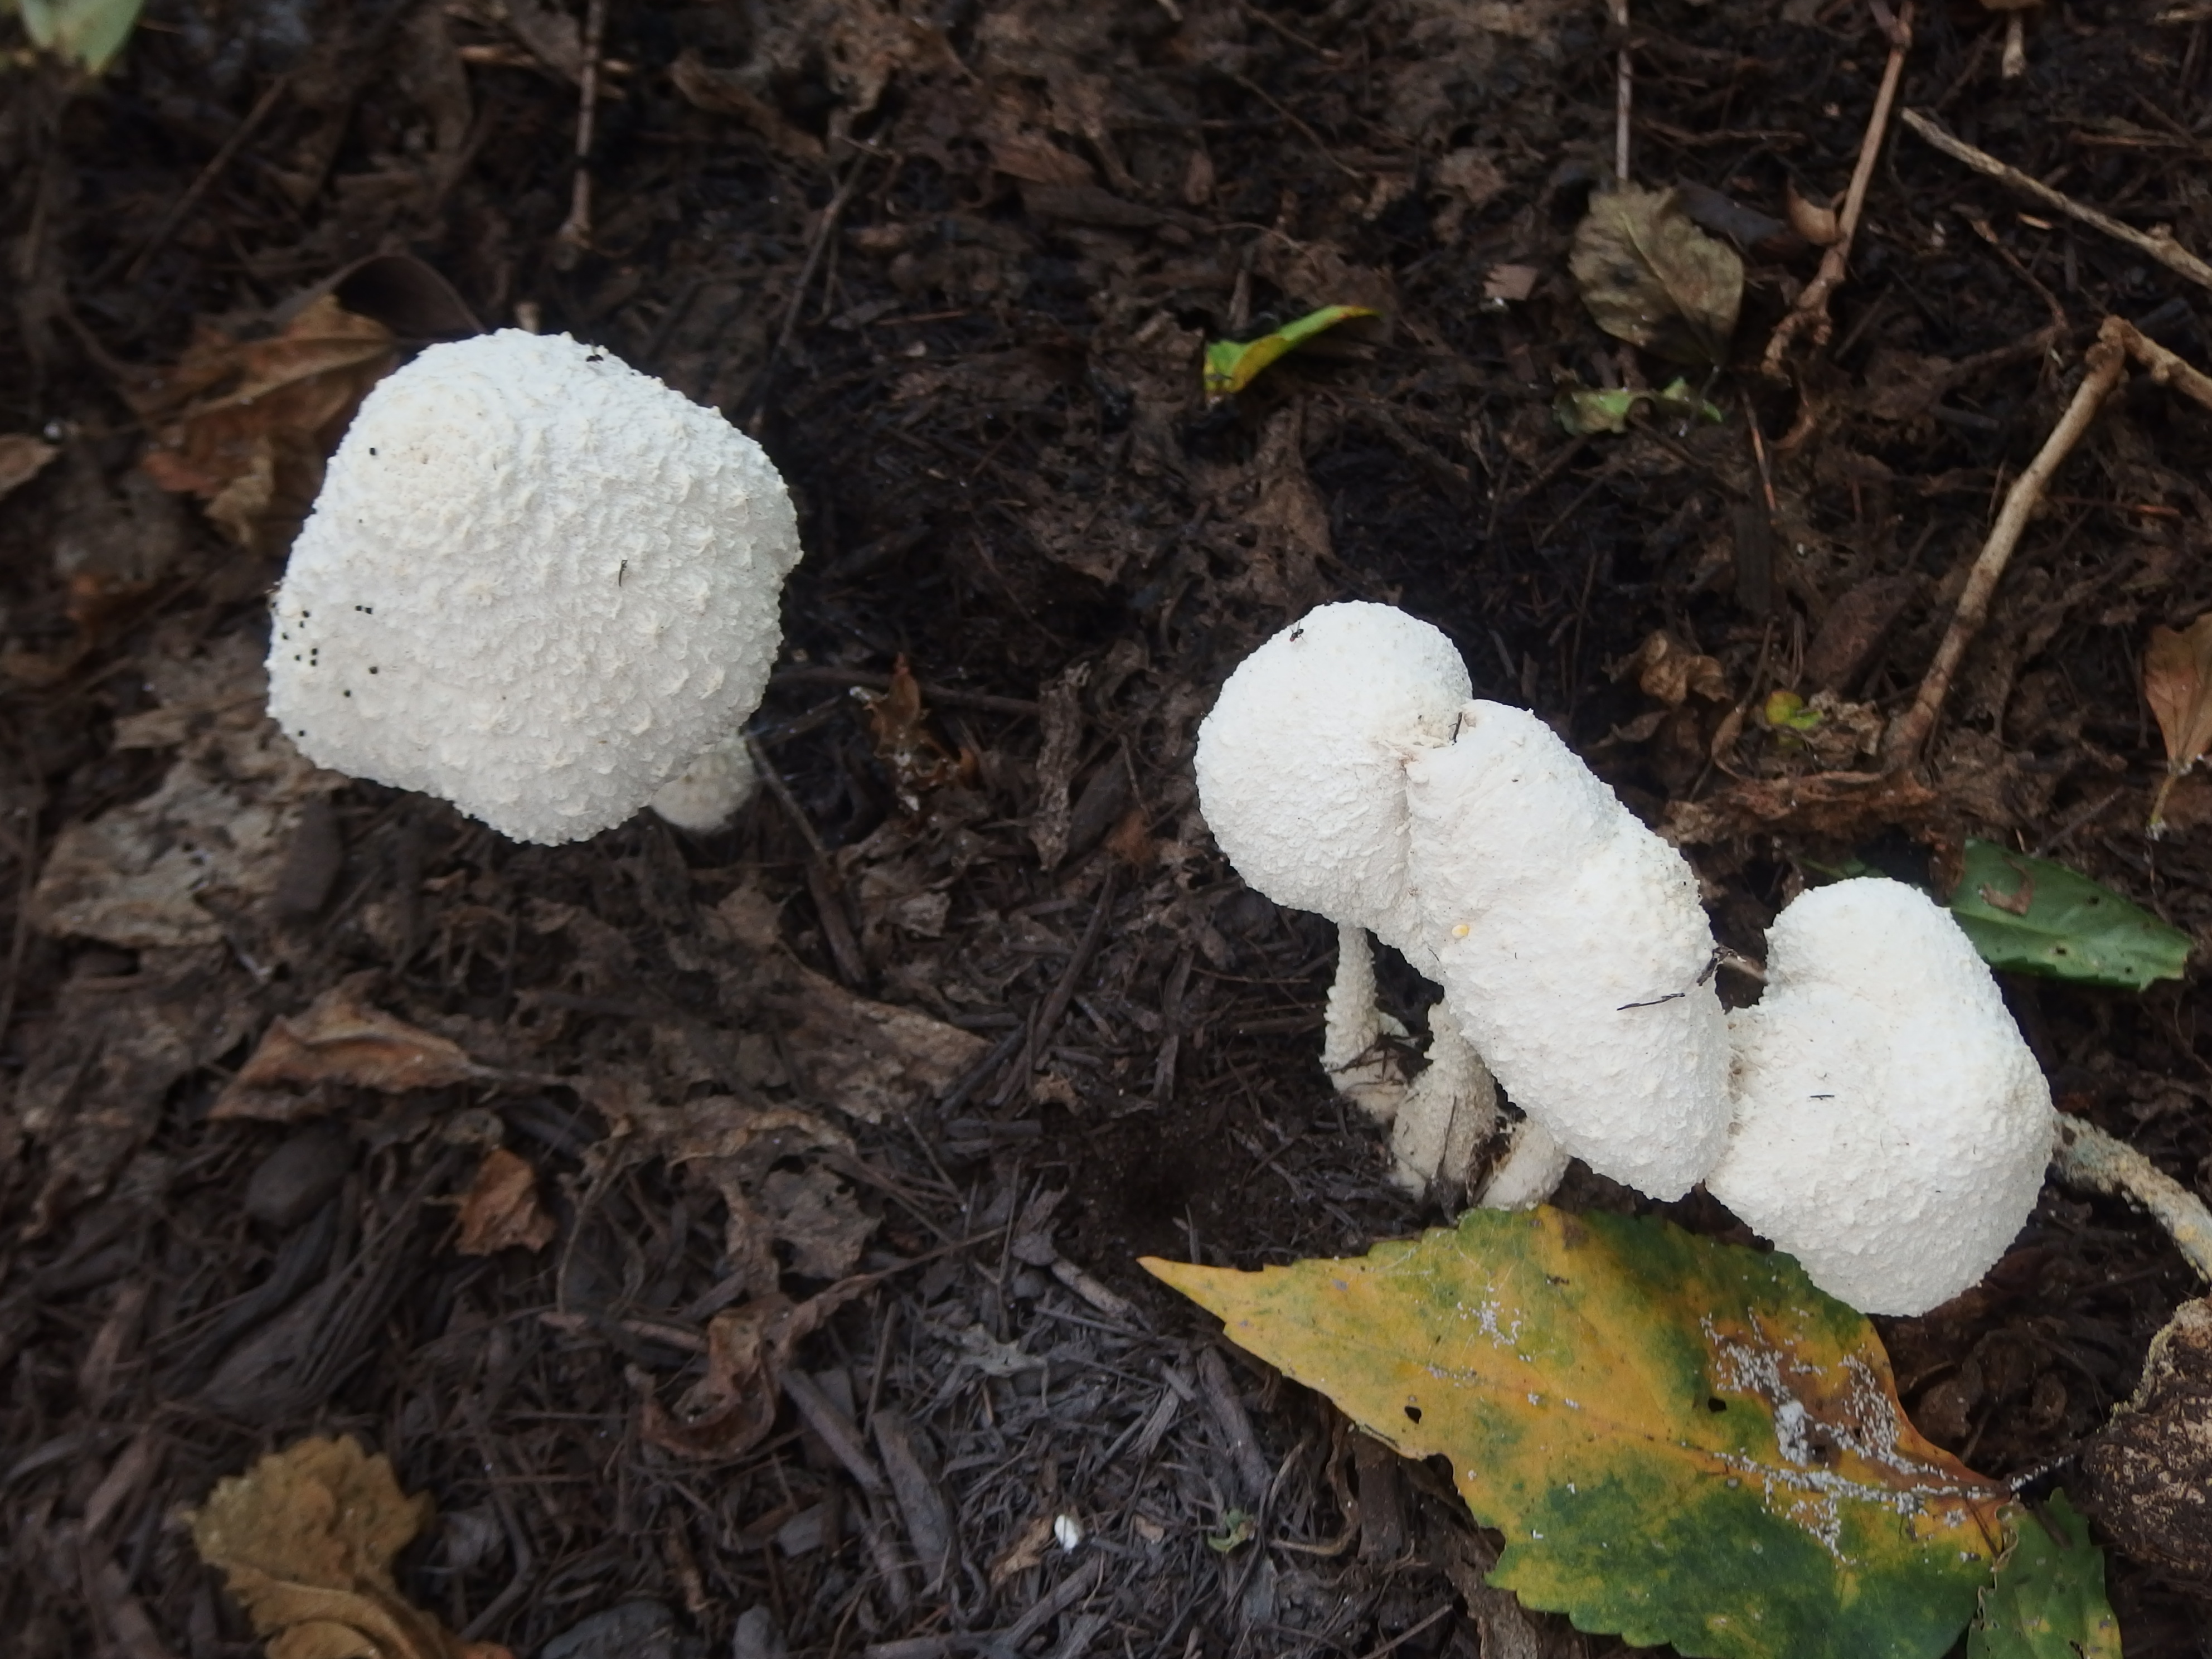
Pure white wee toadstools I looked but could not see any fairies under them?
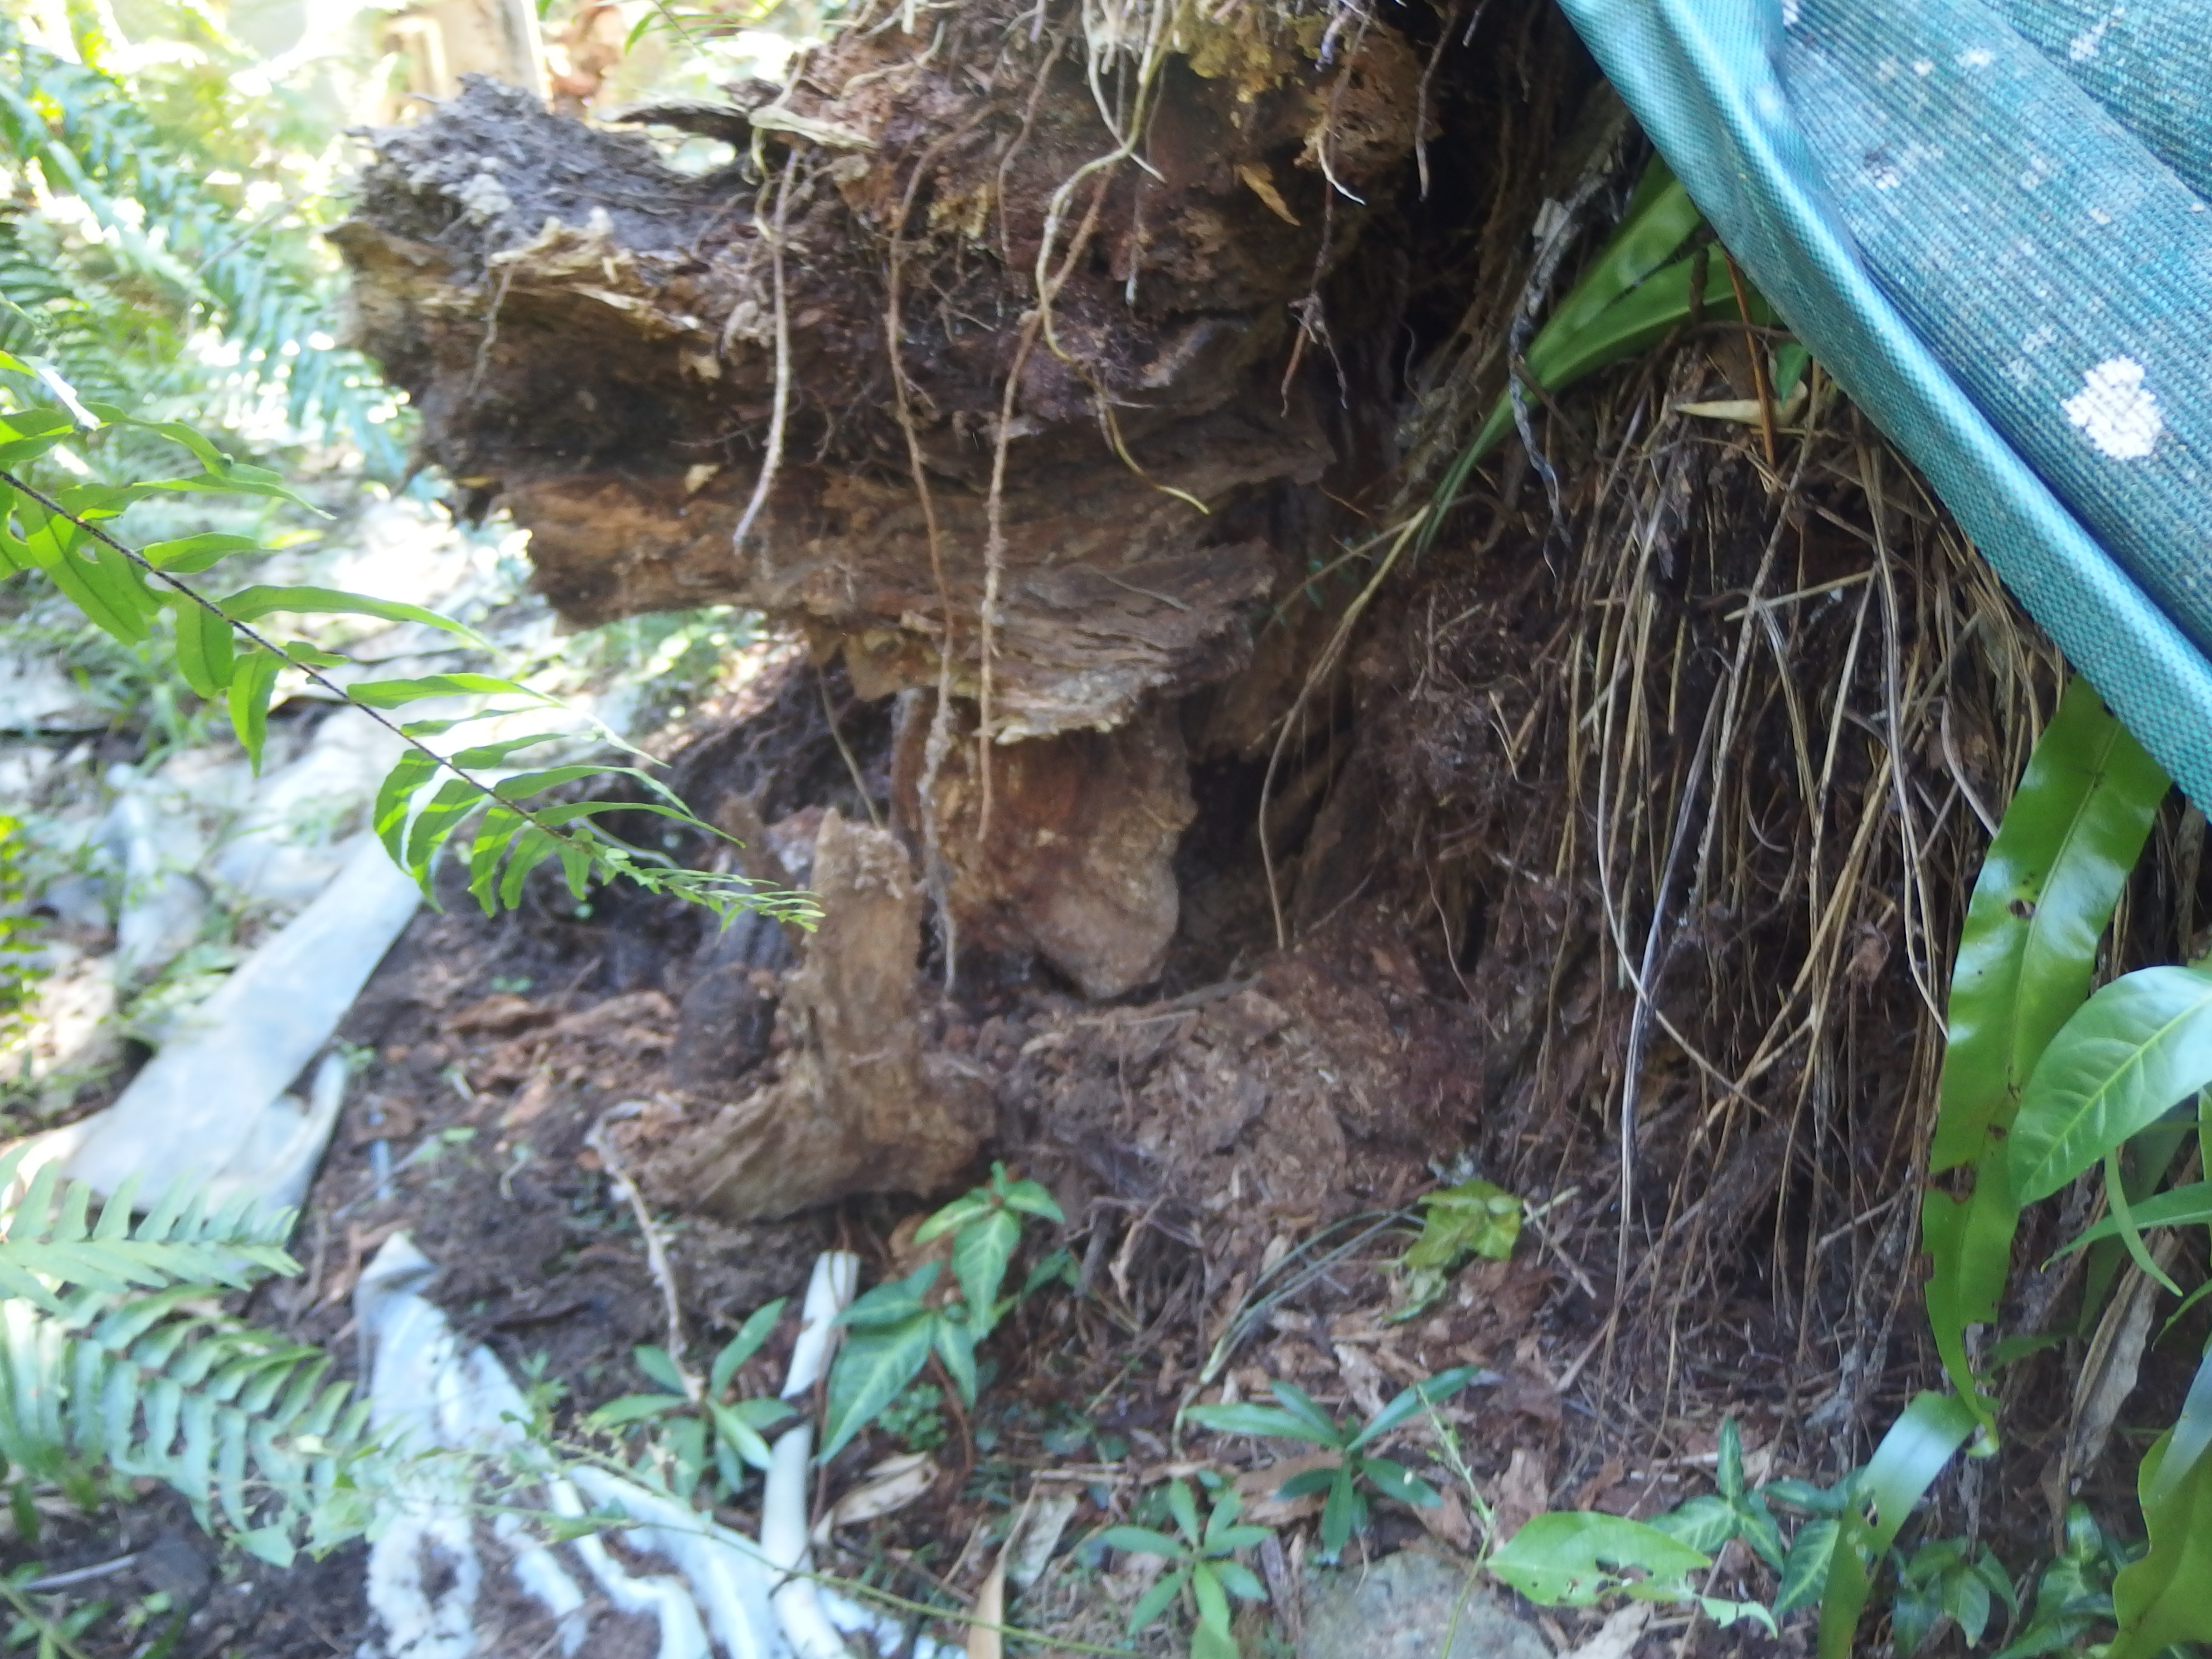
Roots of the giant tree not much left of them???? When we first moved in here over 20 years ago there was a giant tree beside the swimming pool it was dying but much to our surprise it was still there years later but this year with all the rain it slowly started to come down. Fortunately for us the trees and palms around it stopped it from crashing down and destroying many trees. We lost about 5 palms instead of dozens.

the trunk is about 1 1/2 metres through
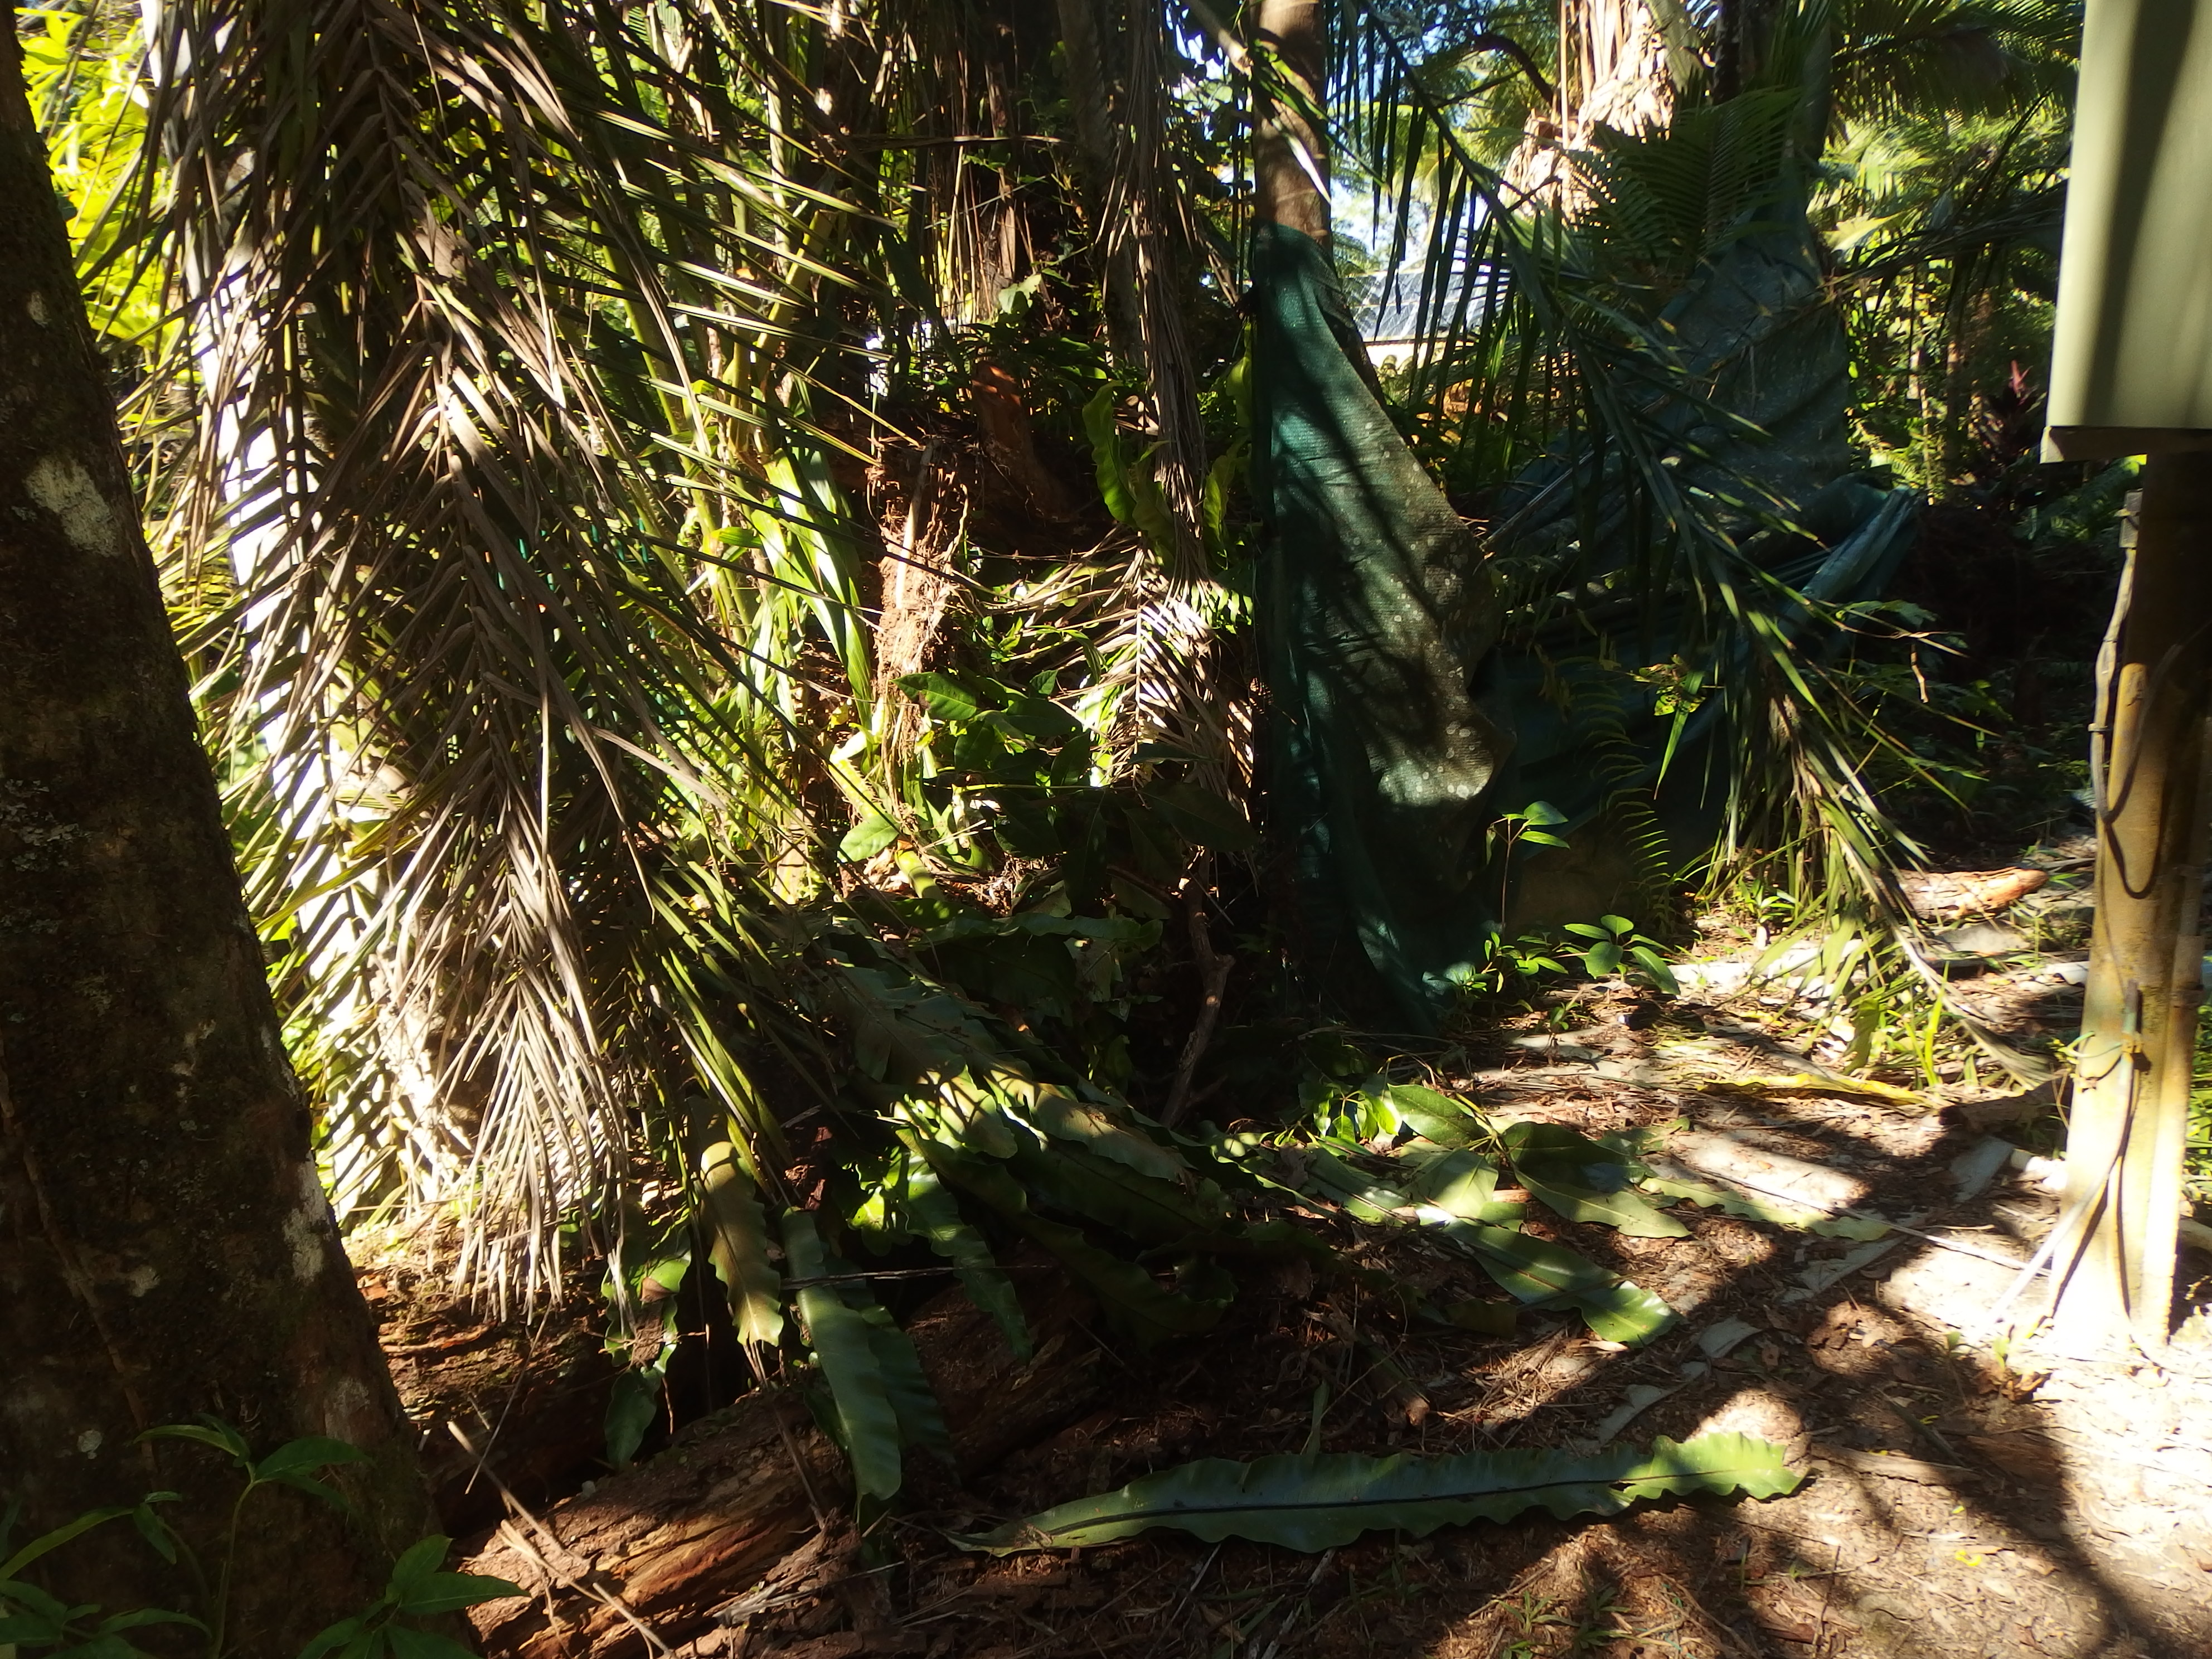
we will have to leave the trunk were it is all 5 metres as it is just to huge for our chainsaws, it will still be there in 10 or 15 years time till it rots away.
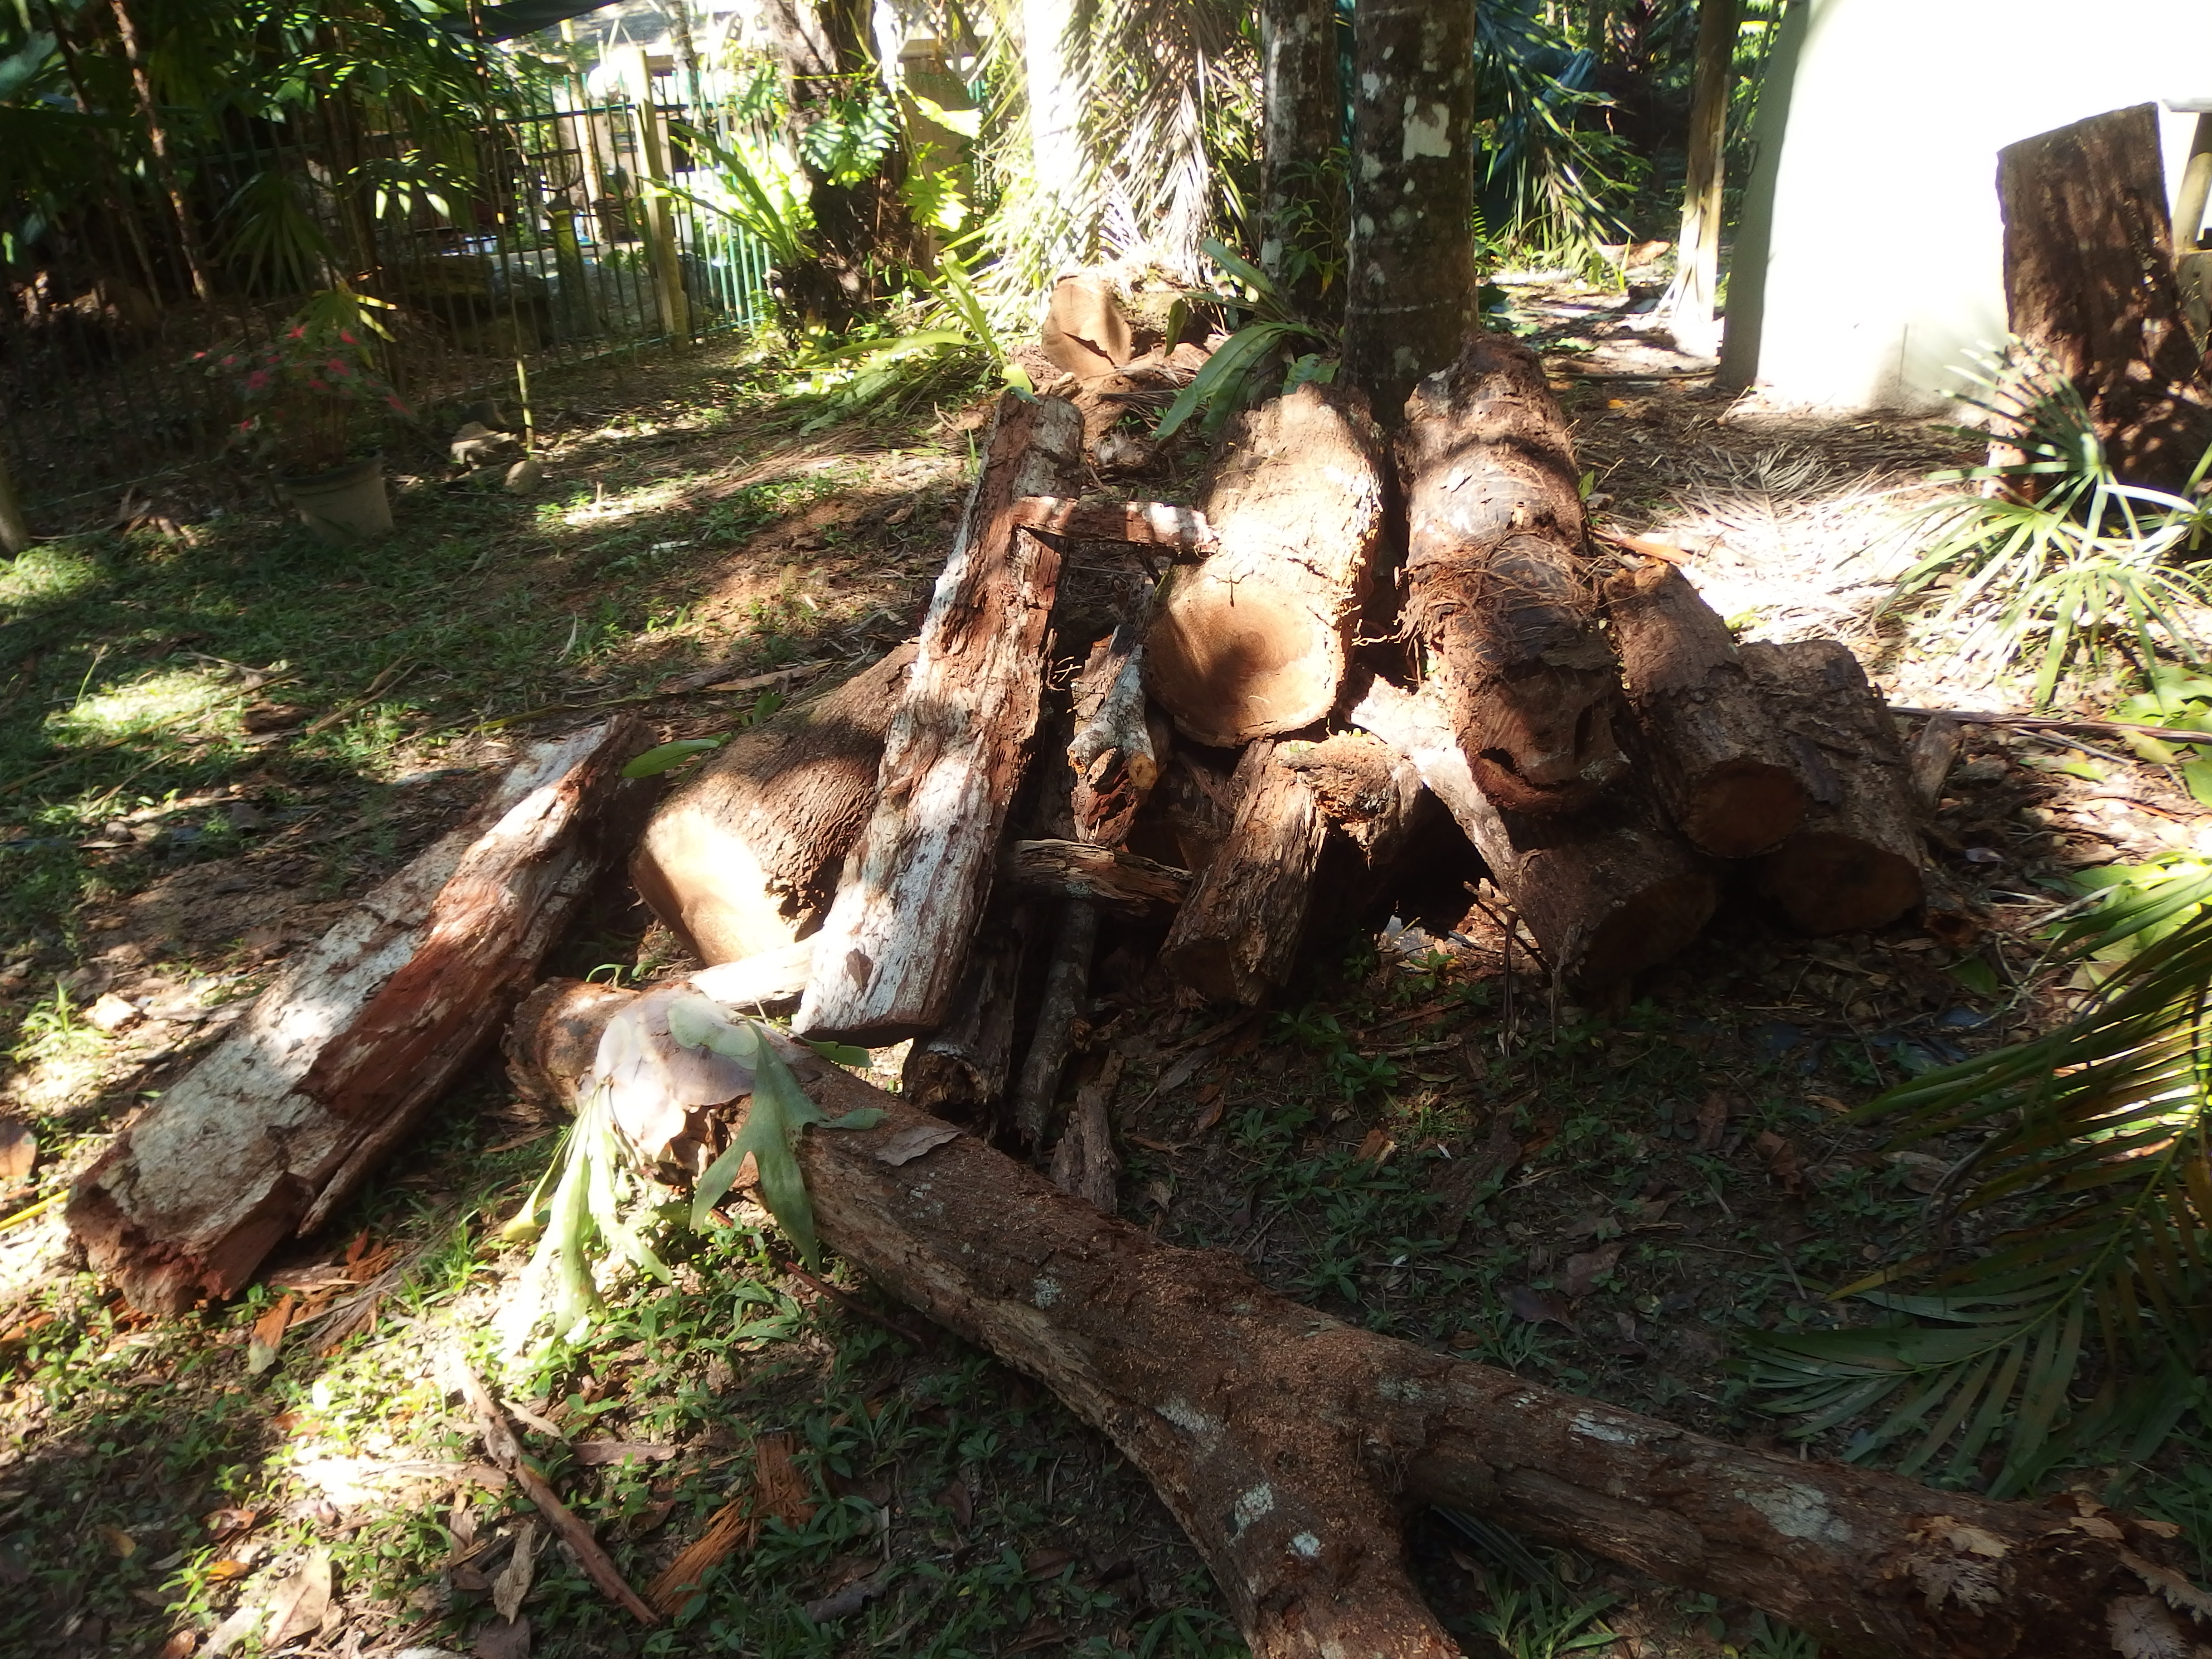
One of our DS’s came in and started cleaning up he has a firebox so this will be great dry wood for it.
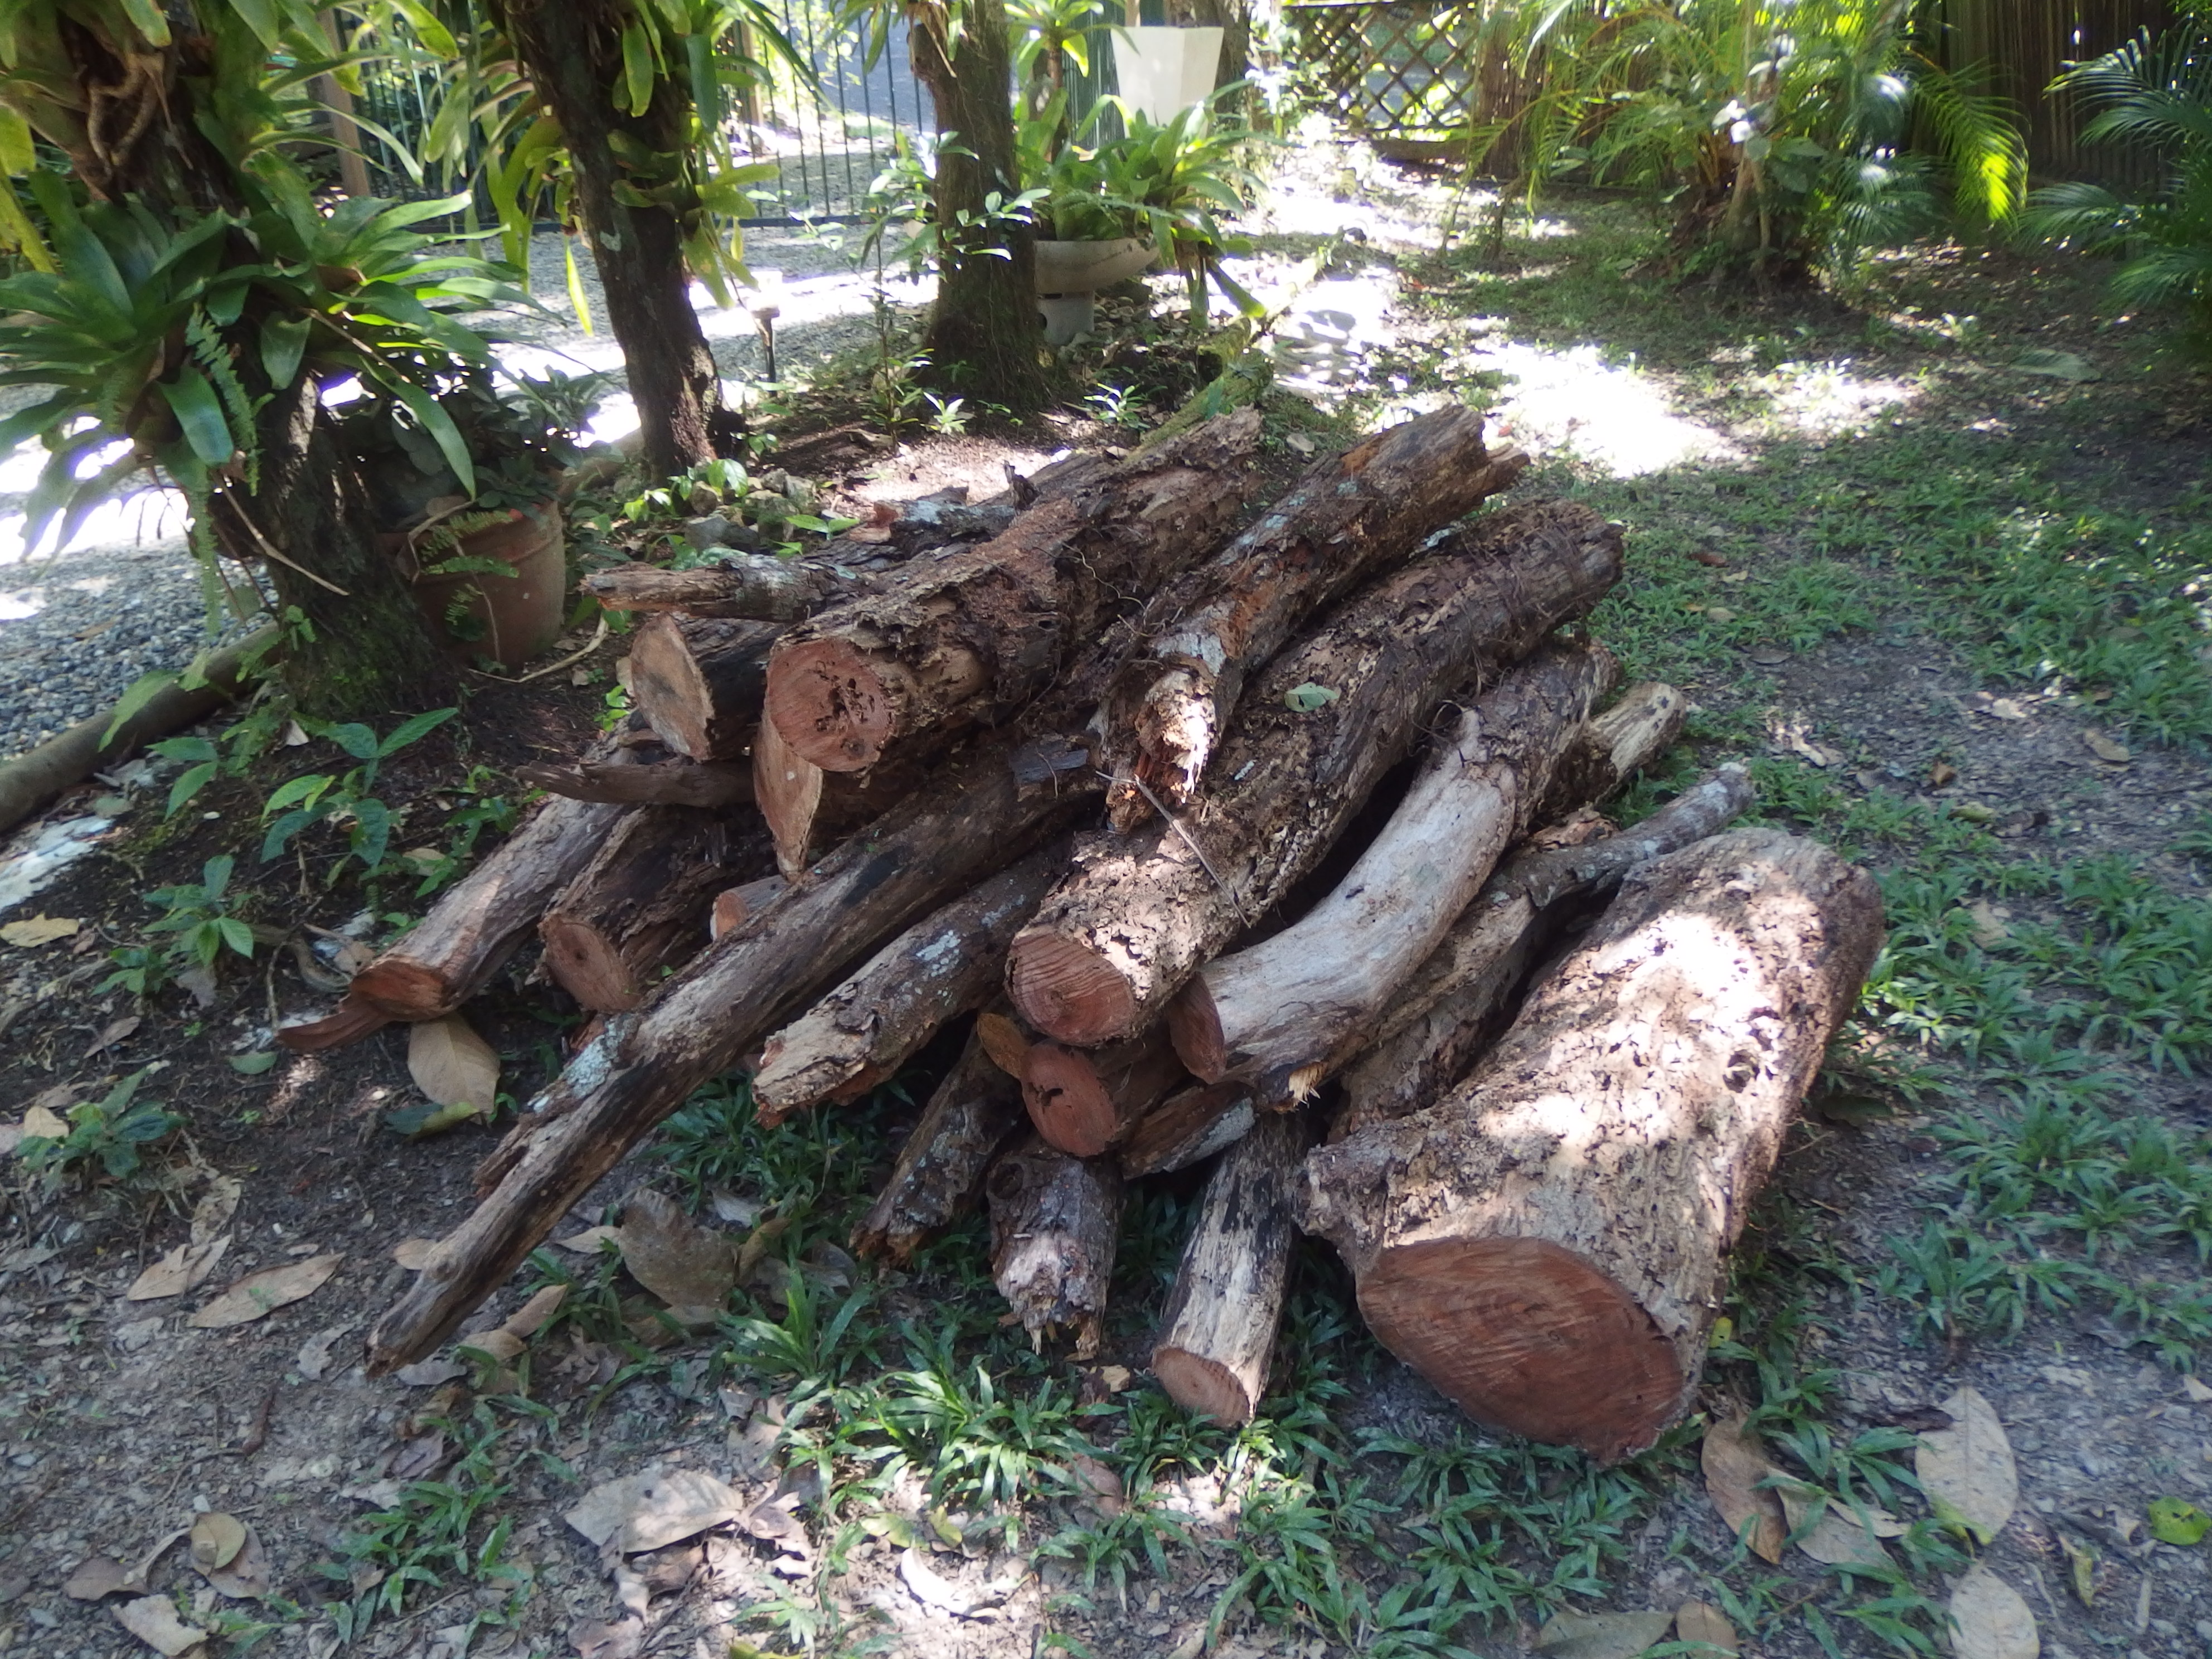
Another pile logs ready to be loaded and taken away Bless him for helping us with this job, Rod and I are past this kind of clean up now LOL
Off to link up with Esther over on her blog I missed last week as I first slashed my leg with a gardening knife and had 8 stitches and had to have a tetanus injection that made me feel sick then I picked up a vertigo virus which is still with me but I can sit up now and sew so Im happy LOL .
How I love Wednesday mornings my time to read every ones links and take time out for just me.
Thanks for dropping in Cheers ALL Glenda
love your flowers and your embellishment of the Sue blocks are cute. Good idea on the green paper cut out ovals for the LE – I saw the finished quilt that Esther showed a couple weeks ago or last week of of LE – beautiful
Hi Karen we have had no rain for 3 days and the flowers are all starting to pop out at last to see the sun that has been missing for months, I’m very much a sun person not to sit or bath in but just to feel the Rays warmth makes me happy. There are many LE been finished this year, Narelles won 3 major prizes at the Australian Quilt show this year and it deserved those ribbons it is truly a work of Art. Hugs Glenda who should be in bed as it’s midnight LOL
What a fun read, Glenda! Thanks so much for sharing your quilty adventures and beautiful, interesting photos! Your sashiko quilting stitches look perfect! Got a big kick out of your upside down thimble story, too. 🙂
Hi Jeanne every time I have Seen my sashiko thimble to day I have laughed at myself, thing is how did I even manage to use it like I did LOL. I must see if I can find the video again so I can share it as it was so clear how she used the thimble and needle. Take care and have fun quilting. Glenda
Be careful Glenda, a cut like that is serious! Your silkwork is wonderful. I am amazed at your patience. Your new sewing box is beautiful and you do have the patience to restore it. Blessings, Gretchen
Hello dear Gretchen, yes you are right but lucky I was using a razor garden knife from Japan they a extremely sharp so it was a very clean cut even though deep. It was stitched within 30 mins of doing it and the stitches came out last Friday 7 days later and it has healed beautifully and I don’t even think I will have a scare. I’m sitting looking at my box, I left the 3rd coating of oil on it all day and then polished it off tonight and I’m so surprised at how much better it looks all ready. So I must be doing the right thing. Sitting here doing sashiko quilting and the quilt is keeping me lovely and warm. I will be sorry to finish hand quilting this quilt. But I have a pile more siting in the wings to quilt LOL. Hugs Glenda
Dear Glenda
I love Sue bonnets boots! Your LE is amazing. How did you print the green paper in one continuous strip? Or did you do it in pages and then joined them all? All my pages have to be printed, then pieced together, as the paper is 8.5 by 11 inches. Sometimes not all the image is printed on the page, so it is a bit of a puzzle, I then have to look at the bigger picture to fill in the blank areas, LOL!
Dear Maggie, I enjoyed making Sunbonnet footwear the most, from gum boots to dancing shoes, I made 32 different pairs of footwear for her LOL. She even had some clogs! Green paper is just coloured copy machine paper. Our paper for our printers is roughly 11 3/4 by 12 inches then I just joined all the pages till I had a full border. Yes your paper is much smaller and I would find that quiet frustrating but where there is a will there is away LOL. Hugs Glenda
Dear Glenda
Thanks for clearing up the paper size. Now a lot of things make sense. Your flowers are beautiful. We are having a drought here, so our gardens, especially. Grass is having a tough time. Tomorrow we will be close to 40C with the humidity! So indoors and doing sewing. LE is finally getting some little hearts and some flowers. Yours is such an inspiration. Esthers pattern is such a gift to us all. The pleasure to create such an amazing quilt. We should have a LE worldwide get together in a few years time. Dear Jane, the Stickle Quilt, had such a get together!
Then we can all meet and enjoy each other’s company and quilts.
Stitches? Oh my goodness Glenda, how did I miss that one?! Hope you are over that nasty vertigo flu today too. You always amaze me with your ability to jam pack so many things into one week 🙂