
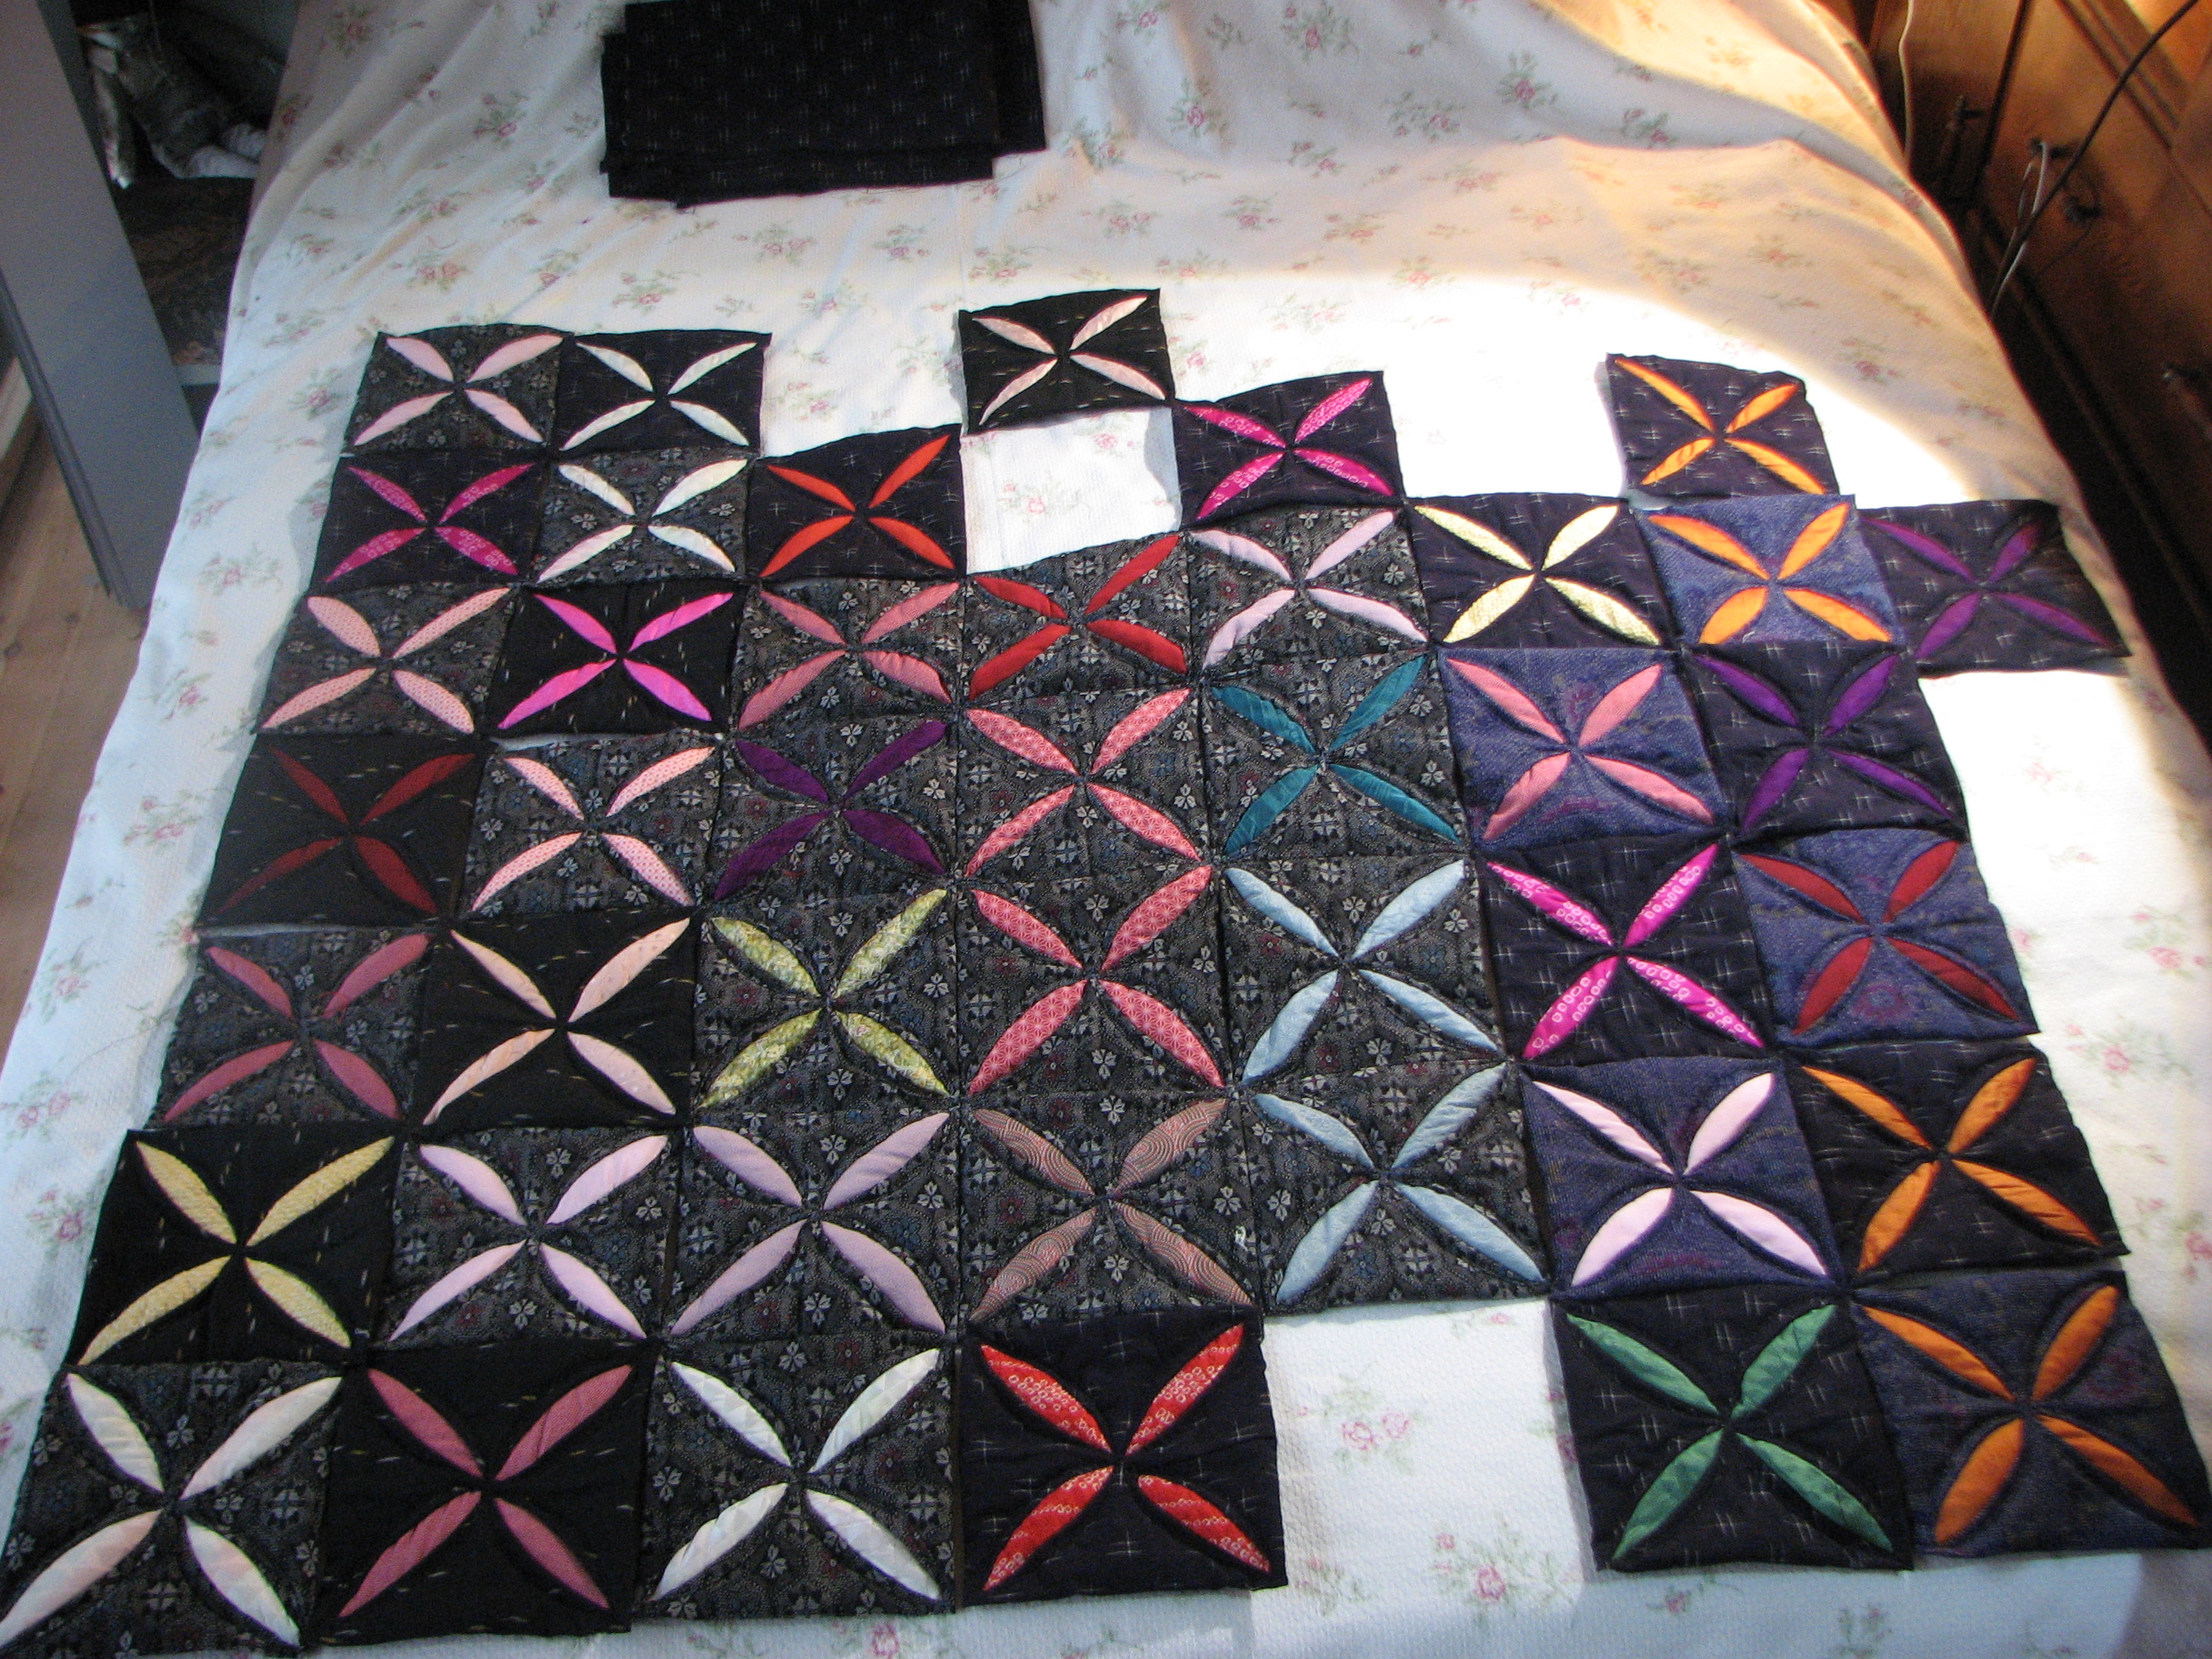
Cathedral windows made with wool fabric and silk squares; squares are Japanese woollen fabric with silks peeping through
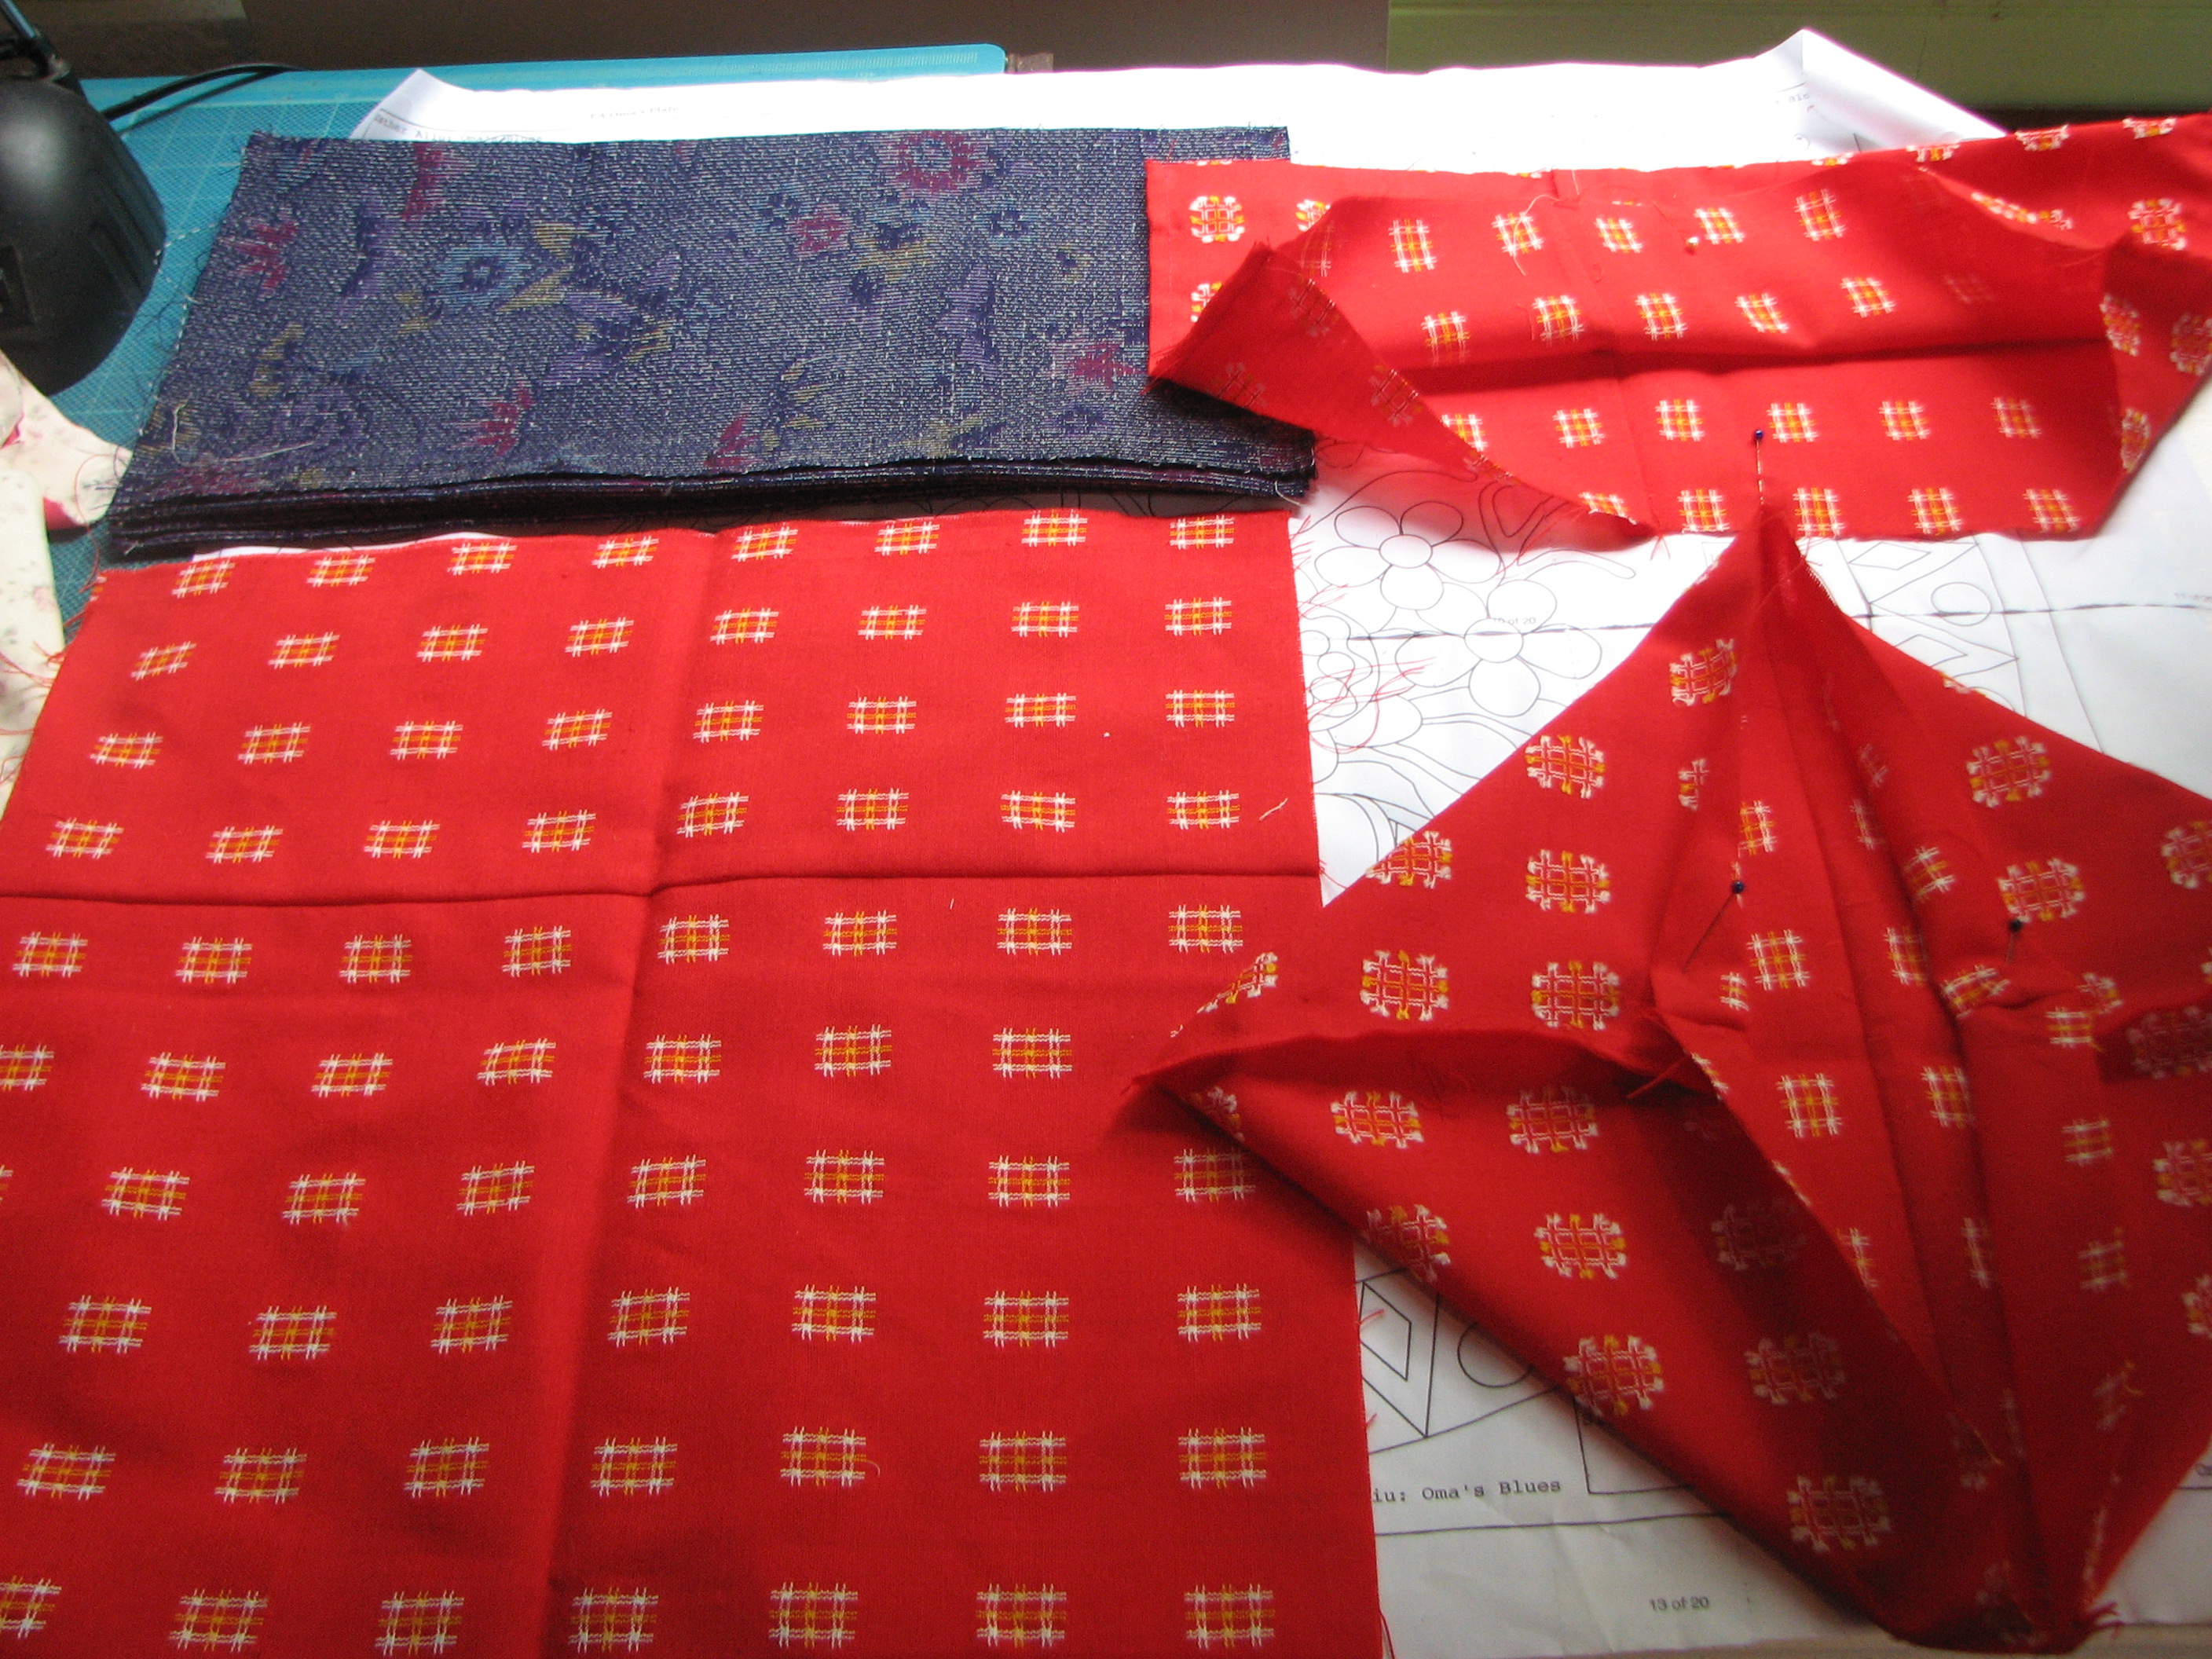
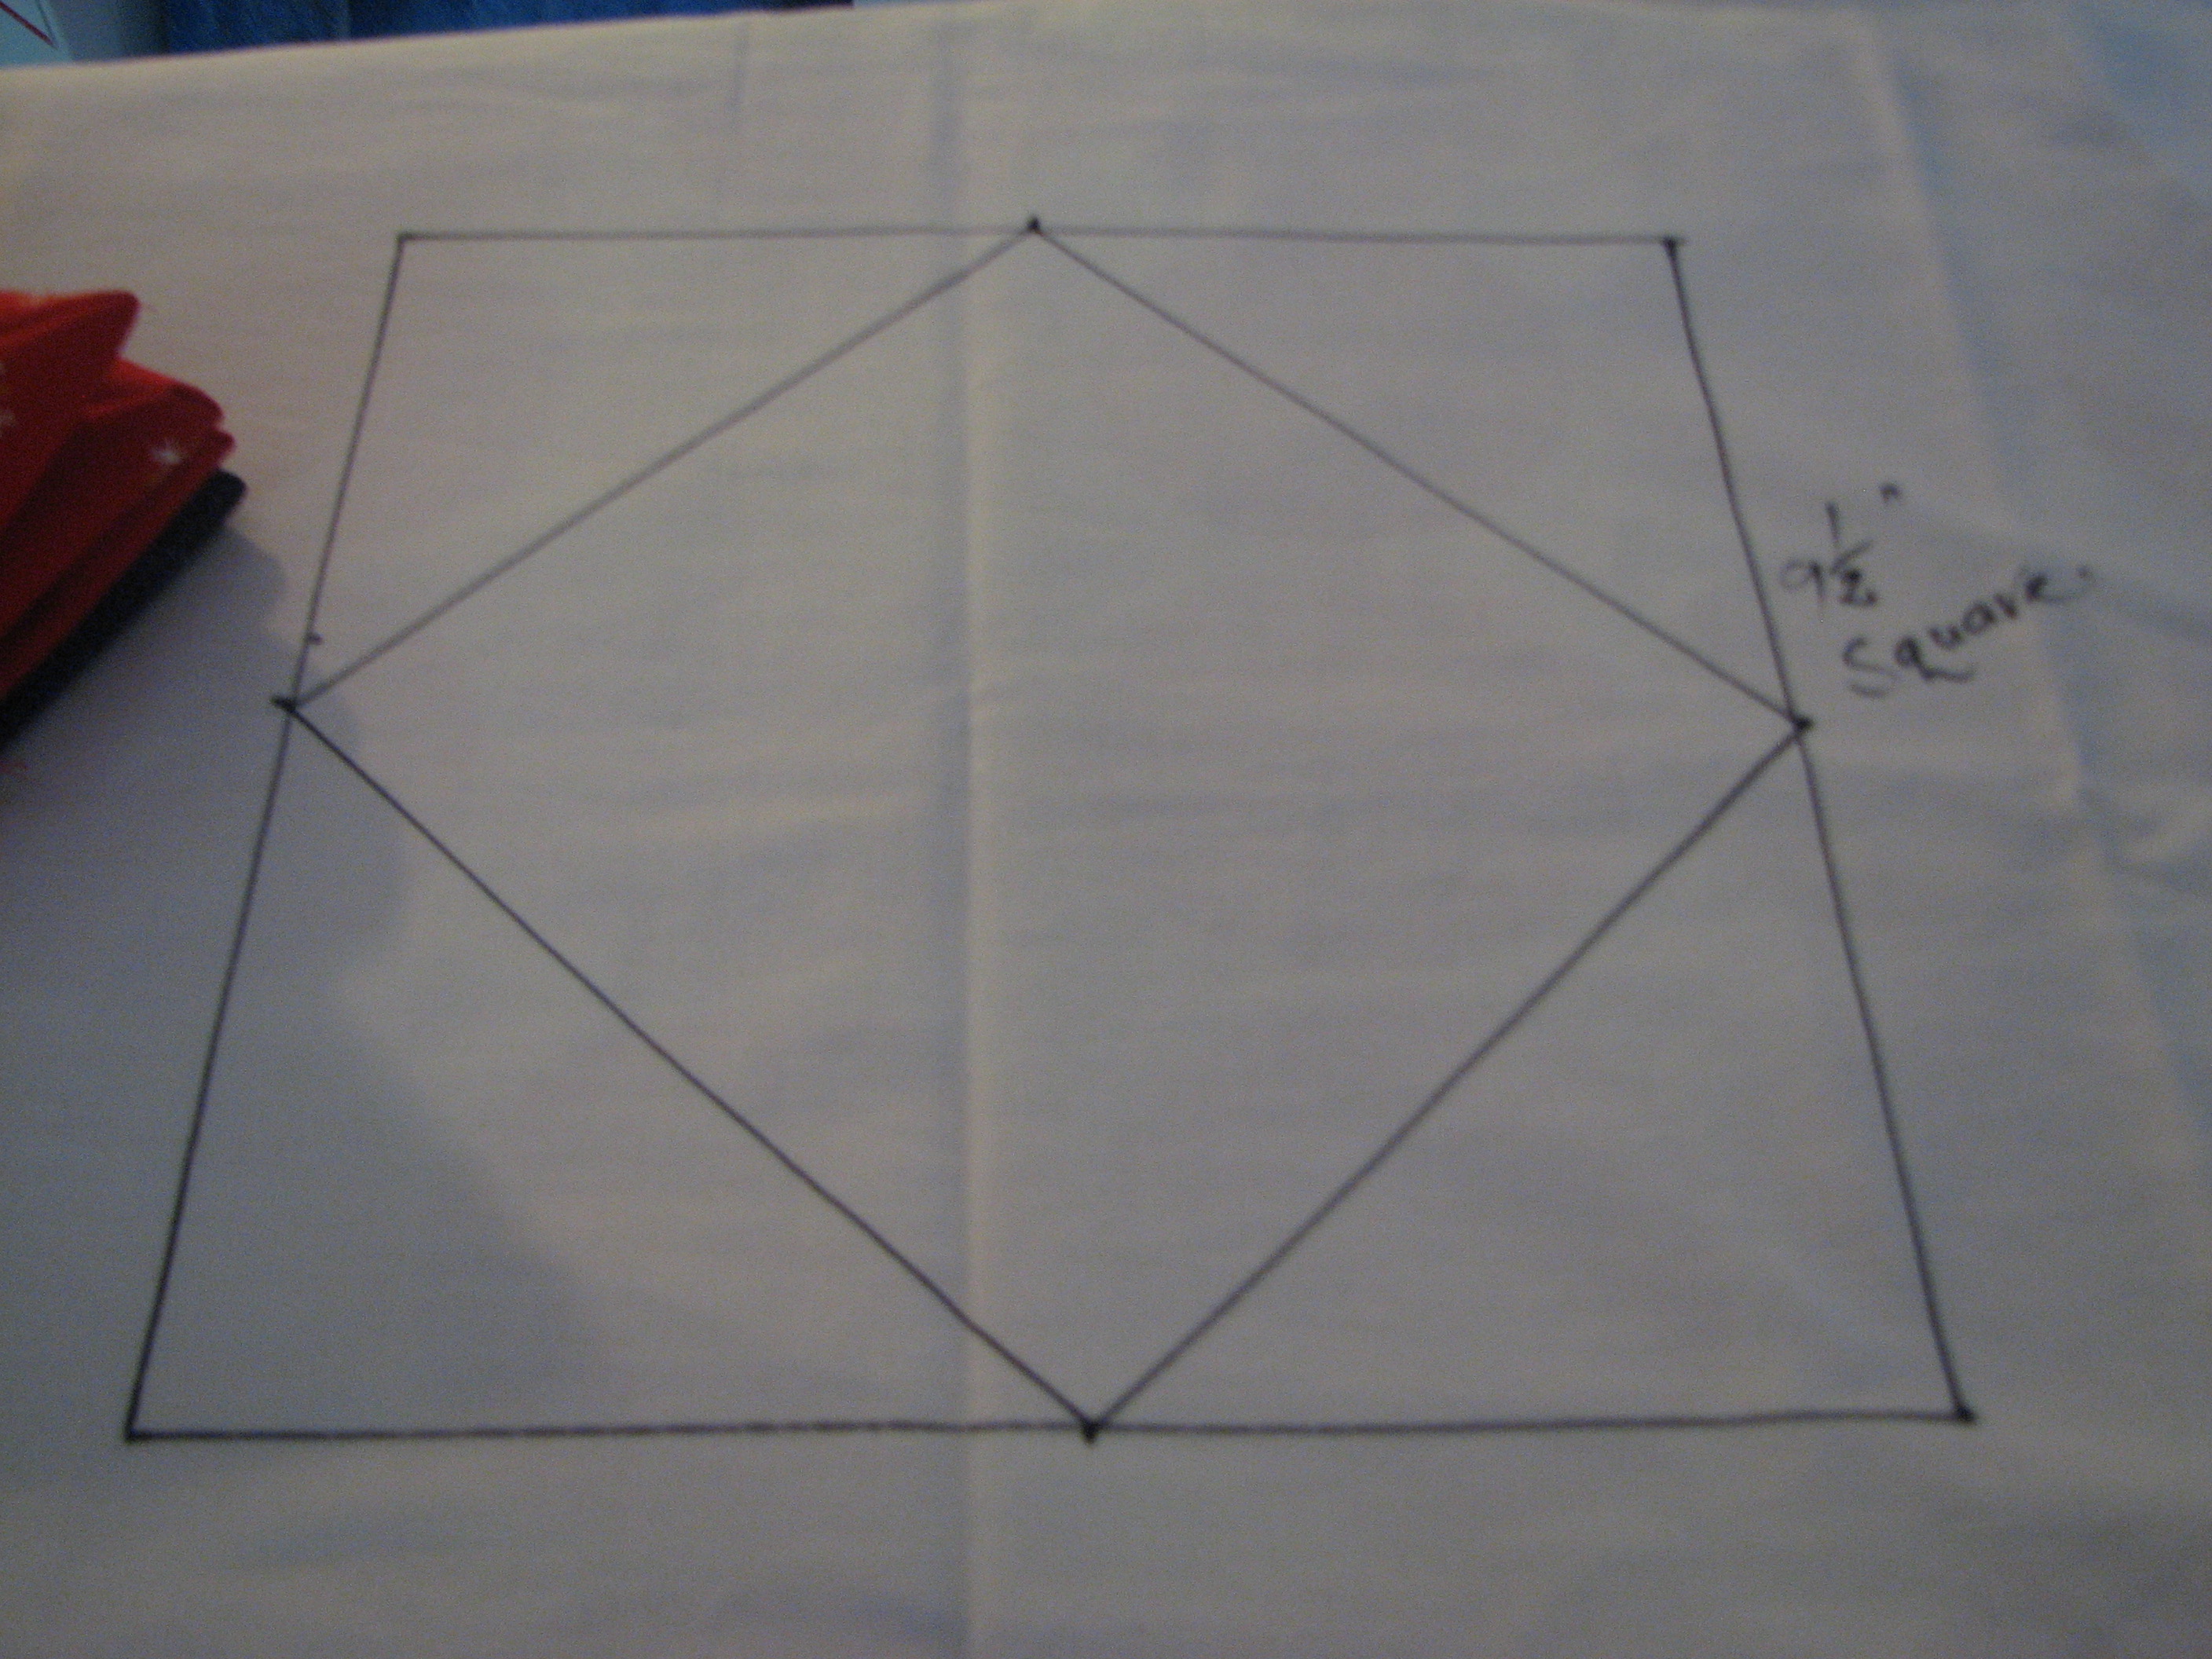
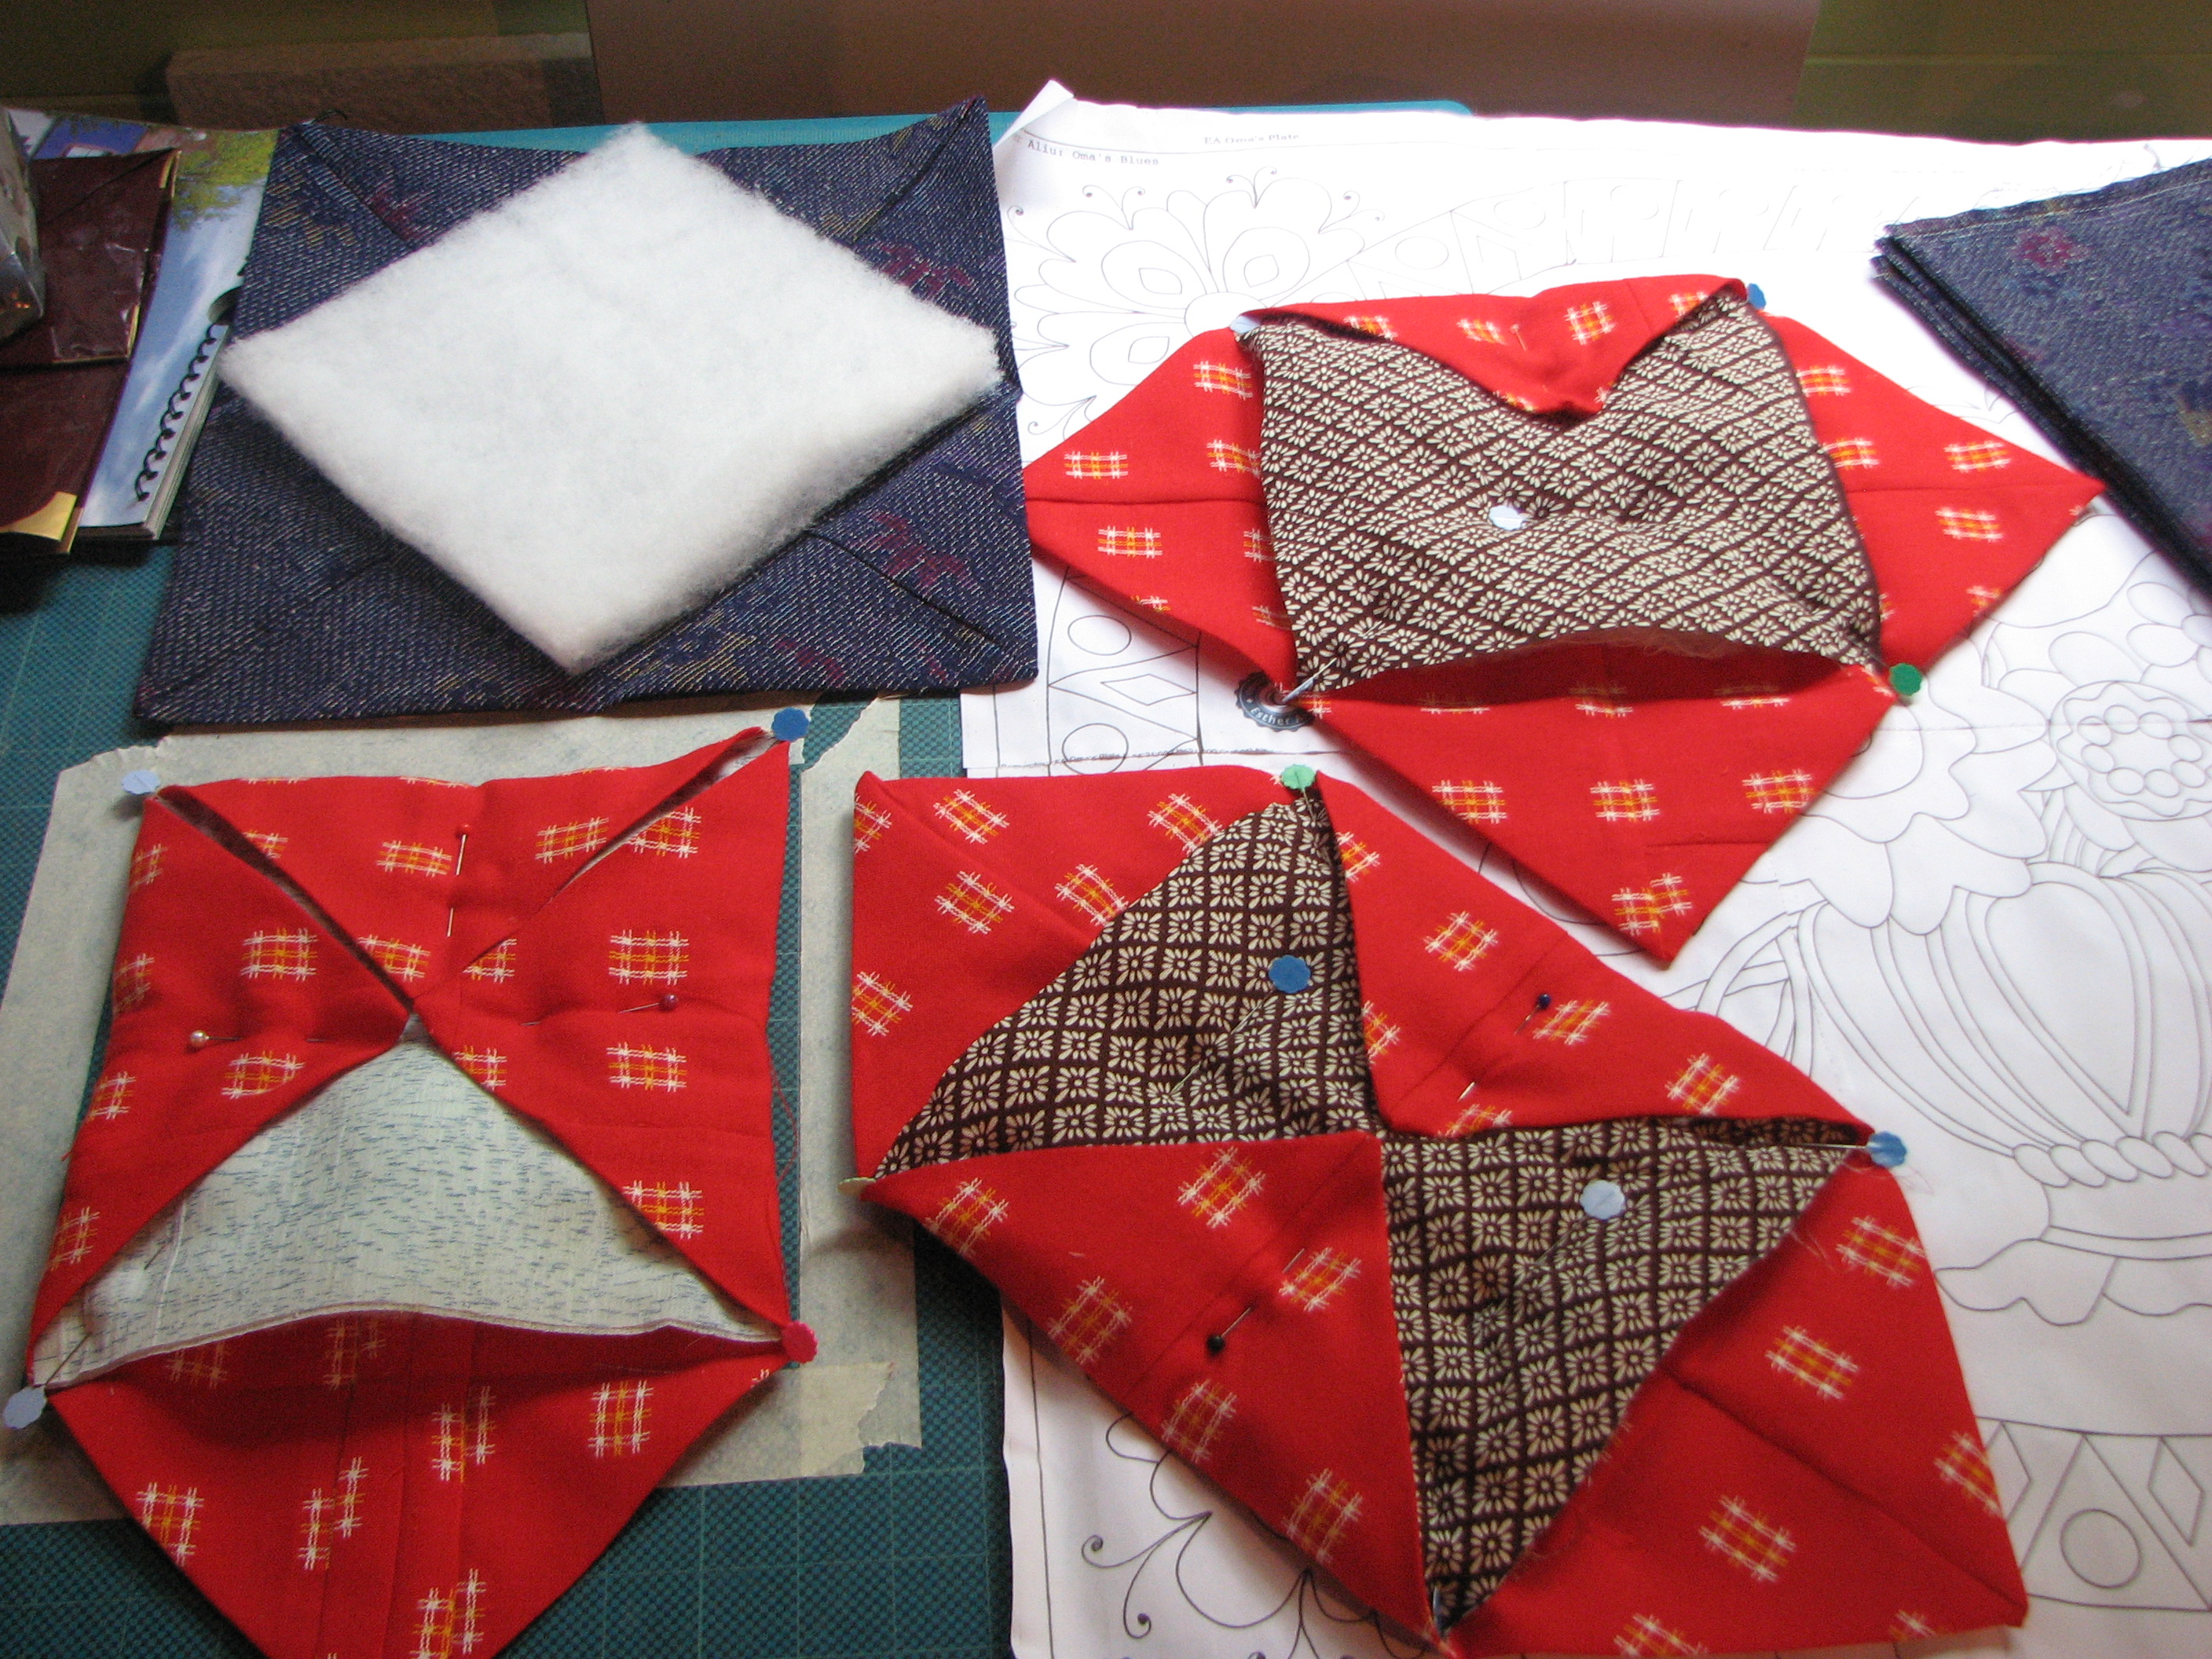
I will try and give you a step by step by photos how I make these quilt as you go squares. Bottom of photo below. First we start with a square mine are 14 1/2 ” as this is the width of woven kimono fabric in Japan.
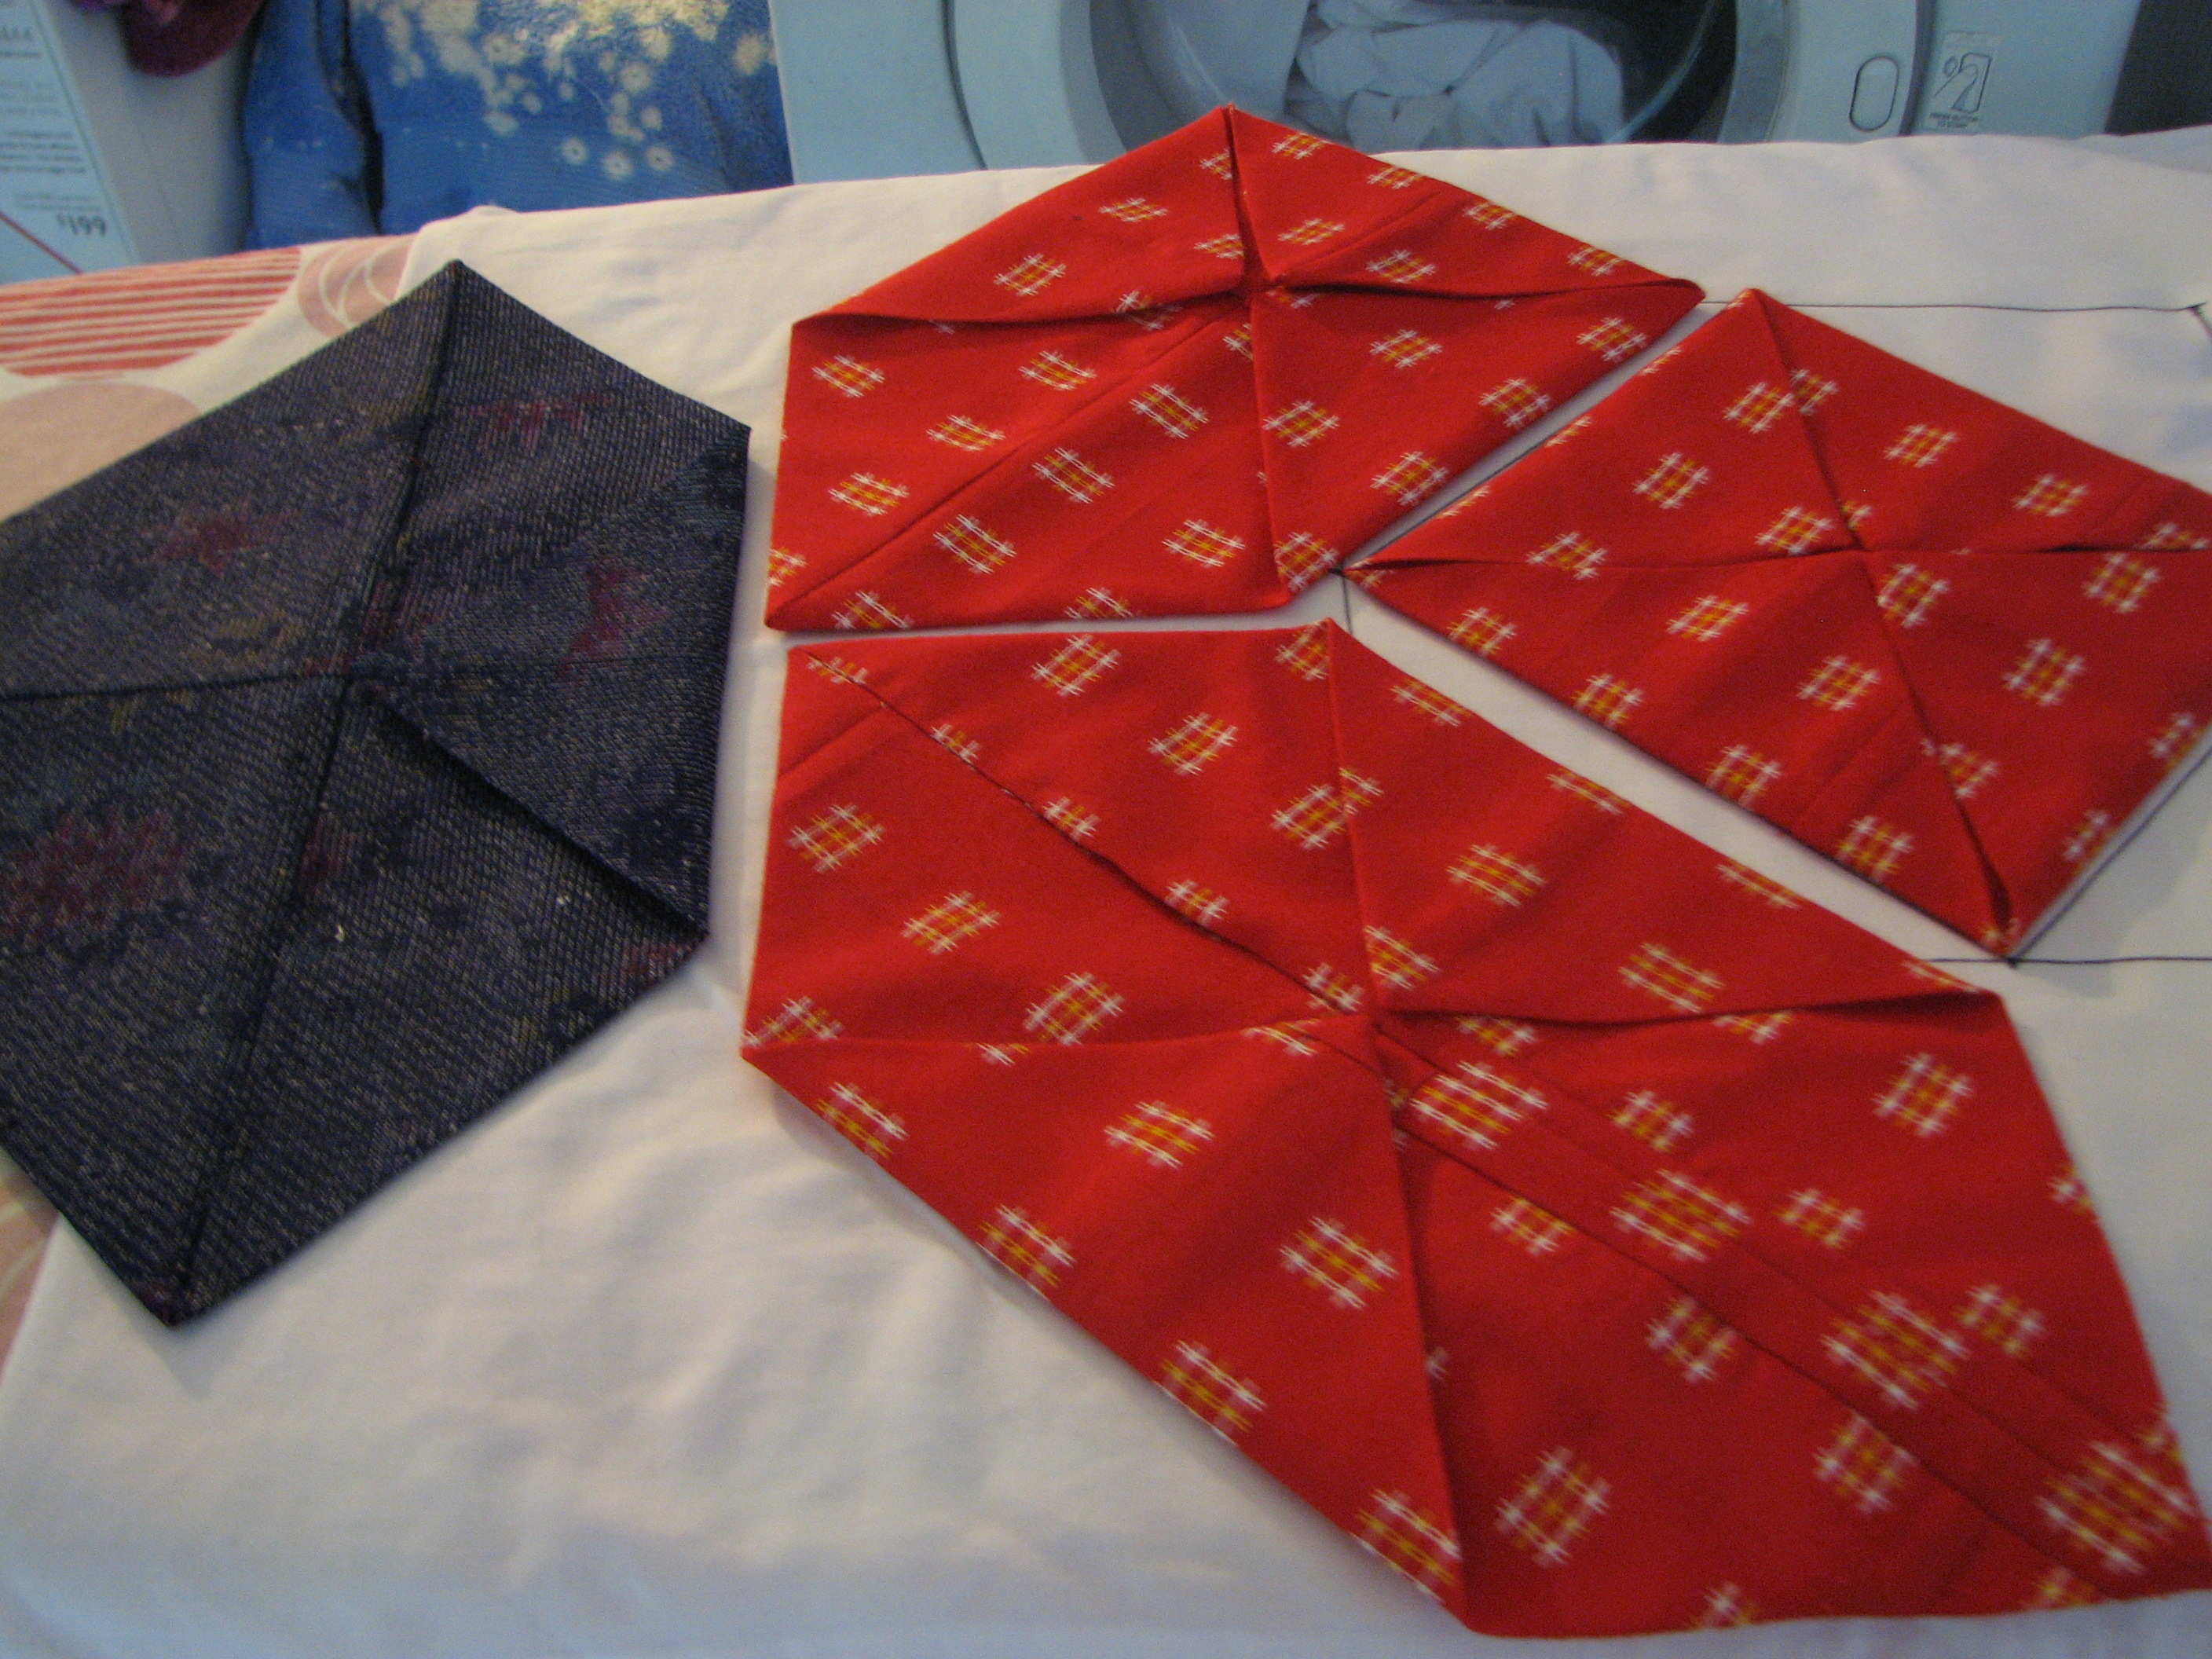
Top left hand of photo fabric is folded in 1/2 and sewn each end.
Top right hand of photo. open what now looks like a bag or pocket put your hands where I have placed the pins and pull the bag like you are going to pull it apart.
Bottom right hand corner of photo this is what you will end up with; now sew these seams together BUT make sure you leave 2″ of seam unsewen so you can turn pocket inside out!!!!!
Top right hand corner seam sewn and we have a square again with all raw edges.
Bottom right hand corner you can see my unsewen seam where I can pull out the inside fabric.
Left hand bottom corner I’m pulling the fabric through.
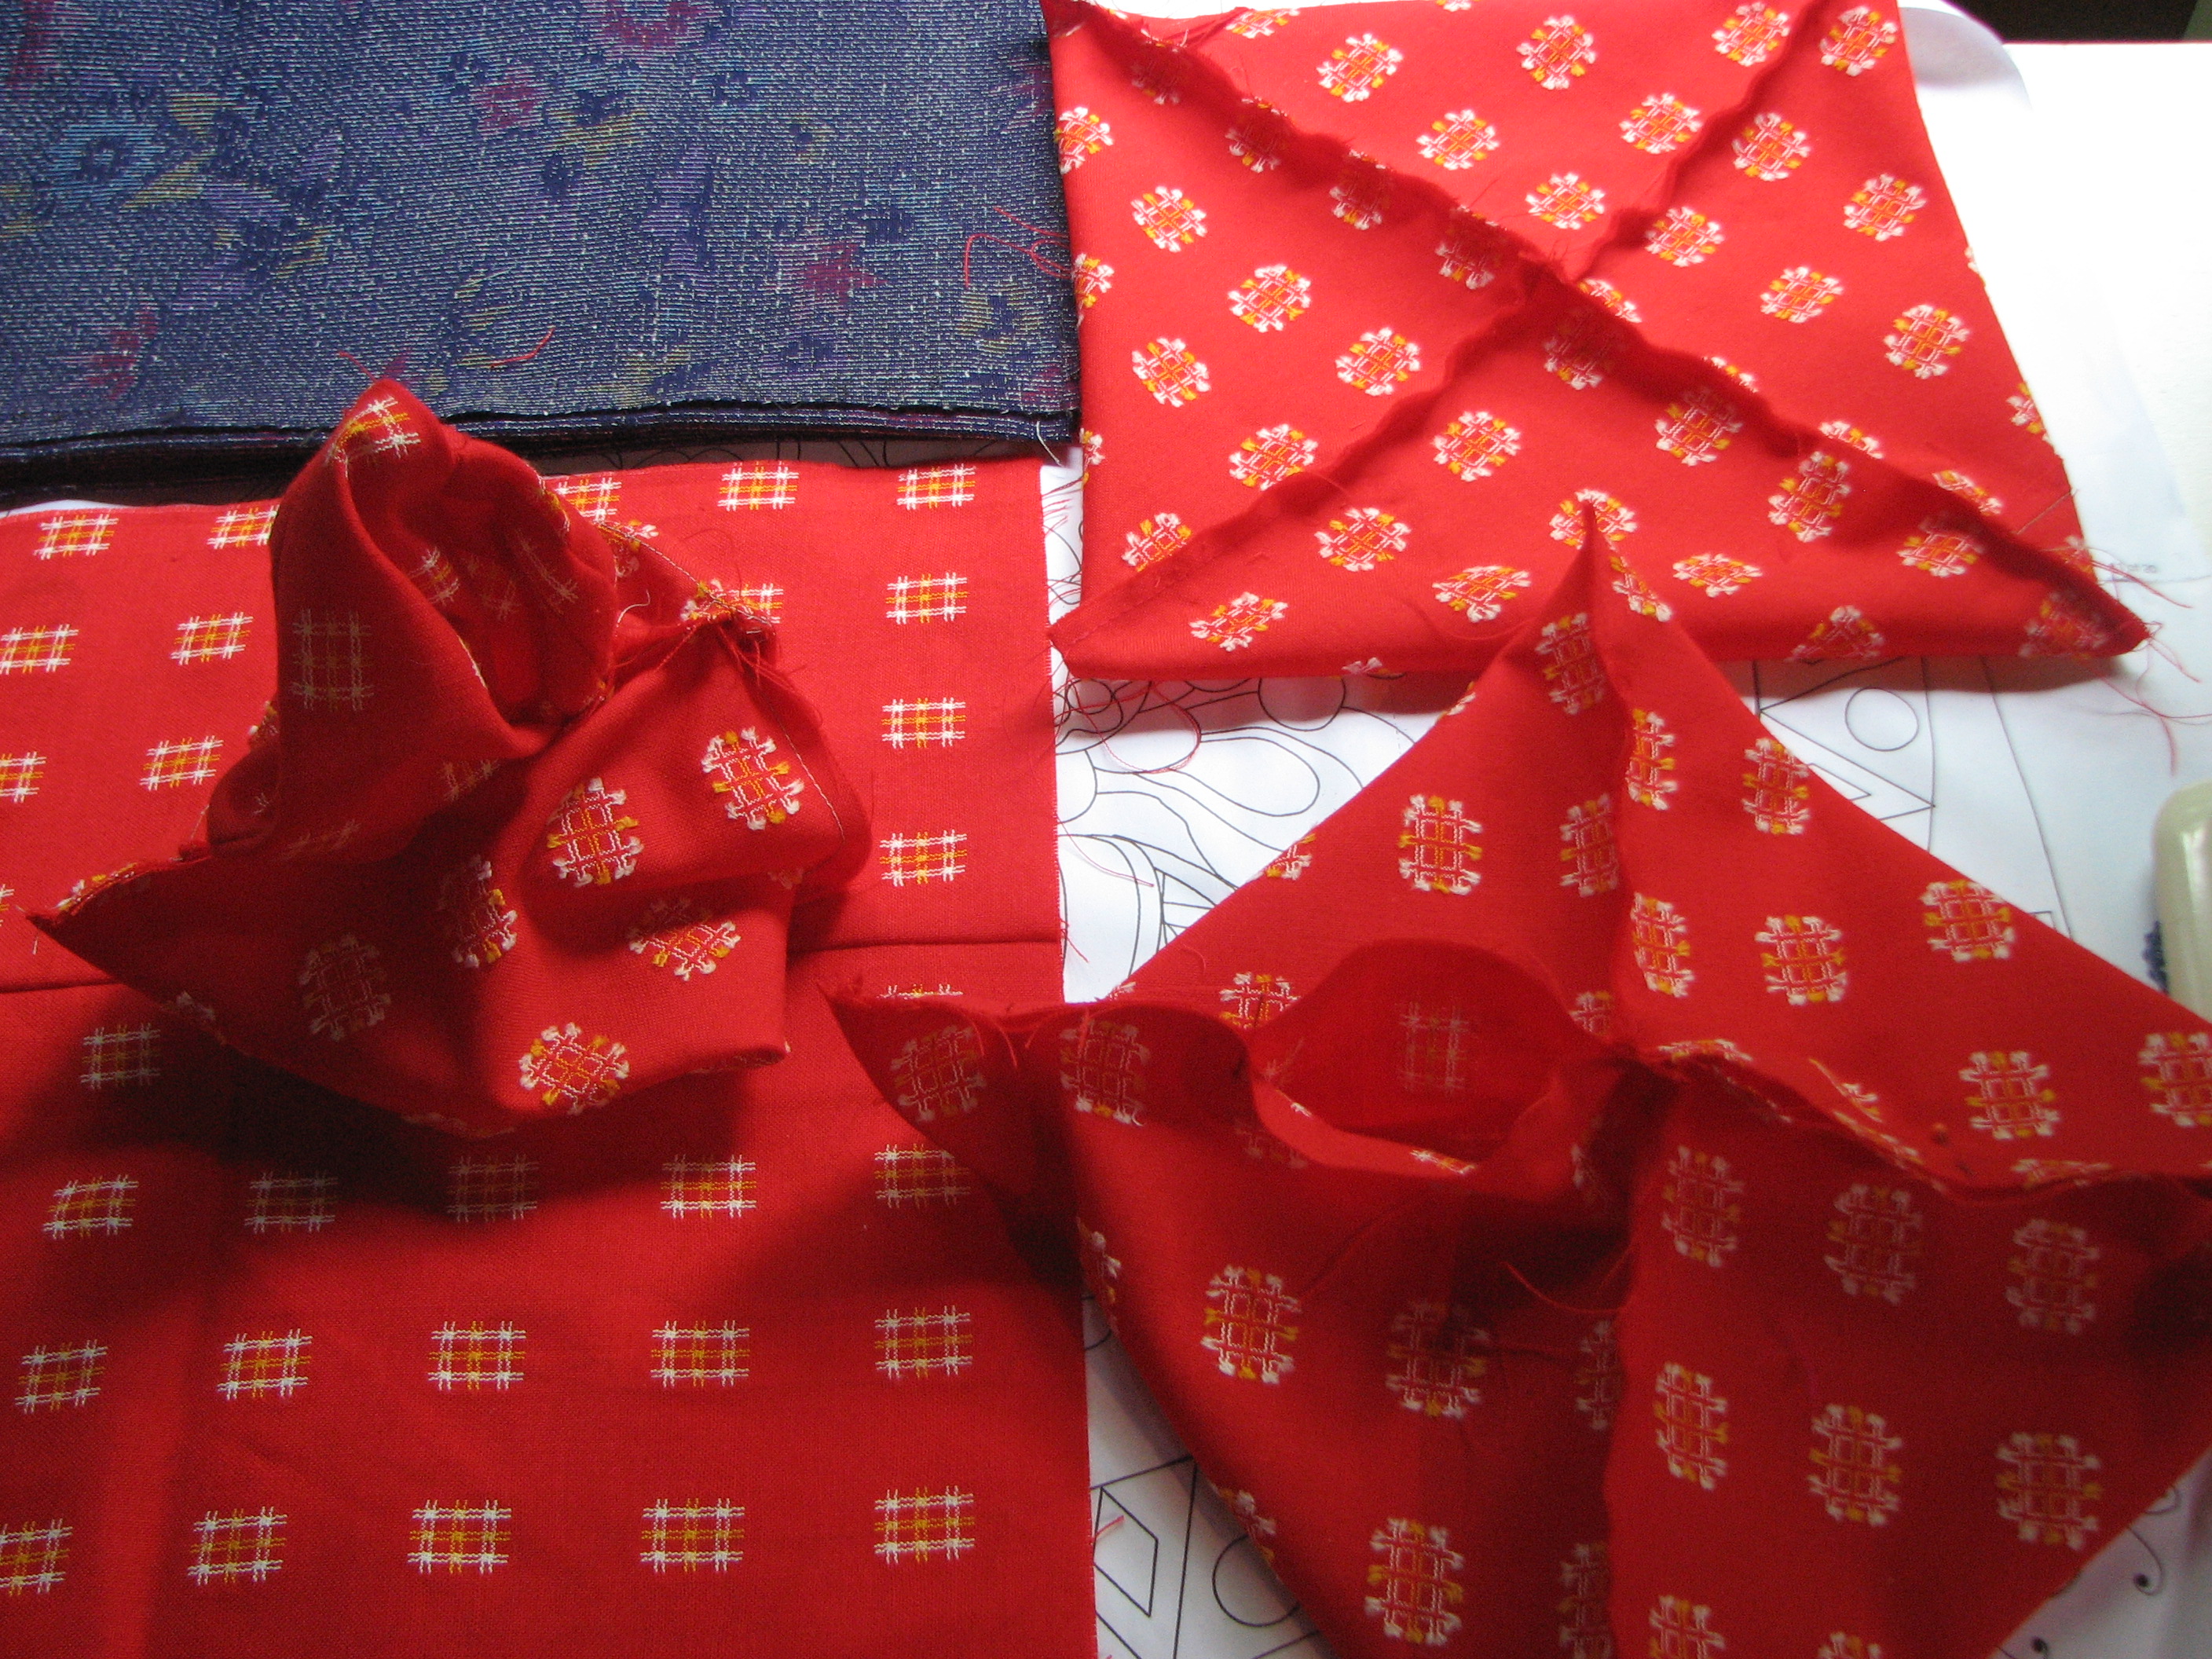
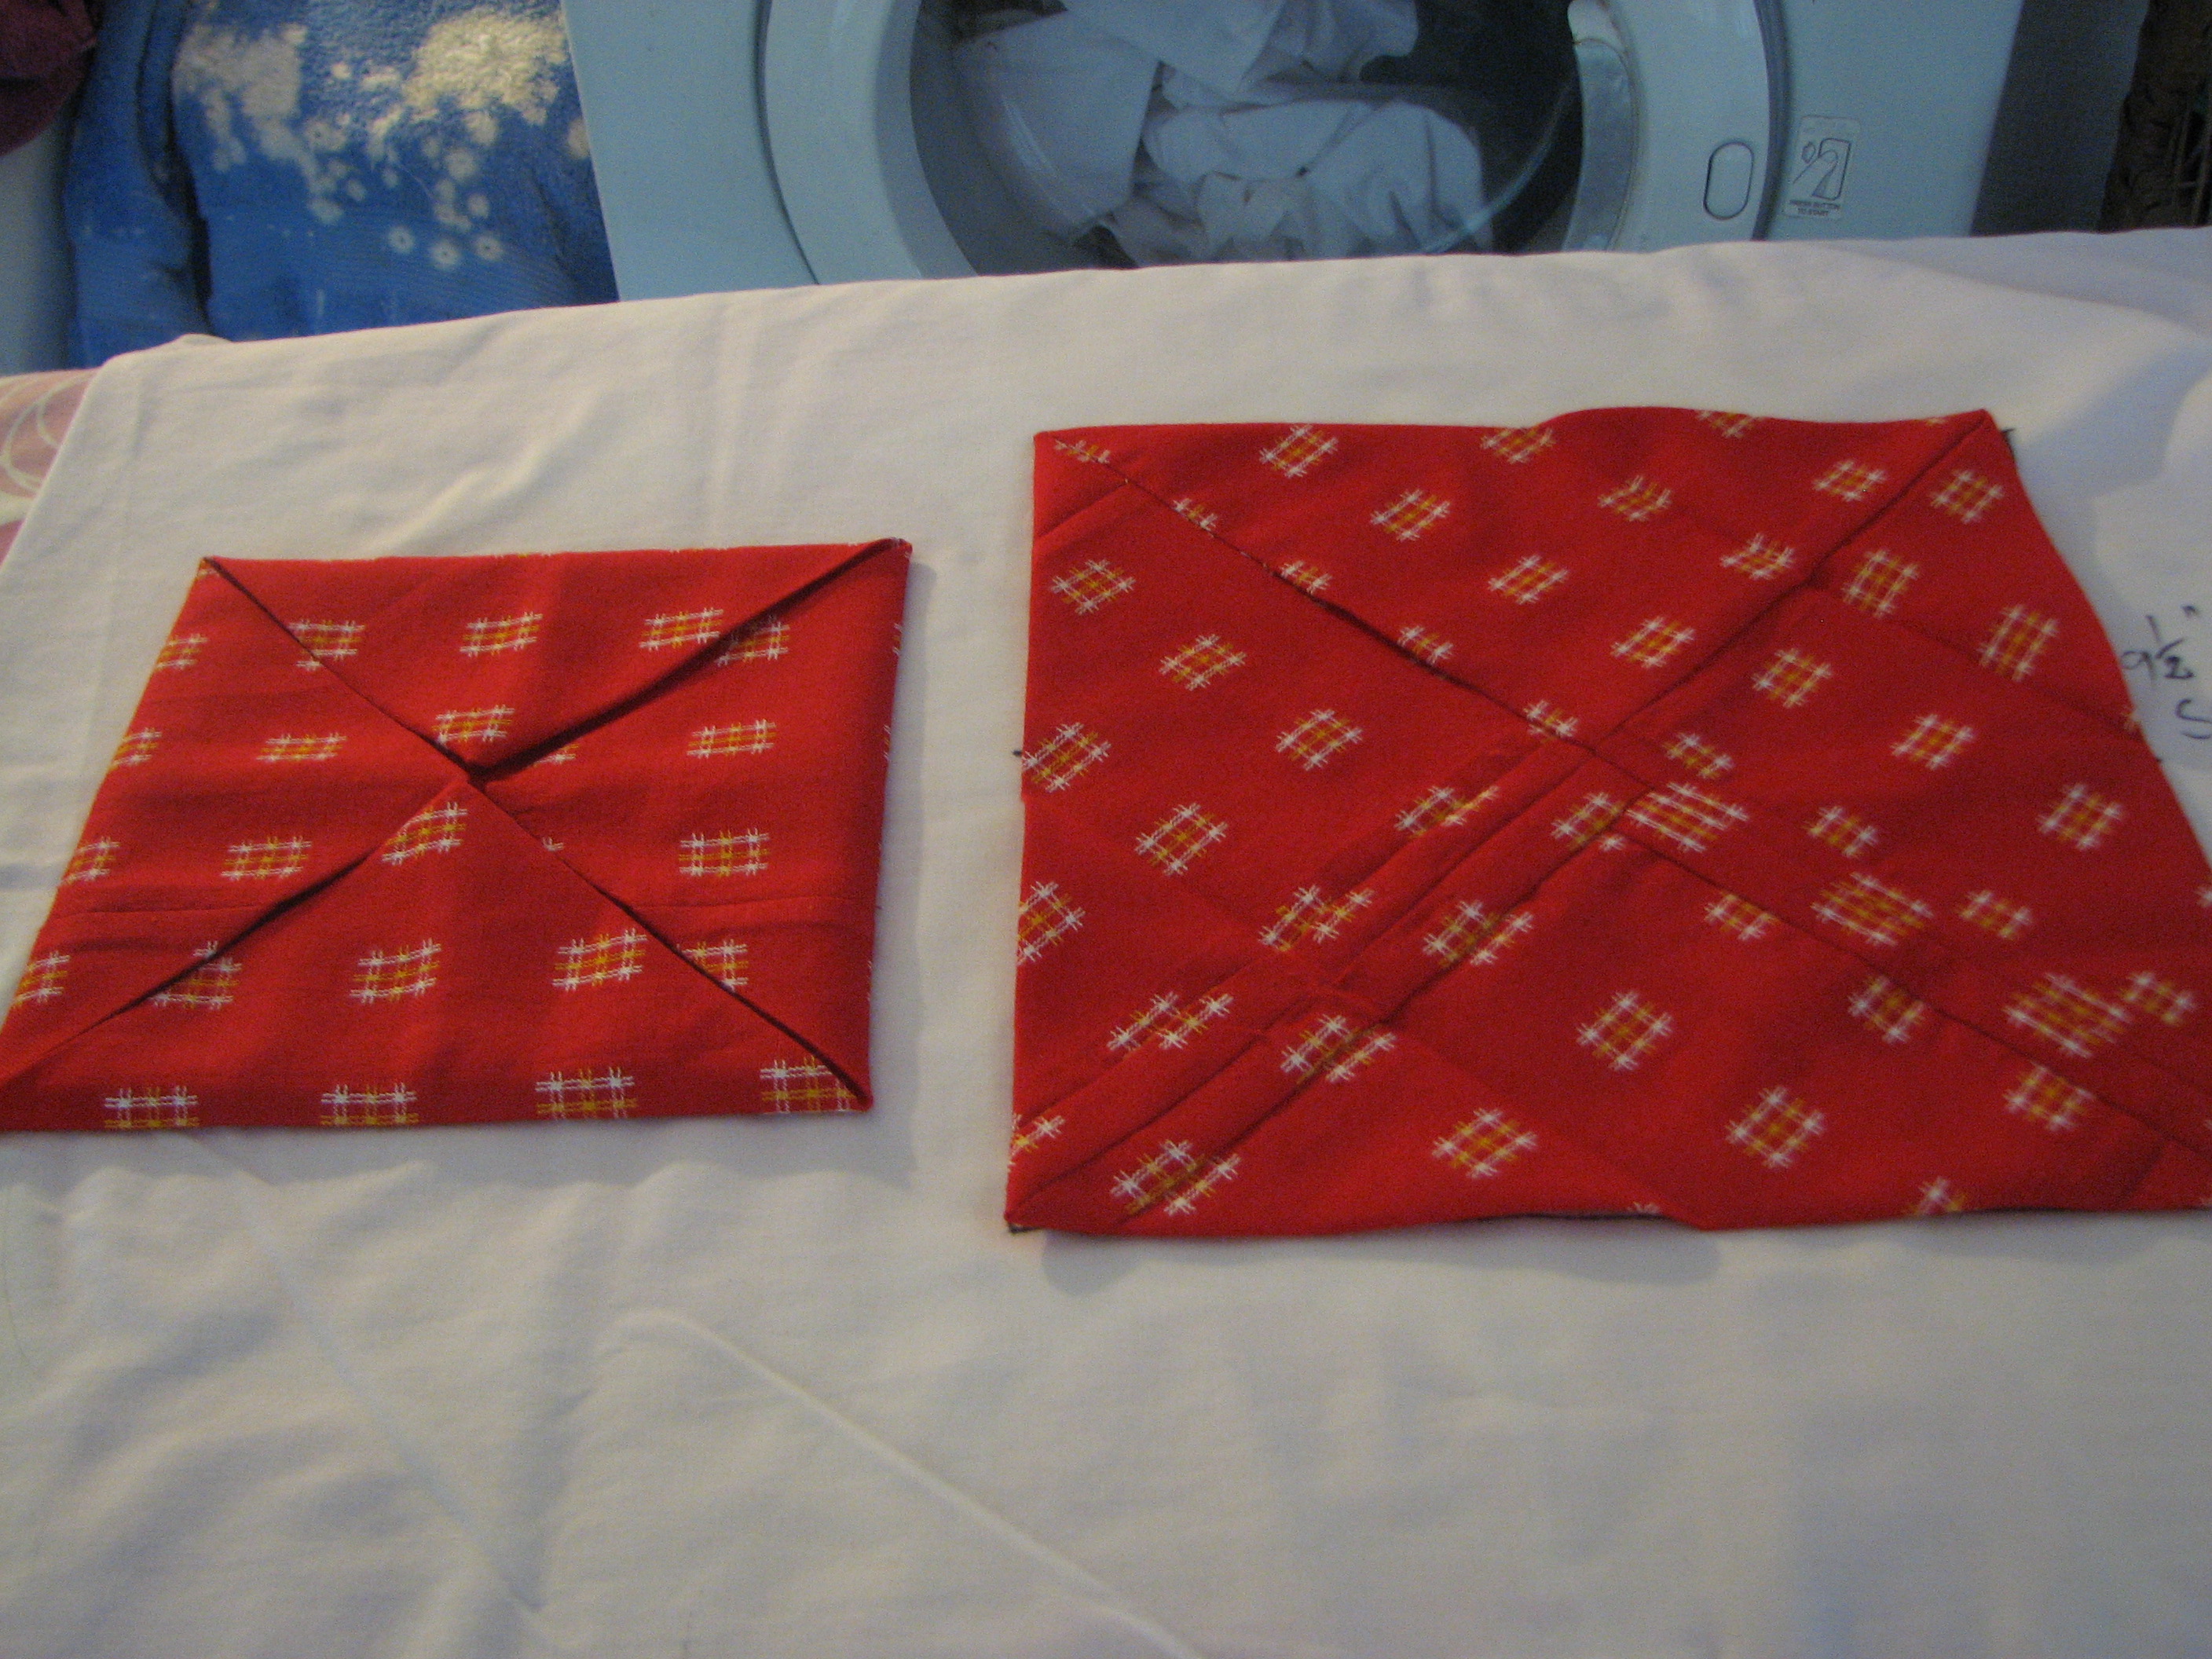
I now have a square with no raw edges on the right. this is where the original Cathedral Window starts but it usually has raw edges that you have to contend with!!!!! , I need to go from this size square to the one on the left.
I have now made a wee pile of square roughly 91/2 ” square . Off to the ironing board where I have made a 91/2″ square on an old pillow case with another square inside on point that is roughly 6 5/8″ I use this to make sure my squares stay perfectly square before ironing the edges. Its a little extra thing to do but speeds up the ironing and you end up with perfect squares.
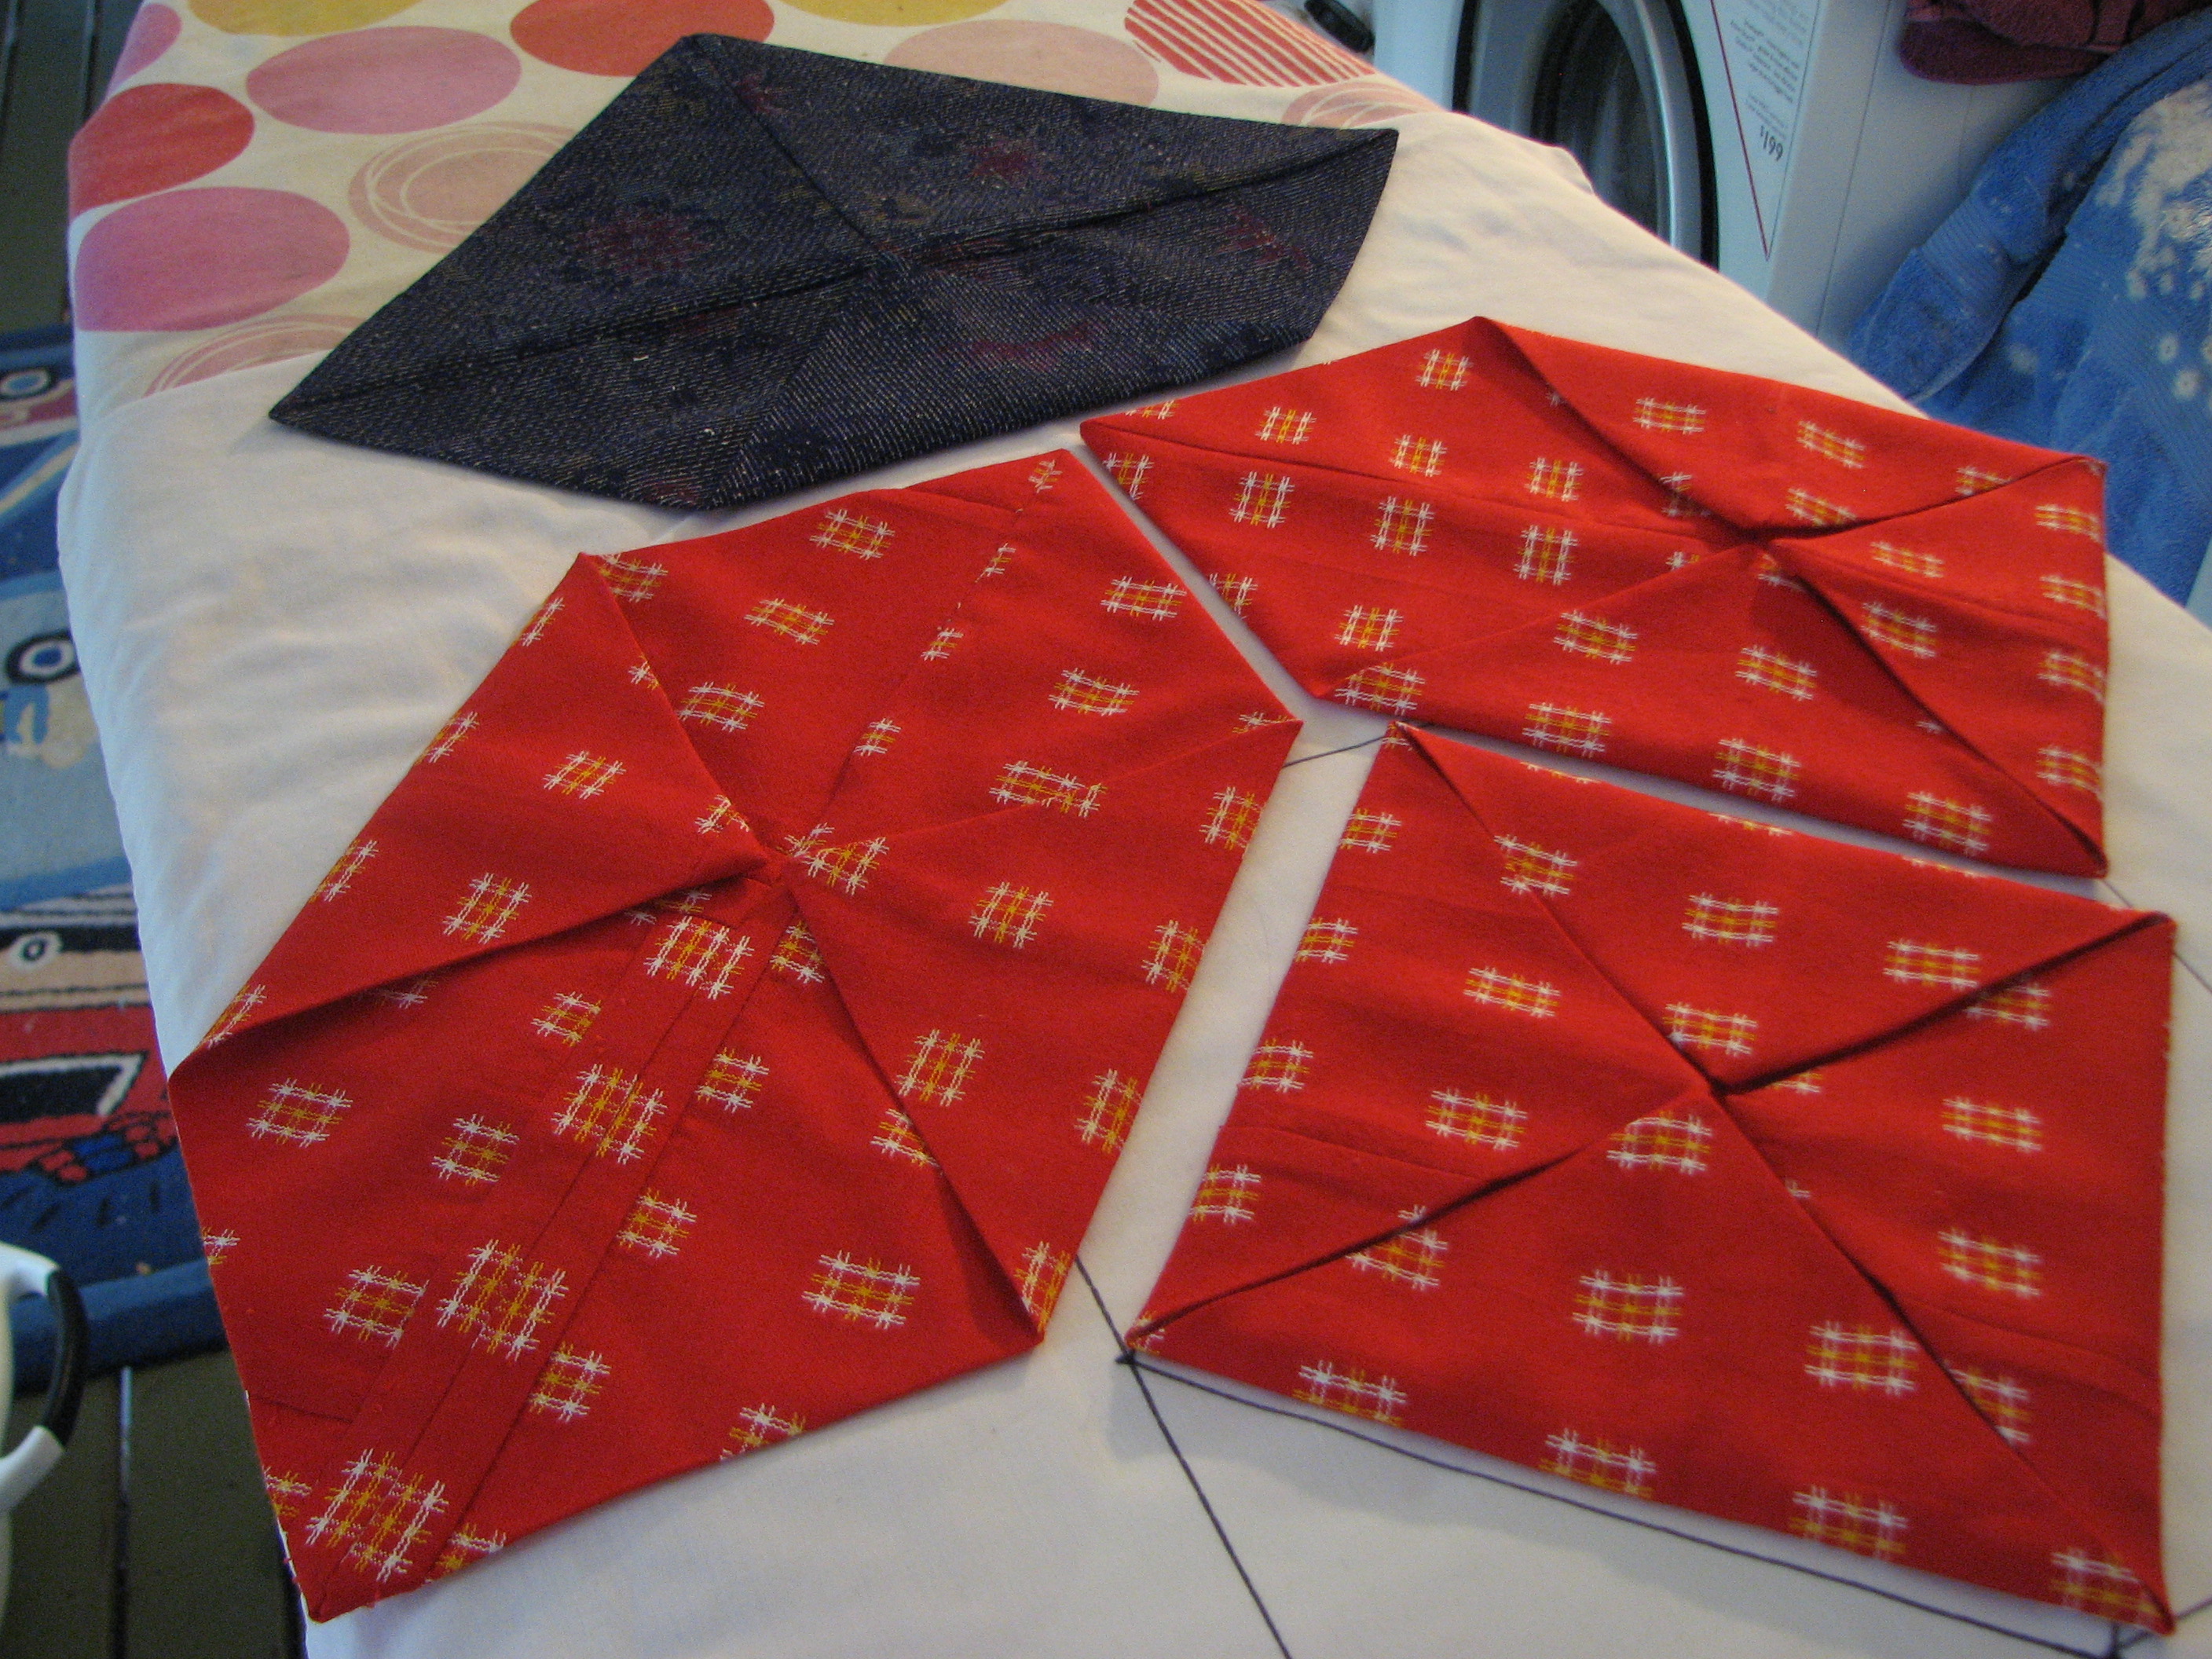
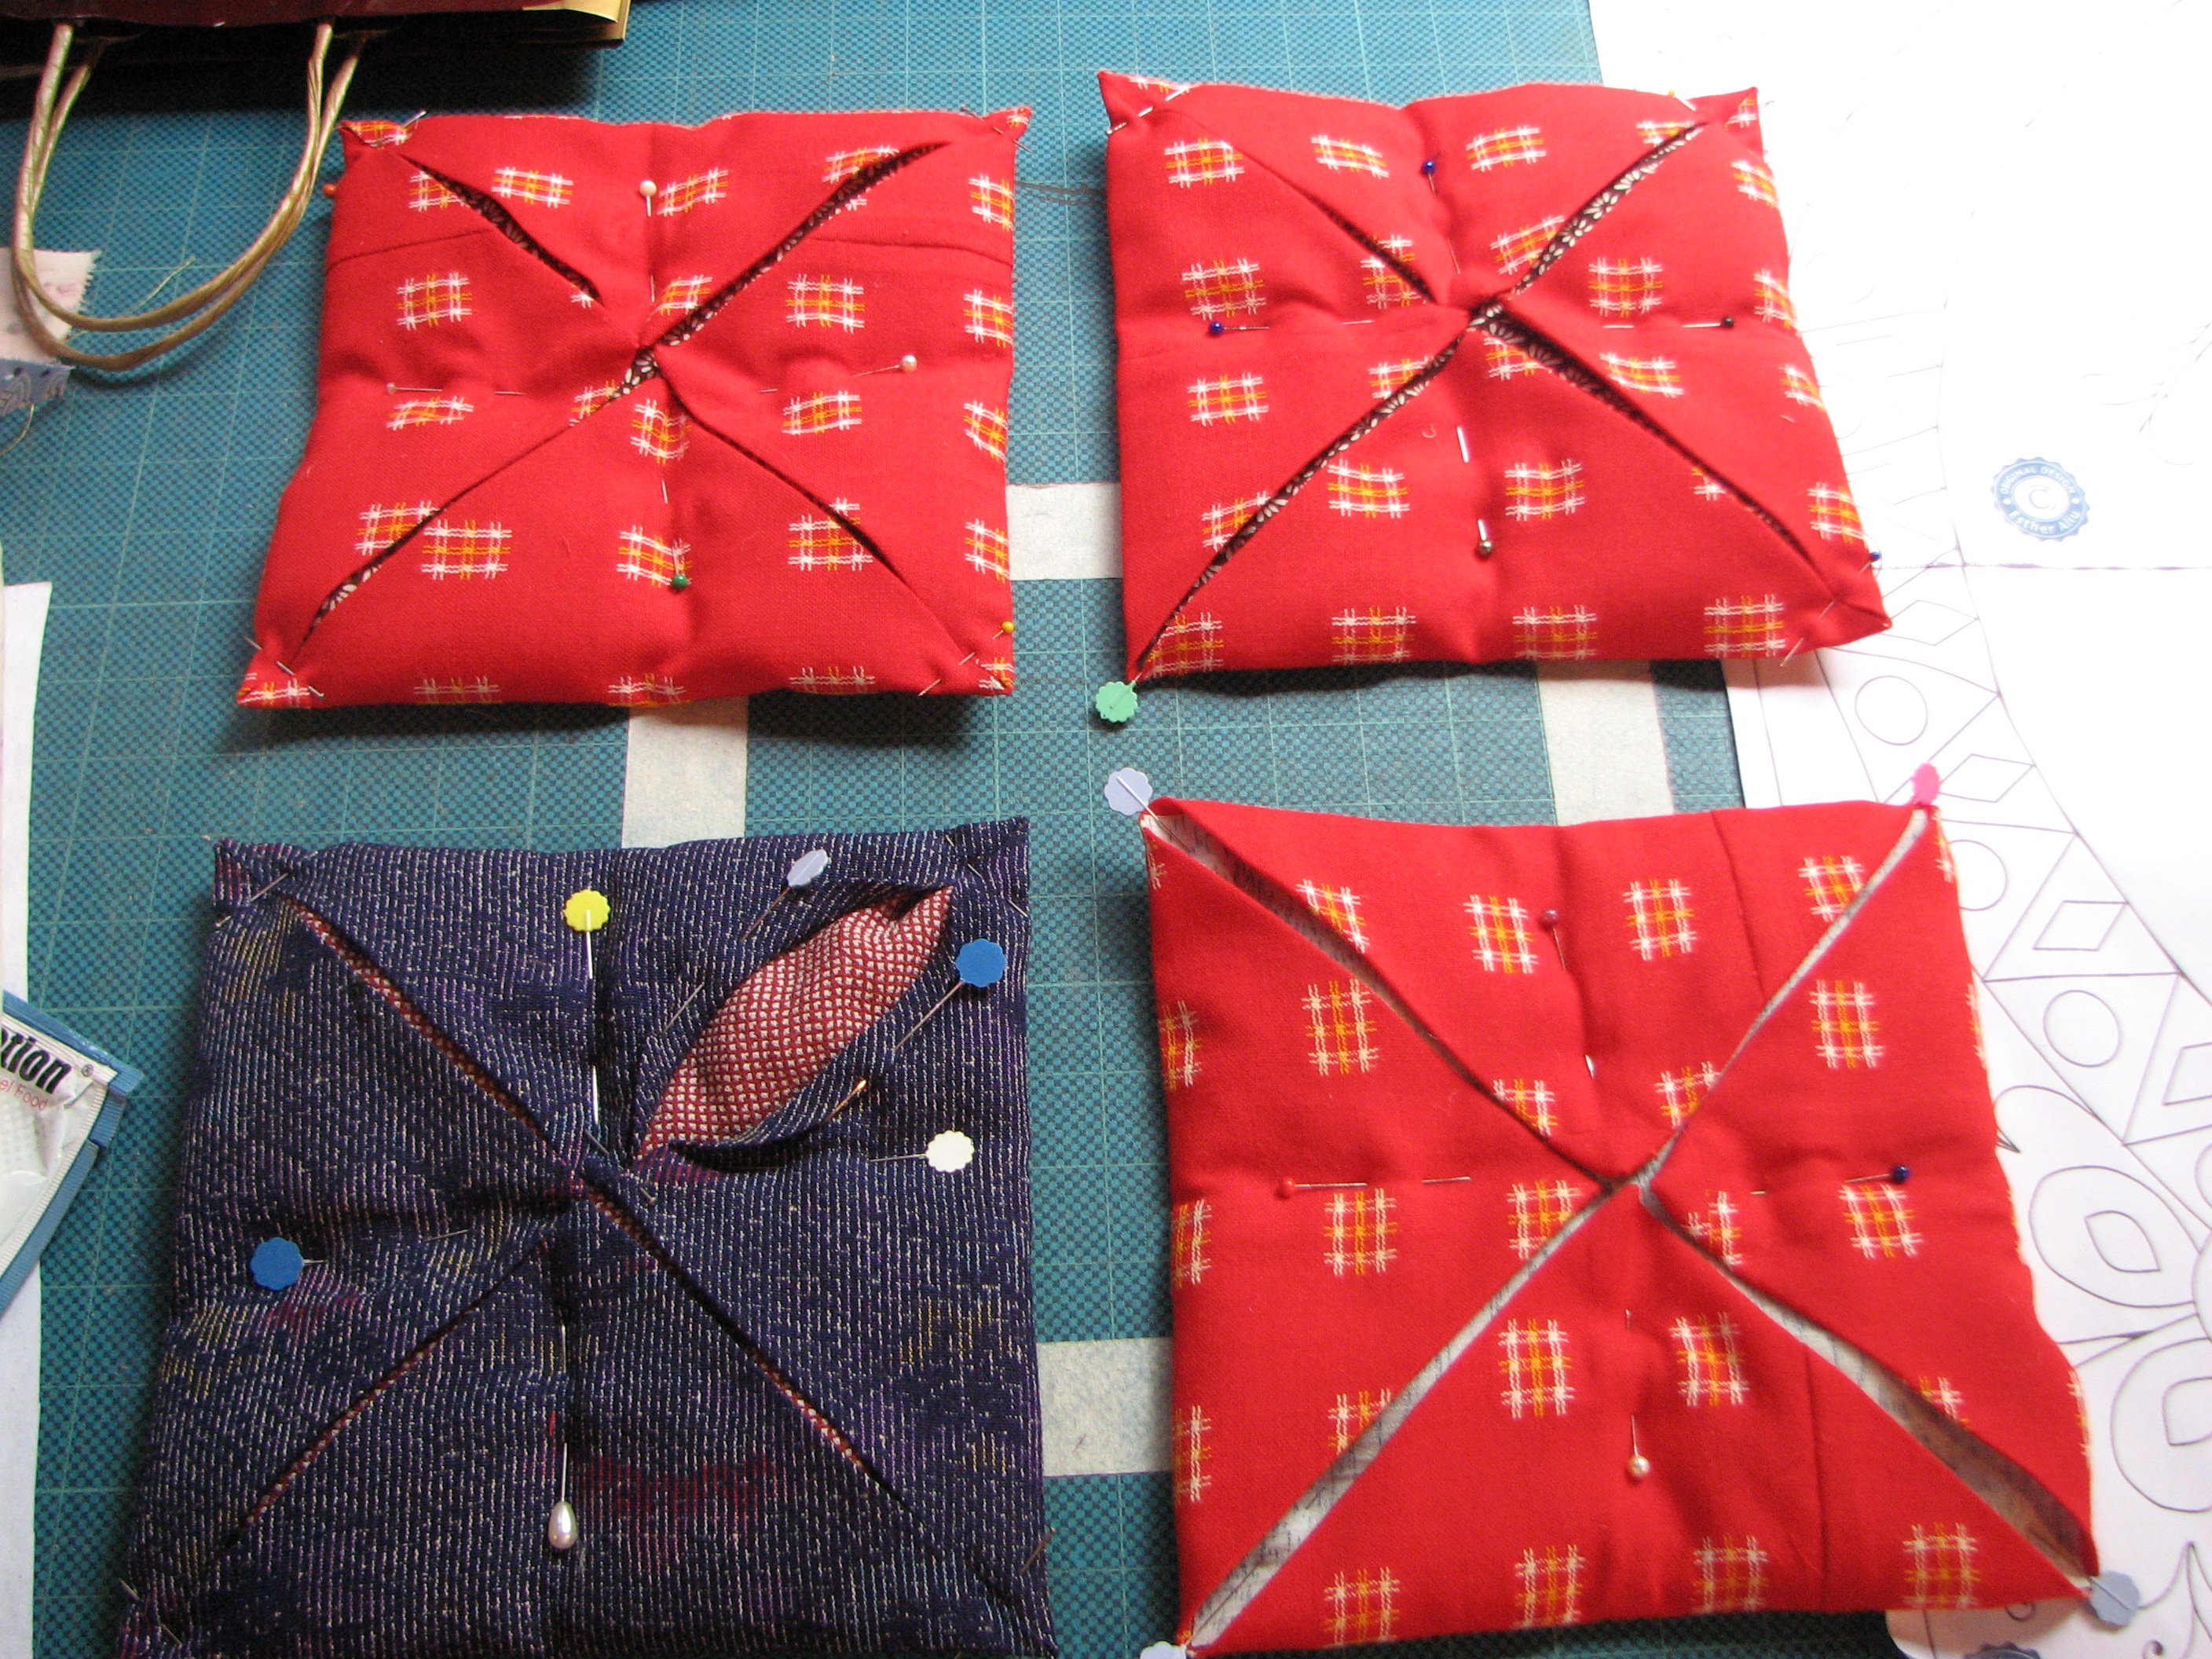
Next stage of the game fold the sides in first one flap see navy square, then bottom red has two flaps folded in and ironed (I’m using a steam iron here so it really presses those seams flat) Top red centre has 3 flaps pressed down, then red top right hand corner all 4 flaps and we are now down to roughly almost a 7″ square.
Photo below is the same as above but from a different angle. You can see finished square is sitting in side the square on a point.
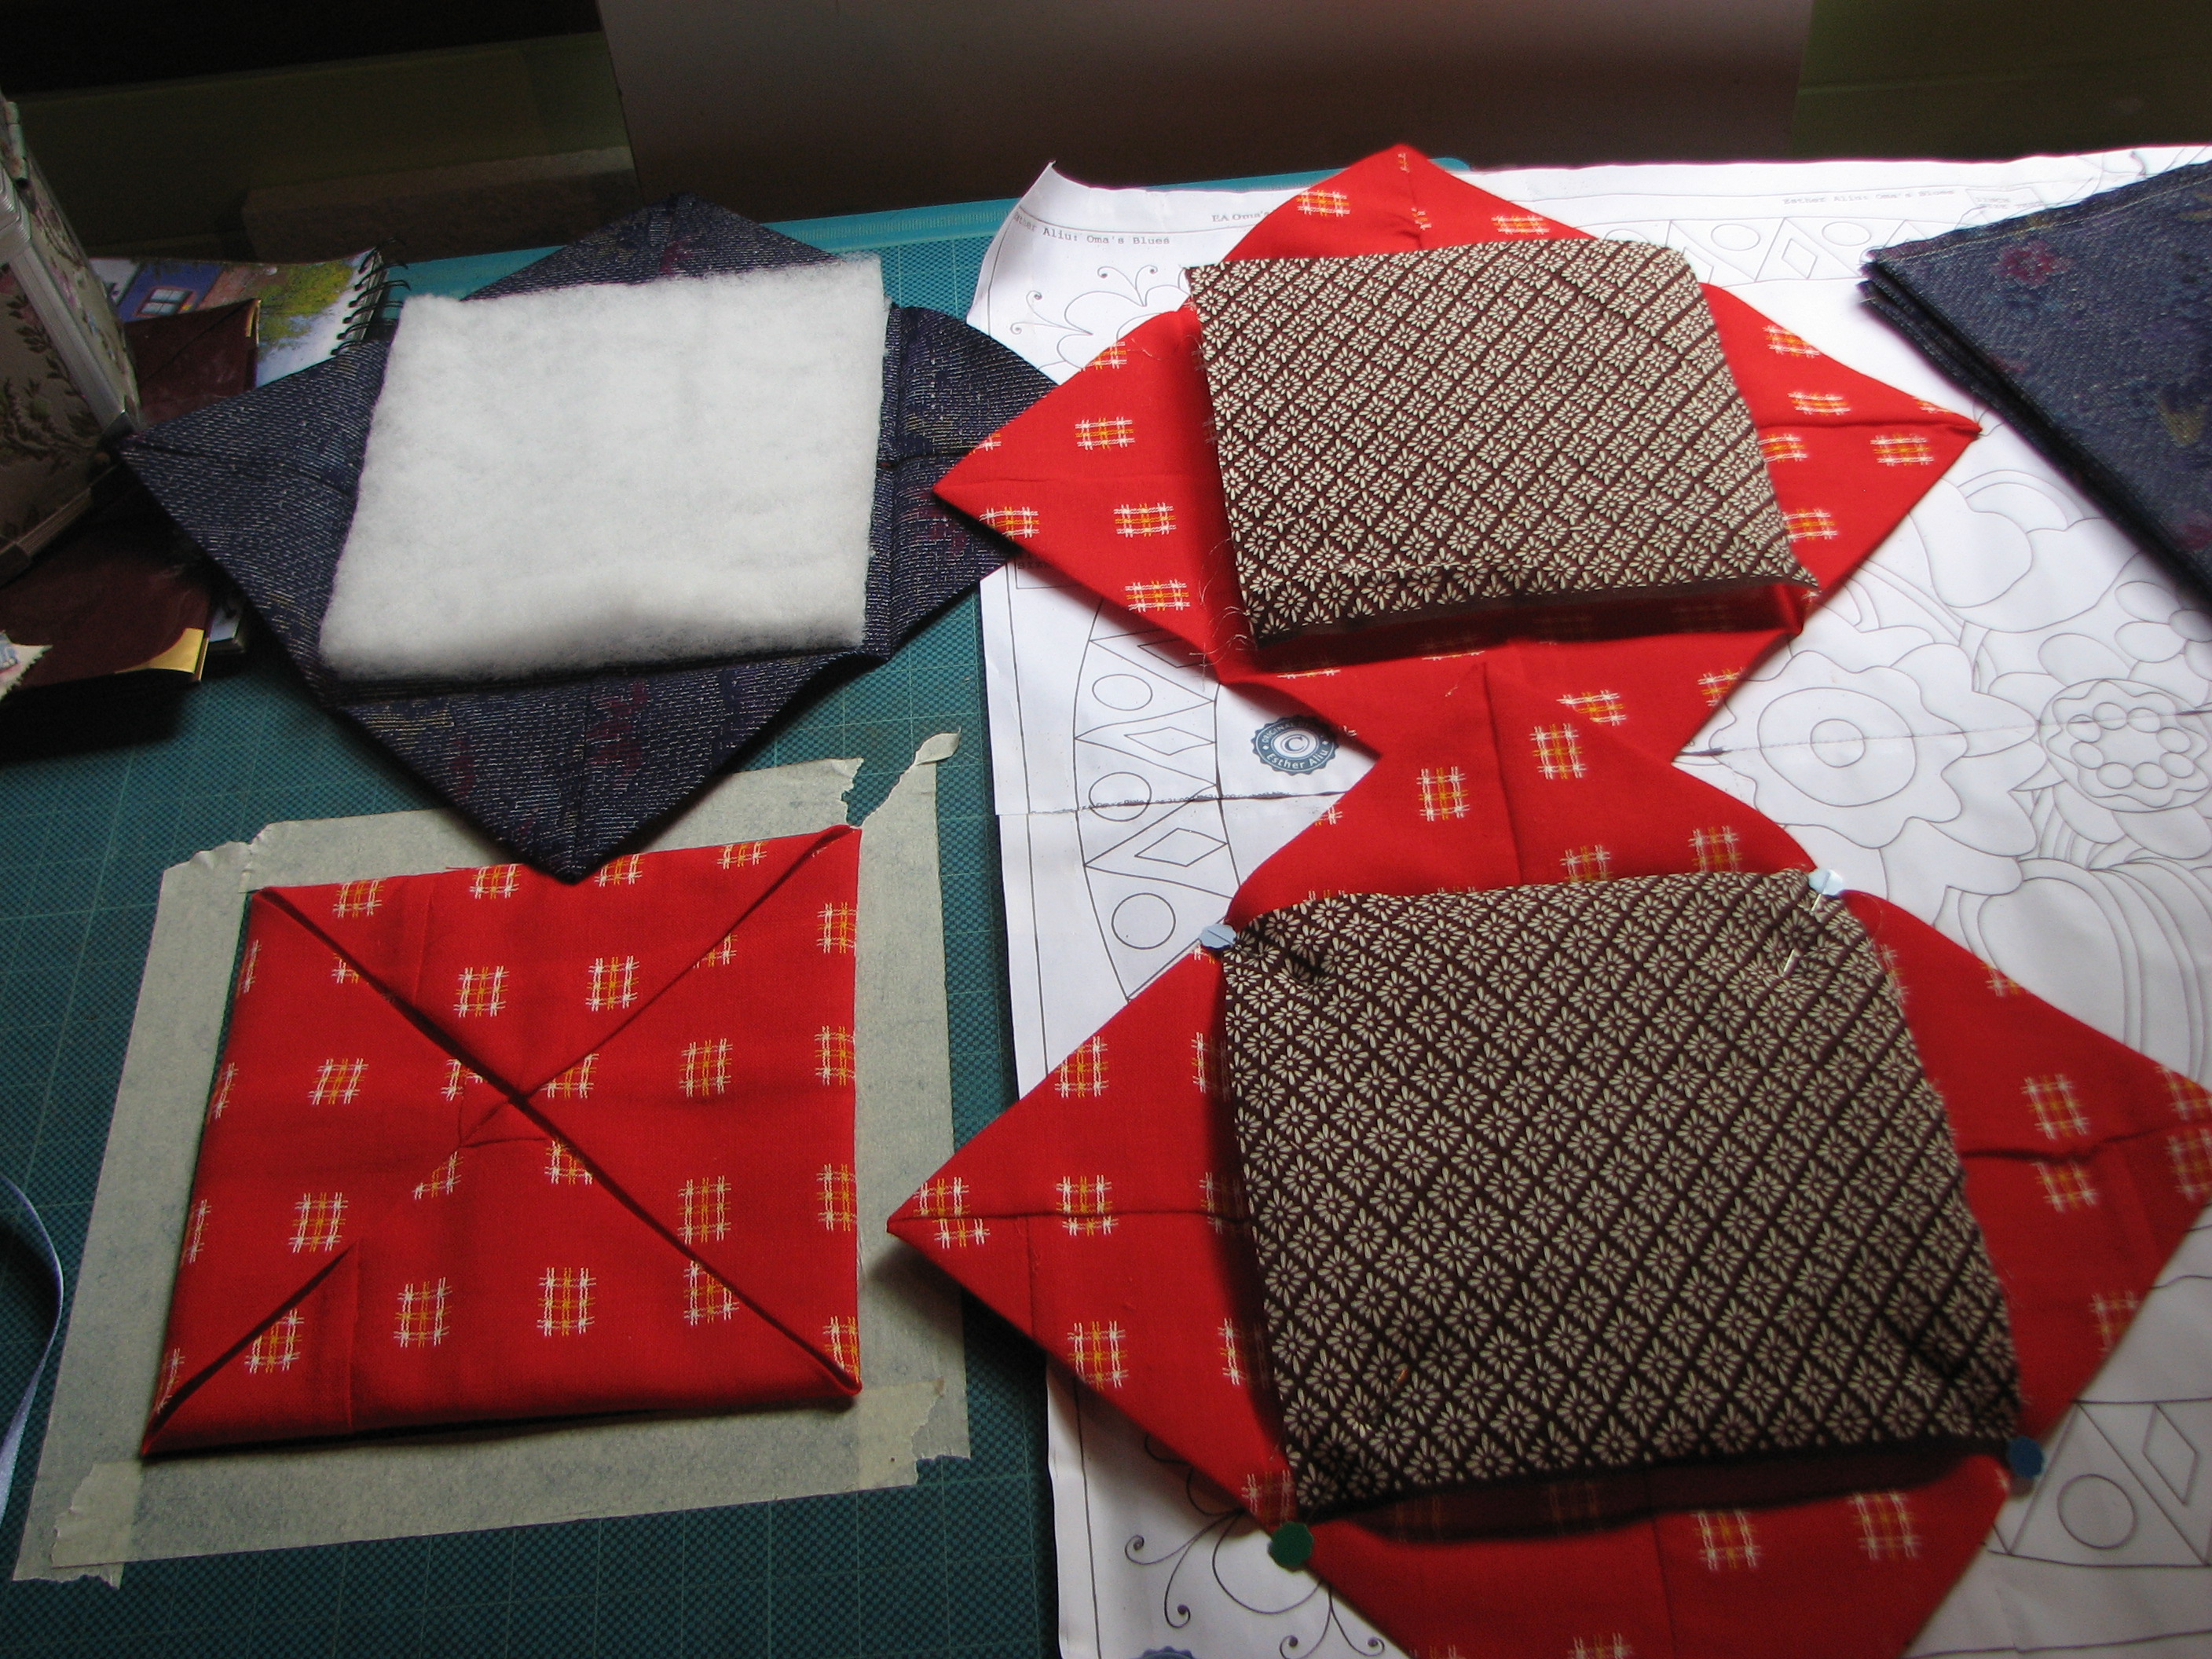
Bottom left hand corner our 7″ square now ready to add the wadding and fabric of windows to be. Top navy blue has a 61/4′ square high loft wadding I like to use high loft as it gives that 3 D look when you quilt the square. Top right hand corner has a 6 5/8″ fabric square on top of wadding this fabric is wider than the wadding this will take the fabric right to the corners but not the wadding so that the flaps fold back over nicely with the extra hight of the wadding, now pin those corners to stop any movement when you fold the flaps back in to place see bottom right hand corner.
Top right hand corner has one flap folded down and pinned, below two flaps in place left hand corner one flap left to go, remember to remove pins when you fold flaps back down??????? but leave corner pins in place still.
Bottom left hand corner all flaps turned over and pinned now we need to pin the outer edge points to make sure they stay square over the next stage. Top right hand corner 3 corners pined square and my original corner pins removed. Top left hand corner all points pinned this is where I now go and start my hand needle work and anchor those 4 centre points down through all the fabrics. But I will show you here a peek at what the first window will look like in the following photos to come may be tomorrow
When I take photos for a tutorial I am all ways am so grateful for those other quilts that do it on ALL their work it takes such a lot of time to do this. So a BIG Thank You to all who do this.
Cheers till next time Glenda
Bravo, Glenda! Wonderful photos and great descriptions of exactly what you did. Thank you!
Thanks so much Ursula, I was not sure if you would be able to follow it. Great relieve. Cheers Glenda PS have been working on the next stage so hopefully they will be up tomorrow or Sunday.