Nothing exciting to show as I have been sick the last couple of weeks and have been house bound and to sick even to sew. But this morning I decided to write up a blog on how I’m binding my 1930’s Grandmothers Flower Garden quilt that I’m quilting at present, I did do some quilting on this while I was sick but nothing else.
How I’m binding Grandmothers-Flower Garden quilt keeping the hexagon shape.
I made this binding over a week ago before I became sick the second time round????? I took photo’s at each stage I just hope you can understand the below!!!!!
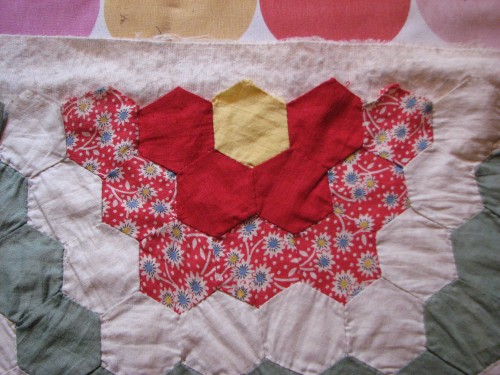
Step 1 This quilt is over 80 years old and the papers have been removed from the edge of all the hexagons. I have decided to use iron on freezer paper for several reasons, one it will add some body, two it will add some weight around the edge plus it will be much easier to work with than just freezer paper.
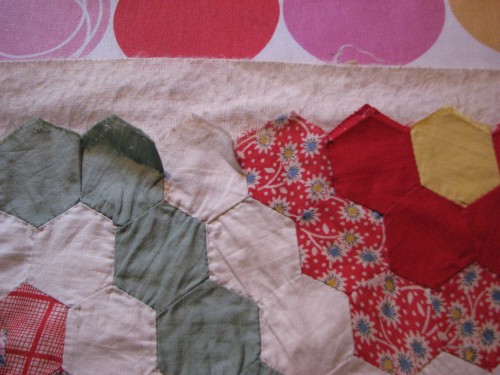
Step 2 I need to resew several of the side seams as they are coming undone plus I only want the seam to stop 1/4 of an inch at the end of each seam, this will make it easier to turn the seams in the valleys of the hexagon shape. unknown quilter sewed right to the end of all seams.
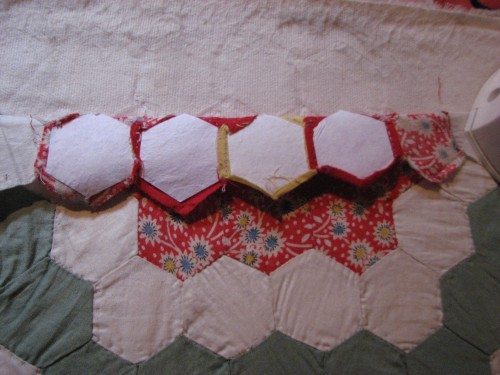
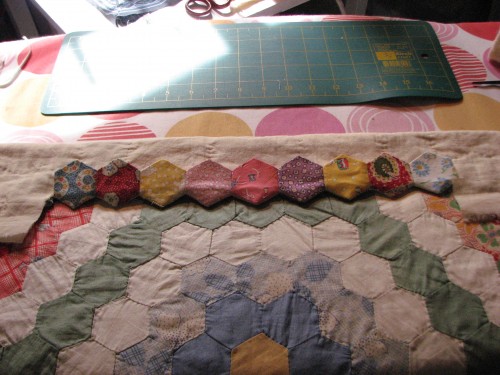
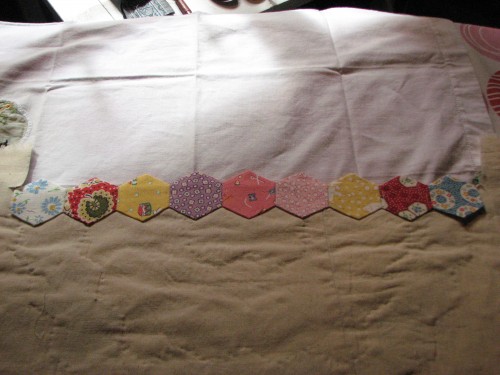
Step 3 I’m working in sets of 9 to make the binding, first I ironed all the edges of the hexagons then ironed the papers to the back of the 9 hexagons then pressed the seams down too ready for basting with thread not glue as I live in the tropics and glue is a no no; ants love it and the mould????
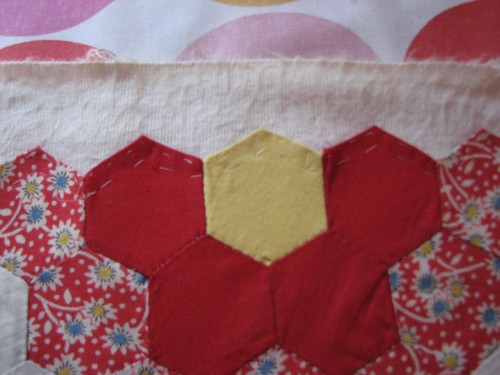
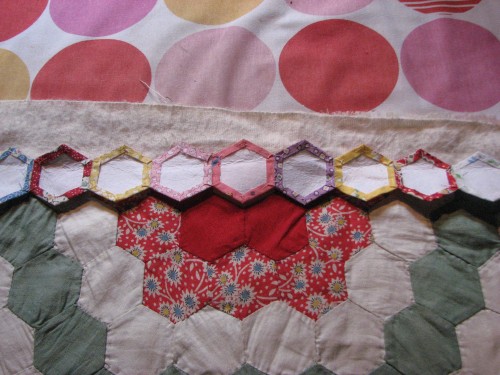
Step 5 Hexagons basted and then these tacked to the wadding and backing to keep them straight for cutting away wadding and backing later.
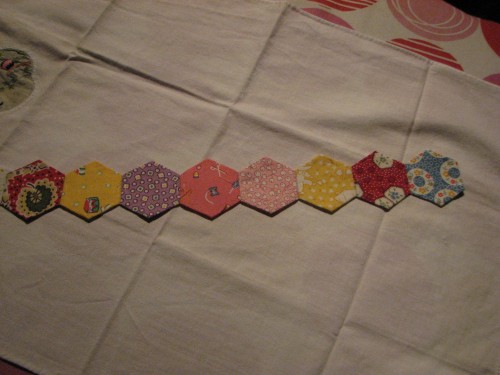
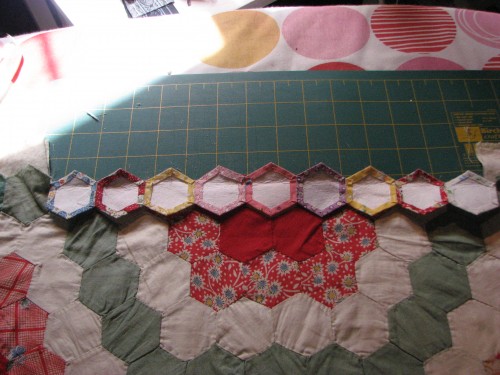
Step 6 I have needle basted 9 hexagons using wash away freezer paper, these will be my binding, I have stitched them in a row. I was going to use my old 1930’s fabrics but felt that they were just to fragile for her where there will be a lot of handling and wear over the next 50 years or more????? SO have used reproduction 1930 fabrics mostly from my stash.
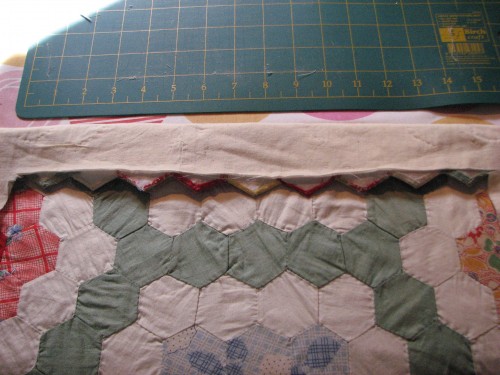
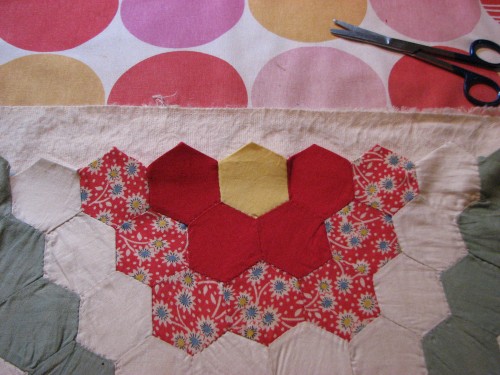
Step 9 Backing cut away looking at the back of quilt I have cut it back to just below the valley of each hexagon. I’m not worried about there been no wadding and backing in the tips on the edge as I have to thicknesses of wash away freezer paper here plus the seams for a sharp point.
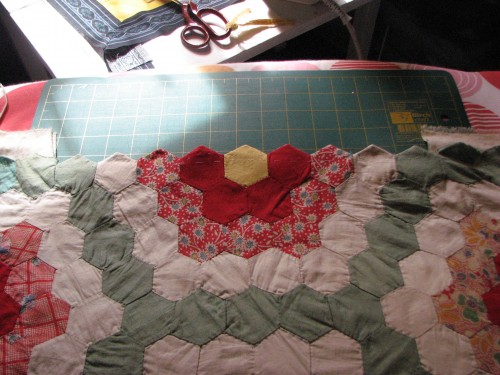
Step 10 This is the fun part flipping the hexagons over and getting those sharp points; I use a fine rounded pointed chop-stick for this it works so well.
Step 12 Hexagons now pressed ready to be quilted down to keep perfectly. I tacked them down first though.
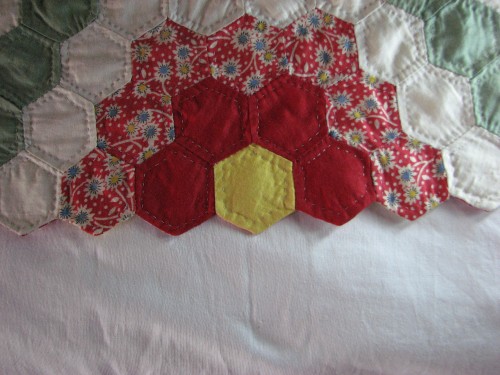
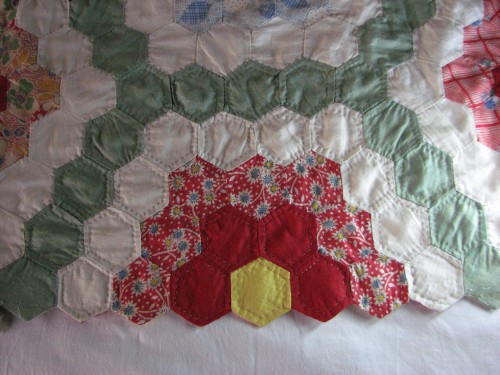
Step 14 Close up of the edge finished. I must admit that quilting those hexagons on the edge were difficult and time consuming as I was sewing through two layers of wash away freezer paper plus the two fabrics and the fleecy backing; I ended up making one stitch at a time, pushing the needle through pulling it right through then poking it back up from behind, it was just too thick to keep the stitches small any other way. But it is worth the effort to see that nice hexagon edge .
Well that was a surprise to get this blog made this morning on how I’m binding my GMFG. It has taken me 3 hrs though uploading the photo’s and adding some text !!!!! No house work done or sewing though??????
I will now link up with Esther http://www.estheraliu.blogspot.com on her WOW today after ALL.
I hope this is of some use to a few of you now or in the future I just hope you are able to understand it all LOL. Thanks for dropping in.
Cheers Glenda

Hi there Glenda,
Glad to hear you are feeling a bit better – enough to tackle such a project – lookin’ good!!
Don’t wear yourself out though!!!
Hugs – Wendy
that looks terrific! what a good tutorial on that. I have heard of it done this one and yes I bet it does take a lot of time but worth it in the end.
I’m trying to figure out just how to go about putting a back on a hexie table topper that I have the top done for.
There is a reason why I keep putting it off!
Hi, just came over after seeing your comment on my blog. So fortuitous because I have a quilt that belonged to my boys’ great grandma. It is so worn and I have aspirations to give it a little makeover someday. It is also a hexie quilt. I have to worked with hexies before. Your post will come in handy. Definitely pinning it so I can come back to it. Hope you are feeling better, nothing worse than being down for a long while. Take care!
Sorry…. I meant to say I have not worked with hexies before. Oops!
Oh my goodness this looks fantastic. Great job and such a nice finish. Hope by now you are feeling much better.
Hugs Bunny